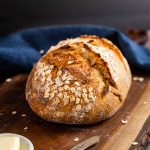
Sourdough Rye Bread Recipe
Sourdough Rye Bread recipe has a deep golden chewy crust with a soft and tender crumb tasting of light sweet rye.
Servings 12 Slices
Ingredients
- 300 gr bread flour
- 60 gr rye flour
- 72 gr active starter (leaven)
- 288 gr water
- 7 gr salt - fine sea salt
- 35 gr honey
Instructions
Make the Leaven (bubbly starter)
- The night before mixing the dough feed your starter by combining 1 tablespoon of starter with 100 gr of filtered water, 50 grams of all-purpose flour, and 50 grams of whole wheat flour. Stir to combine and let it sit in a warm spot.
Mix and ferment the dough
- Using a large mixing bowl, blend the bread flour and the rye flour together. Add 260 grams of 80 °F water, the honey, and the active leaven to the flour. Cover the bowl and let the mixture rest for 30 minutes.After 30 minutes, sprinkle the salt over the dough and add the remaining 28 grams of water. Using a pinching motion, combine the water and salt into the dough. It may come apart at first but will come together. Pour the mixture into the proofing container.
- For the first 2 hours, I set a timer for 30 minutes. After each 30 minute increment, I stretch the dough while turning the container about 6 to 8 times by pulling the outside of the dough up and then pushing it down into the center of the dough. This is called a stretch and fold technique. At the end of the 2 hours, gently stretch and fold the dough. Set the timer for 1 hour.
- At the end of the hour, you should start seeing the dough developing air bubbles. Gently turn the dough 3 to 4 times being careful not to deflate forming air bubbles. Set the timer for 1 more hour.*
- Lightly dust your working surface with flour. The dough is stickier and wetter than some sourdough recipes so I use a dough spatula to remove the dough from the container.
- To shape the dough, flour your hands if necessary, and using a bench knife and one hand work the dough into a round shape by pulling it towards you in a circular motion. Adhering to the working surface helps create surface tension. Let the dough rest for 30 minutes covered with a dish towel.
- You're now ready for your final shaping. We will fold the dough like an envelope. Dust your work surface if the dough sticks.
- Fold the third of the dough closest to you up and over the middle third of the round. Stretch the dough horizontally on your right side over the third of the center and repeat on the left side. Finally, stretch out the third of the dough farthest from you and stretch it toward you over the previous folds and anchor it to the working surface. Pull the dough towards you in a circular motion until you have a tight surface.
- Lightly sprinkle flour onto the surface of a bowl or banneton and sprinkle the bottom with oats if desired. Flip the dough into the prepared container, seam-side up. Lightly sprinkle the dough with flour and cover it with a tea towel. I then put the dough into a plastic grocery sack and refrigerate it overnight, 8 to 16 hours.
Bake
- Preheat the oven preheat to 475 °F and place my lidded pot inside to heat up. You can use an enamel dutch oven or aluminum roaster. You can also put the dough into a cold pot but I find I don't get the same golden color when I do that.
- Remove the dough from the refrigerator.
- Carefully remove the pot from the oven and remove the lid. Carefully place the dough into the pot and score it with a lame. I lift mine by the edges of the parchment paper and put the whole thing into the pot. Replace the lid and place the dough in the oven.
- Reduce the heat to 425 °F. Bake for 30 minutes. Remove the lid and bake for an additional 20 to 25 minutes or until an instant-read thermometer reads 209 °F to 211 °F.
- Immediately remove the bread from the pan and put it on a cooling rack. Cool completely before slicing. (2 to 4 hours).
Notes
*I usually have to proof my dough for the full 4 hours before shaping it. You'll want to start checking your dough for signs that it's ready to shape after the 3rd stretch and fold.
The dough will feel much lighter and airy and it will release from the sides of the container when you do the turns. Also, the ridges left by the turn will hold their shape for a minute or two. These are signs that the dough is ready to shape.
Time doesn't include making the leaven the night before mixing.
Make sure you test your leaven to make sure it's ready to use before adding it to your flour. See how to do the float test.
Tried this recipe? That's awesome!Mention @hostessatheart or tag #hostessatheart!
