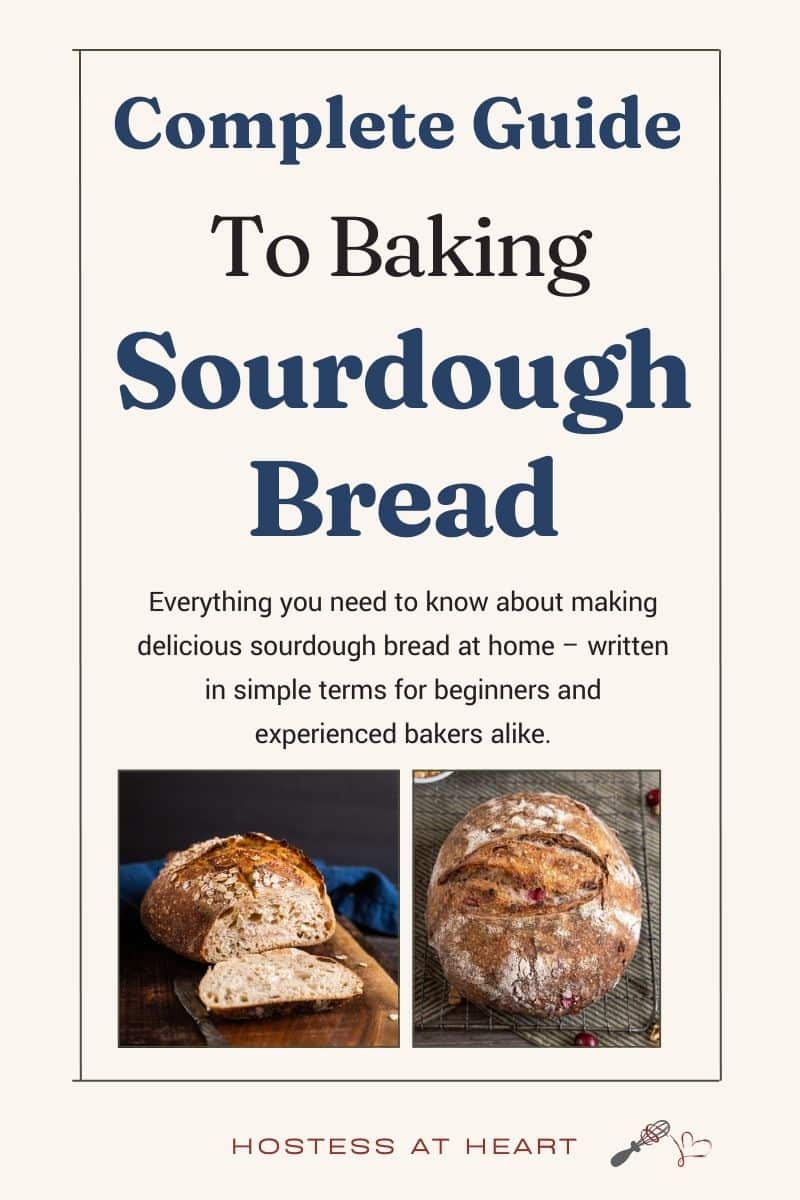
The Complete Sourdough Baking Guide: From Starter to Perfect Loaf
This post may contain affiliate links. Please read our Disclosure Policy.

Everything you need to know about making delicious sourdough bread at home – written in simple terms for beginners and experienced bakers alike.

Introduction to Sourdough Baking
Sourdough bread is more than just a baking trend—it’s an ancient art that combines science, patience, and a little bit of magic. Unlike regular bread that uses store-bought yeast, sourdough relies on wild yeast and good bacteria that you capture and grow yourself. This natural process gives sourdough its unique tangy flavor and chewy texture that keeps people coming back for more.
Each of our sourdough recipes lists the ingredients and equipment we recommend. We’ll give you substitutes when available. This document is intended to troubleshoot many of the questions and problems that can arise.
Why Choose Sourdough?
- Natural Fermentation: No commercial yeast needed—just flour, water, and time
- Better Digestion: The long fermentation breaks down gluten and makes nutrients easier to absorb
- Amazing Flavor: Complex, tangy taste that you can’t get from quick-rise breads
- Longer Shelf Life: Natural acids help preserve the bread without additives
- Satisfying Hobby: Creating something from scratch is deeply rewarding
Sourdough Terms Made Simple
Don’t let the lingo scare you! Here are the most common sourdough terms explained in plain English:
Starter (or Levain): Your living mixture of flour, water, wild yeast, and good bacteria. Think of it as your bread’s “engine.”
Active/Bubbly Starter: When your starter has been recently fed and is full of bubbles, doubled in size, and ready to make bread rise.
Discard: The portion of starter you remove before feeding. Don’t throw it away—use it for pancakes, crackers, or other recipes!
Hydration: The percentage of water compared to flour. For example, 70% hydration means 70g of water for every 100g of flour.
Autolyse: Mixing just flour and water and letting it rest. This jumpstarts gluten development without kneading.
Bulk Fermentation (First Rise): The time after mixing when your dough develops flavor and structure. Usually 4-6 hours at room temperature.
Stretch and Fold: A gentle technique to build gluten strength. You literally stretch one side of the dough up and fold it over itself.
Gluten: The protein network that gives bread its structure. Think of it as the “scaffolding” that holds the air bubbles.
Proofing (Final Rise): The last rise after shaping, when the dough gets puffy before baking.
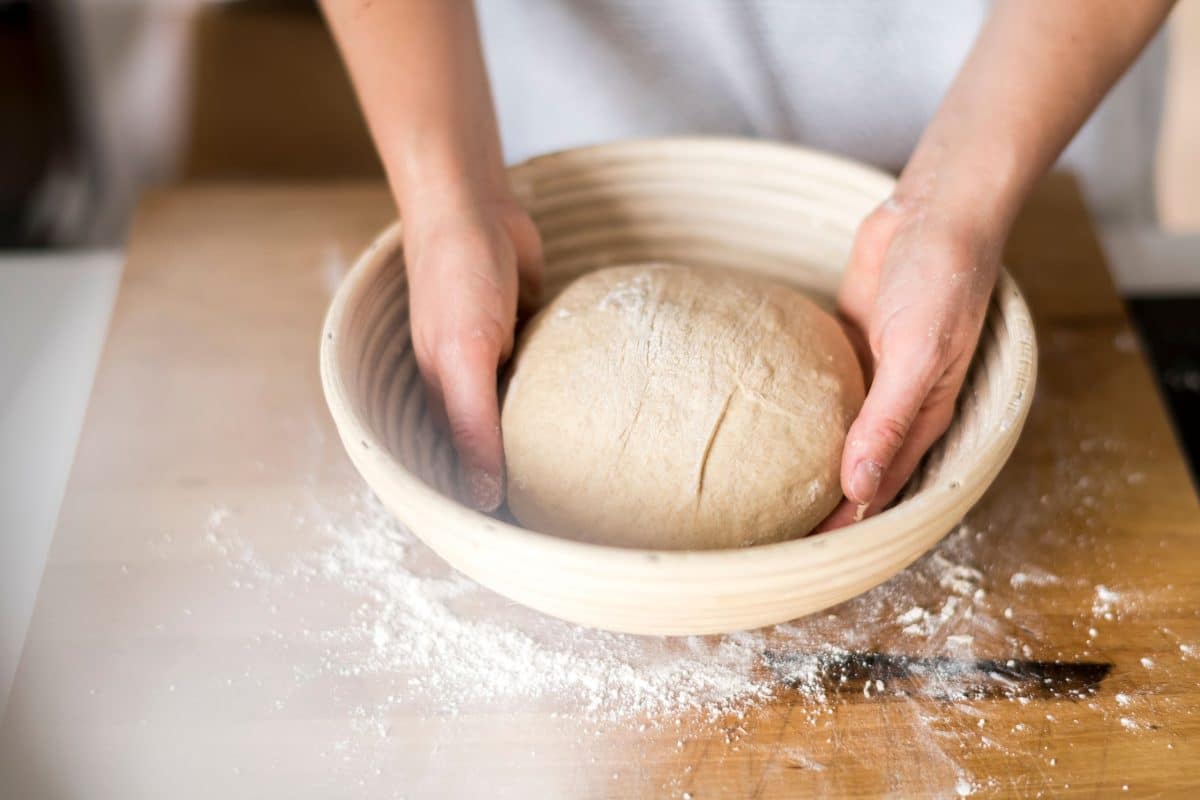
Banneton: A special basket for proofing that helps dough hold its shape and creates pretty patterns.
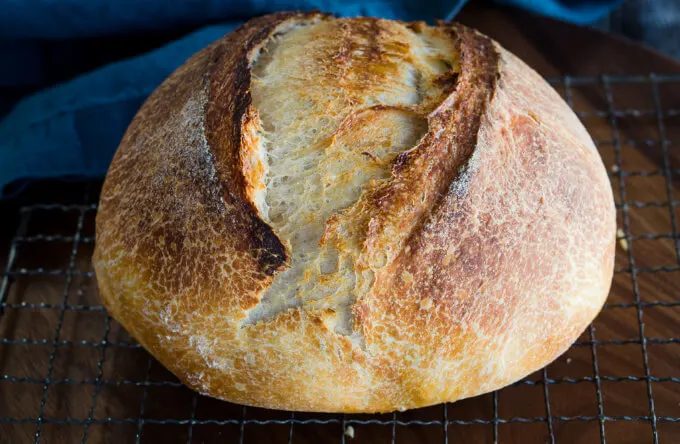
Scoring (or Slashing): Cutting the top of the dough right before baking. This controls where the bread expands.
Oven Spring: The dramatic rise that happens in the first 10-15 minutes of baking when the heat makes the dough puff up.
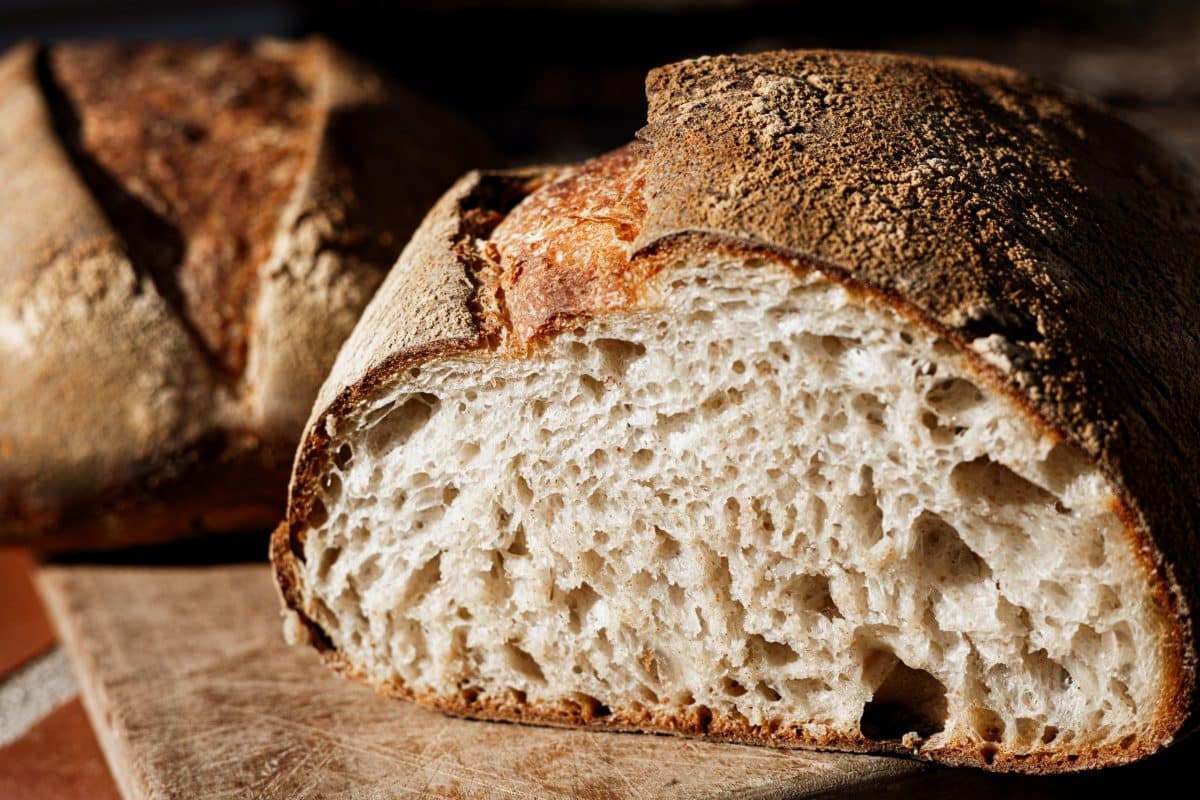
Crumb: The inside texture of your bread—can be tight (small holes) or open (big holes).
Ear: The crispy ridge that forms where you scored the bread. Bakers love a good “ear”!
Lame: A special tool for scoring bread (pronounced “lahm”). A sharp knife works too!
Dutch Oven: A heavy pot with a lid that traps steam while baking, giving you a crispy crust.
Float Test: Dropping a bit of starter in water—if it floats, it’s ready to use!
Poke Test: Gently poking proofed dough to see if it springs back slowly (ready) or quickly (needs more time).
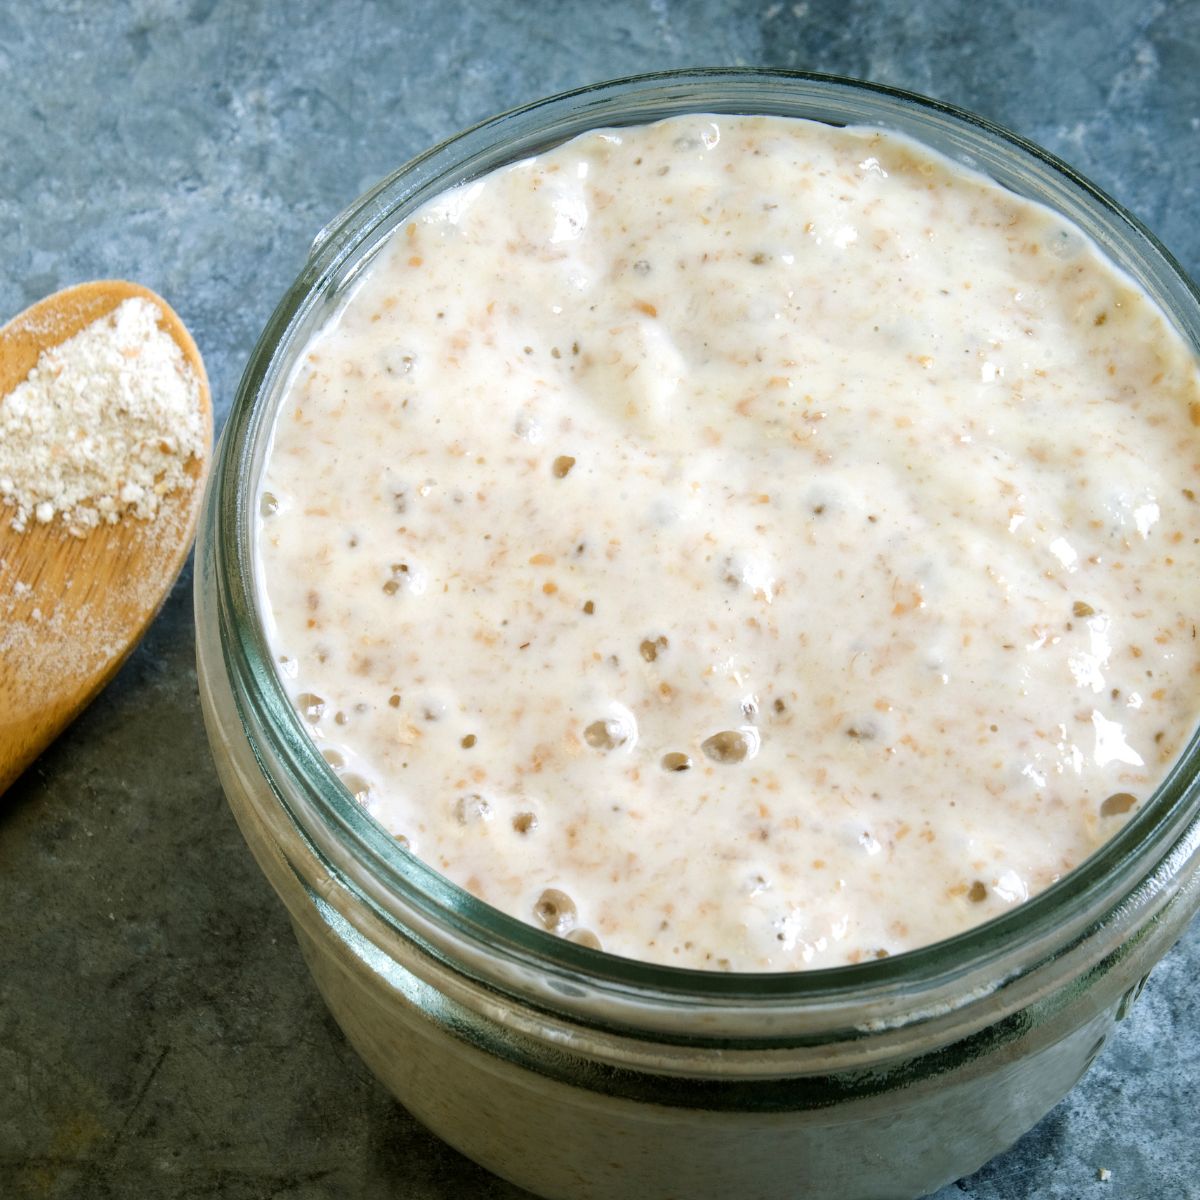
Understanding Your Sourdough Starter
Your sourdough starter is the heart of every loaf. It’s a living culture of wild yeast and friendly bacteria that work together to make your bread rise and develop flavor. Think of it as a pet that needs regular feeding and care.
Creating Your Starter
A basic schedule is as follows. For a comprehensive instruction, see our Sourdough Starter Guide.
Day 1: Mix equal parts flour and water (50g each) in a clean jar
Days 2-7: Discard half, then add 50g flour and 50g water daily
Ready When: It doubles in size within 4-6 hours and passes the float test.
Maintaining Your Starter
- Room Temperature: Feed daily with equal parts flour and water
- Refrigerated: Feed weekly; take out 12-24 hours before baking
- Always use clean utensils and filtered water for the best results
Preparing Enough Starter for Your Recipe
Many recipes call for specific amounts of active starter. Here’s how to feed your starter to have enough for baking PLUS some left over to maintain:
For 1 Cup of Starter (240g):
- Feed with: 125g flour + 125g water
- Total after feeding: About 300g (keeps 60g for next feeding)
For 1½ Cups of Starter (360g):
- Feed with: 185g flour + 185g water
- Total after feeding: About 430g (keeps 70g for next feeding)
For 2 Cups of Starter (480g):
- Feed with: 245g flour + 245g water
- Total after feeding: About 560g (keeps 80g for next feeding)
Pro Tip: Always feed your starter 6-12 hours before you plan to use it. It should double in size and pass the float test (a spoonful floats in water) when it’s ready!
Essential Ingredients & Equipment
Key Ingredients
1. Flour
The variety of flour that you use has a big difference in how the bread dough mixes together, the texture of the crumb, and, of course, the flavor.
- Bread Flour: High protein (12-14%) for chewy texture and good structure
- All-Purpose: Works well for beginners (10-12% protein)
- Whole Wheat: Adds nutrition and flavor; start with 10-20% of total flour
- Rye: Boosts fermentation and adds complex flavor. It can be difficult for beginning bakers.
2. Water
- Use filtered or bottled water if your tap water has strong chlorine
- Room temperature water is best for consistent results
3. Salt
- Sea salt or kosher salt (avoid iodized table salt)
- Usually 2% of flour weight (10g salt for 500g flour)
Essential Equipment
Hostess At Heart participates in affiliate programs. As an Amazon Associate, I earn a commission from qualifying purchases. Please refer to my disclosure page for more information.
- Digital Scale: Accuracy is key—always weigh ingredients
- Large Mixing Bowl: Glass or plastic for mixing and bulk fermentation
- Bench Scraper: For handling sticky dough
- Proofing Basket (Banneton): Helps dough hold shape during final rise
- Dutch Oven: Creates steam for crusty bread
- Lame or Sharp Knife: For scoring before baking
Step-by-Step Baking Process
We recommend starting with our easiest Overnight Sourdough Bread recipe. We provide a video that shows our process within the post. It’s highly rated with over 800 comments.
Step 1: Autolyse (30-60 minutes)
Mix flour and water until just combined. Cover and let rest. This helps gluten develop, making the dough easier to work with.
Step 2: Add Starter and Salt
Add your active starter and salt to the dough. Mix by pinching and folding until well combined. The dough will be sticky—that’s normal!
Step 3: Bulk Fermentation (4-6 hours)
During this time, perform stretch and folds every 30 minutes for the first 2 hours:
- Wet your hand, grab one side of dough
- Stretch up and fold over to opposite side
- Rotate bowl and repeat 4 times total
- Let rest between sets
Step 4: Pre-shape
Gently turn the dough onto a lightly floured surface. Shape into a loose round and let rest 20-30 minutes.
Want to save this recipe?
I'd like to receive more tips and recipes from Hostess At Heart!
Step 5: Final Shaping
Shape into a tight boule (round) or batard (oval). Place seam-side up in a banneton or bowl lined with floured towel.
Step 6: Final Proof
- Room Temperature: 3-4 hours
- Cold Proof: 8-24 hours in fridge (recommended for better flavor)
Step 7: Score and Bake
- Preheat Dutch oven to 475°F (245°C)
- Score dough with sharp blade
- Bake covered 20 minutes, then uncovered 20-25 minutes
- Cool at least 1 hour before slicing
Getting your shaped dough from a bowl or banneton can be tricky. I do what I call a “Flip Technique” using a pie plate and parchment paper.
Timing Your Sourdough Bake
Planning your bake is crucial for success. Here’s a sample timeline that you can adjust to fit your schedule:
| Step | Time | Details |
|---|---|---|
| Feed Starter | 6-12 hours before | Ensure starter doubles in size |
| Autolyse | 30-60 minutes | Mix flour and water only |
| Add Starter & Salt | 0 minutes | Mix until well combined |
| Bulk Fermentation | 4-6 hours | Stretch & fold every 30 min |
| Pre-shape | 20-30 minutes rest | Shape into loose round |
| Final Shape | After rest | Shape tightly, place in basket |
| Cold Proof | 8-24 hours | In refrigerator |
| Score & Bake | 40-45 minutes | 475°F, covered then uncovered |
| Cool | 1+ hours | Before slicing |
Troubleshooting Common Problems
Don’t worry if your first few loaves aren’t perfect—every baker faces challenges. Here’s how to fix the most common issues:
Problem 1: Dough Won’t Rise
Causes & Solutions:
- Weak Starter: Feed more frequently until it doubles reliably in 4-6 hours
- Too Cold: Move to warmer spot (75-80°F) or use oven with light on
- Wrong Flour: Try mixing in some bread flour for better rise
Problem 2: Dense, Heavy Bread
Causes & Solutions:
- Under-fermented: Give bulk fermentation more time
- Too Much Flour: Work with wet hands instead of adding flour
- Weak Gluten: Do more stretch and folds during bulk fermentation
Problem 3: Crust Too Hard
Causes & Solutions:
- Not Enough Steam: Use a Dutch oven or add a water pan to the oven
- Over-baked: Lower the temperature by 25°F and watch the color
- Too Much Flour: Use minimal dusting flour on the working surface
Problem 4: Bread Spreads Flat
Causes & Solutions:
- Over-proofed: Shorten bulk fermentation time
- Poor Shaping: Create more tension when shaping
- Weak Structure: Ensure proper gluten development
Problem 5: Gummy Interior
Causes & Solutions:
- Under-baked: Check internal temp reaches 205°F (96°C)
- Cut Too Soon: Wait at least 1 hour before slicing
- Too Much Water: Reduce hydration slightly next time
Adding Flavors – Inclusions Guide
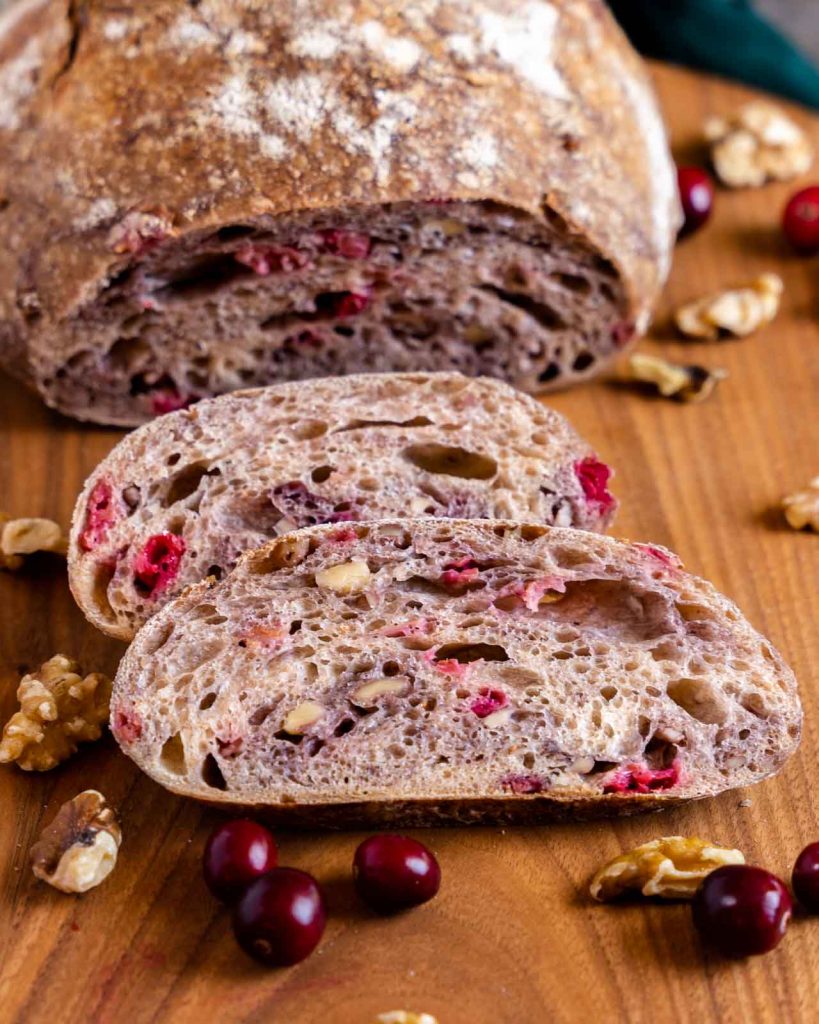
Take your sourdough to the next level by adding delicious mix-ins! The key is knowing when and how to add them without disrupting your dough.
When to Add Inclusions
The best time is during bulk fermentation, after the first hour. This ensures even distribution without breaking down the gluten too early.
How to Add Inclusions
- Flatten the dough into a rectangle
- Sprinkle inclusions evenly over the surface
- Roll up like a cinnamon roll
- Continue with stretch and folds to distribute
Popular Savory Inclusions
- Cheese: Sharp cheddar, Gruyère, or feta (50-100g)
- Herbs: Fresh rosemary, thyme, or everything bagel seasoning
- Nuts/Seeds: Walnuts, sunflower seeds, or pumpkin seeds
- Mediterranean: Olives, sun-dried tomatoes, roasted garlic
Popular Sweet Inclusions
- Dried Fruit: Cranberries, raisins, apricots, or dates
- Chocolate: Dark chocolate chips pair wonderfully with tangy sourdough
- Cinnamon Sugar: Creates delicious swirls throughout
- Citrus: Lemon or orange zest brightens the flavor
Pro Tips for Inclusions
- Use 10-20% of flour weight (50-100g for a 500g flour recipe)
- Soak dried ingredients in warm water first
- Keep the Dutch oven lid on longer to prevent burning
Creative Uses for Sourdough Discard
 Baked donuts
 Cheesy Scones
- Pancakes
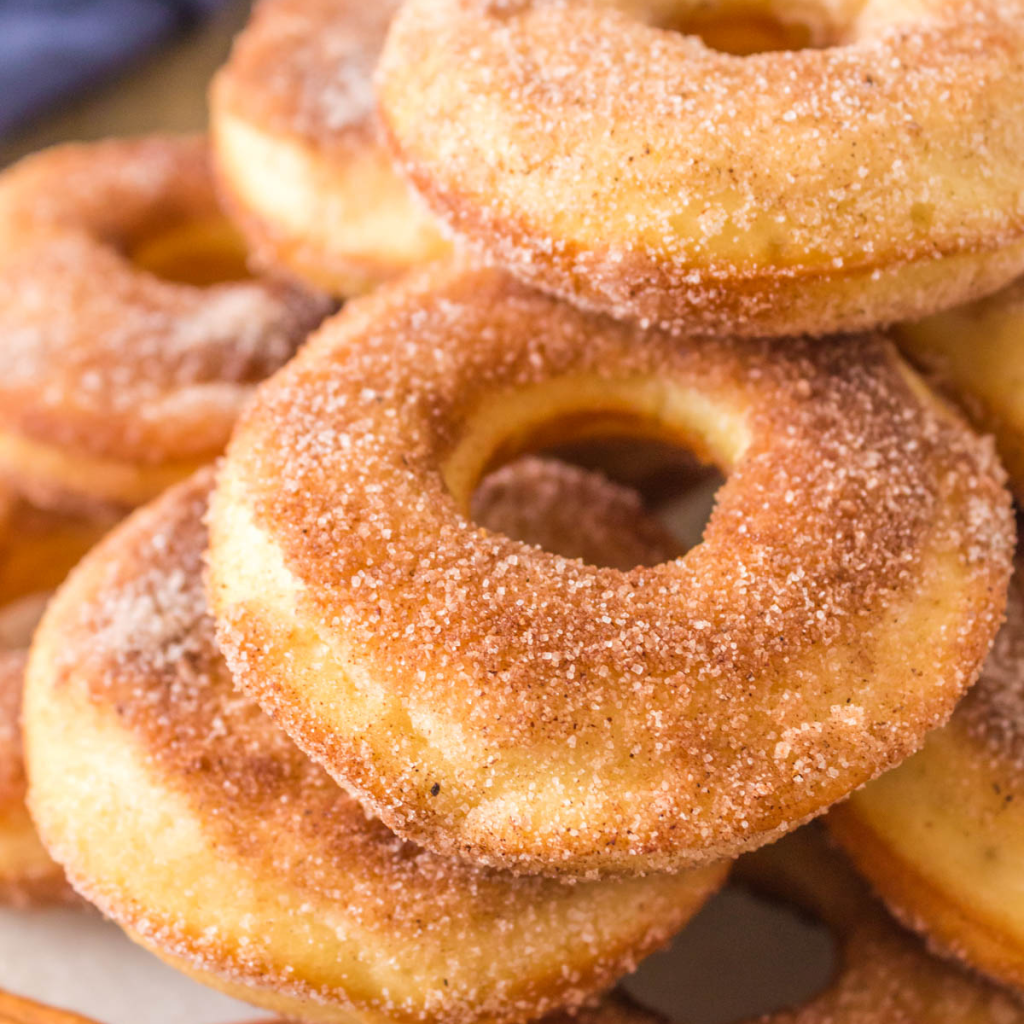

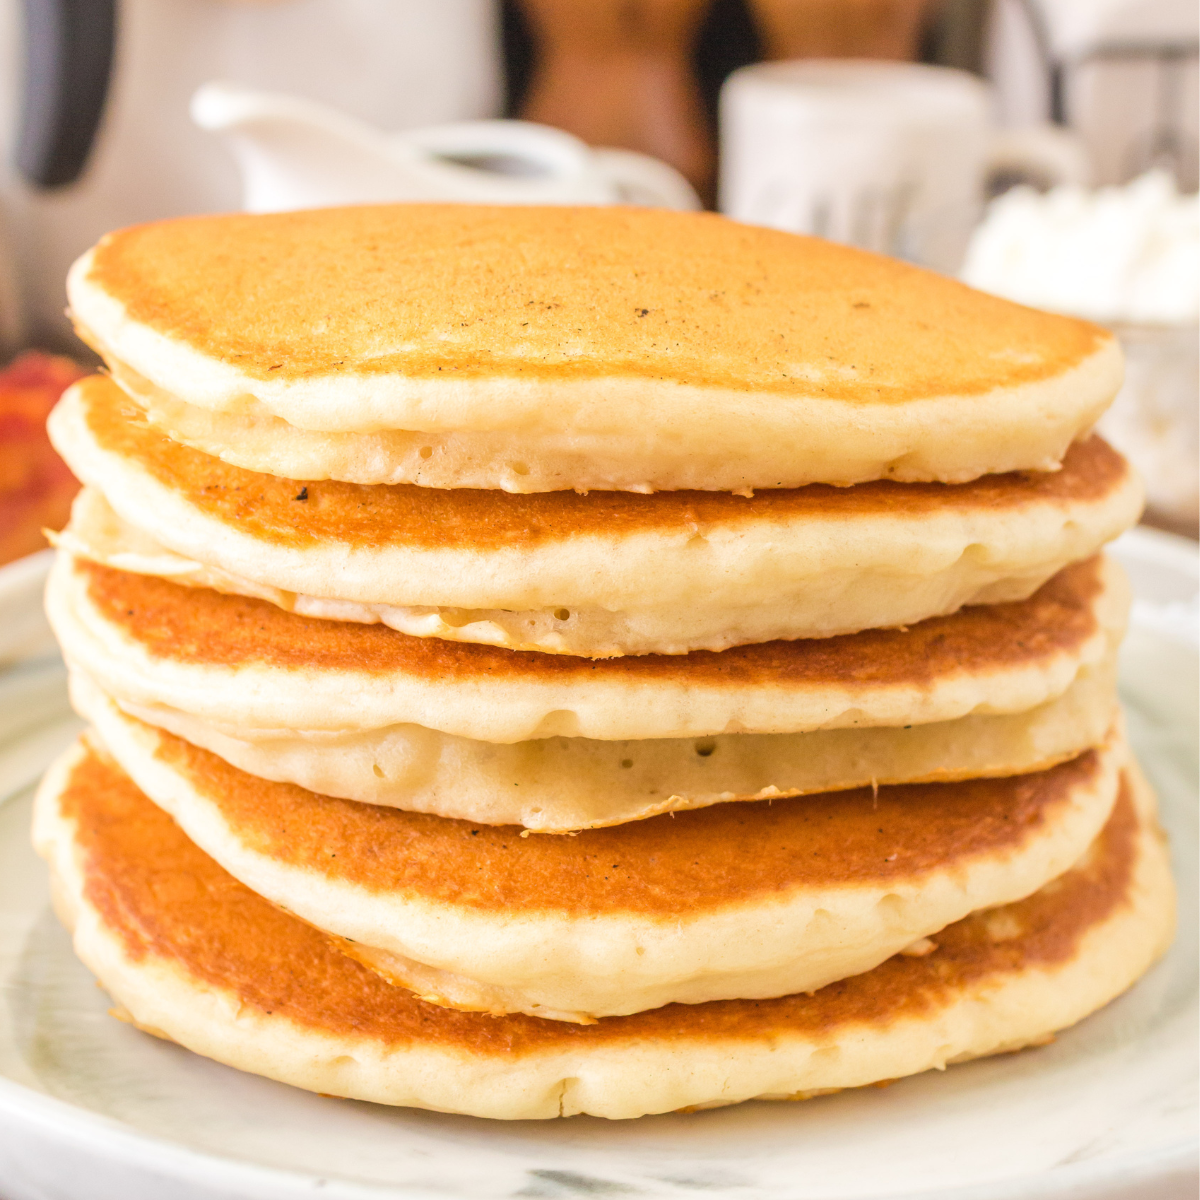
Don’t throw away your sourdough discard! It’s perfect for quick recipes that don’t need long fermentation. Here’s how to use it wisely:
Best Ingredients to Pair with Discard
Leavening Agents (for lift)
- Baking powder & baking soda for pancakes and muffins
- Eggs for structure in waffles and quick breads
- A little yeast for pizza dough when you’re in a hurry
Fats (for texture)
- Butter for flaky biscuits and tender cookies
- Olive oil for crackers and flatbreads
- Coconut oil for moist muffins and banana bread
Popular Discard Recipes
If you dislike wasting ingredients as we do, check out our discard recipes. We have a great list of some of our favorites. Do you have one that you’d like to see here? Leave us a comment.
Pro Tips for Sourdough Success
This sourdough guide comes from years of baking experience and will help you achieve bakery-quality results:
Temperature Control
- Keep dough at 75-80°F (24-27°C) for consistent fermentation
- Use a thermometer to check dough temperature
- Cold environments slow fermentation—adjust timing accordingly
Hydration Wisdom
- Start with 70% hydration (350g water to 500g flour)
- Higher hydration = more open crumb but harder to handle
- Adjust water based on your flour and climate
Timing Flexibility
- Watch the dough, not the clock
- Look for 50% size increase during bulk fermentation
- Poke test: Dough should spring back slowly when ready
Essential Reminders
- Always use a scale—baking by weight ensures consistency
- Keep detailed notes of what works
- Practice makes perfect—every loaf teaches you something
- Join sourdough communities online for support and tips
- Don’t be afraid to experiment once you master the basics
Final Thoughts
Sourdough baking is a journey that rewards patience and practice. Each loaf you bake brings you closer to understanding your dough, your starter, and your own preferences. Don’t get discouraged by early failures—even experienced bakers have off days!
Remember: the best sourdough is the one you enjoy making and eating. Whether you prefer a mild tang or a strong sour flavor, an open crumb or a tight texture, there’s no single “right” way to make sourdough. Keep experimenting, keep learning, and most importantly, keep baking!
Make sure you reach out if you have questions. We all start somewhere and I always say, “you don’t know until you know”.
Did you enjoy this recipe? Don’t forget to pin it for later and follow me on Pinterest for more delicious recipes like this one!


I am just starting my sourdough journey and found this post very enlightening.
Is there a printable version of this post? I would really like to be able to print as do many posts seem to disappear.
Thank you!
Thank you, Karen. Congratulations on starting your sourdough journey. Here is a pdf copy of the post: The Complete Sourdough Baking Guide. Please note that any updates that I do to this document will not update this pdf so I encourage you to stop by. Also, if you have questions, let me know. I use them to update the information that I provide.