Simple Ciabatta Bread Recipe (with Shape Variations)
This post may contain affiliate links. Please read our Disclosure Policy.

Ciabatta Bread Recipe is so versatile. This homemade Italian bread is soft and tender but strong enough to hold the heartiest of ingredients. There are so many things you can do with this one simple yeast bread recipe and I’ll show you a couple!

I know baking bread isn’t for everyone. I’m sure many people wonder why you would bother when there are so many places where you can pick up a loaf right? My first answer would be homemade Italian bread right from the oven. Can you smell that bread baking yet? Just the thought has me gearing up to bake some more homemade bread rolls!
Not long ago I posted a Baked Chicken Parmesan Meatball recipe. The beautiful roll that those delicious meatballs were nestled in was this Ciabatta. This bread recipe would work amazingly well too.!
There are so many homemade bread recipes. How do you know which one will work for whatever you’re using it for? Let me tell you a little bit about these Ciabatta rolls.
Ciabatta is an Italian white bread created by the baker, Arnaldo Cavallari in Verona Italy in 1982 according to my friend, Wikipedia. Ciabatta literally means “slipper”. It’s said that Cavallari and other bakers were concerned by the popularity of sandwiches being made using the French baguette. They worried that it would endanger their businesses.
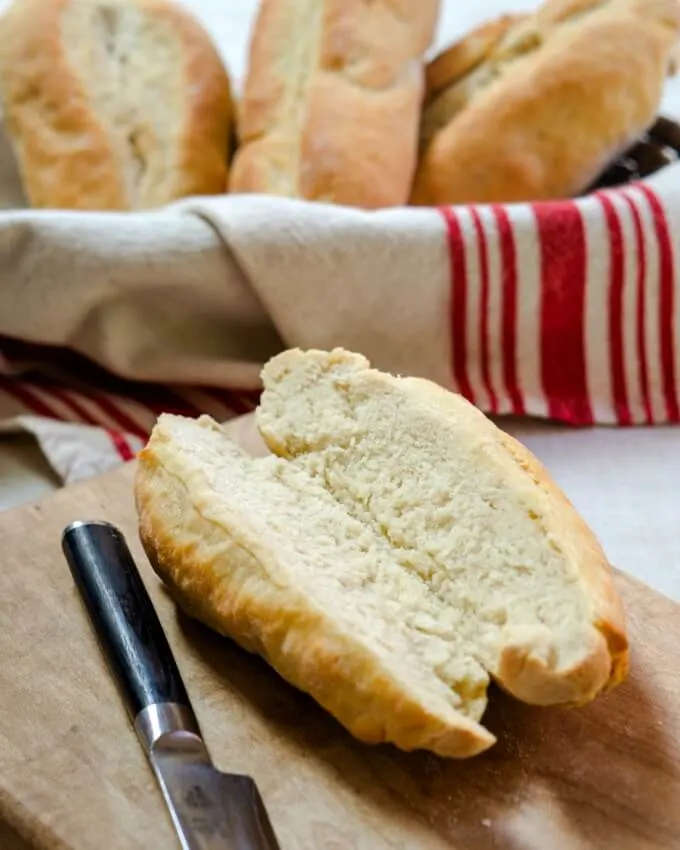
Ciabatta rolls make amazing sandwich bread, bread sticks, or rolls. They’re soft and tender without being weak or dense. The word butter comes to my mind.
Ciabatta bread dough can be made into several shapes including:
- Sandwich bread recipe
- Ciabatta rolls *(Fendu or pillow-shaped)
- Breadsticks
- Artisan bread loaf
Ingredients

In true Italian bread baking, the ingredients are simple. Flour, salt, water, yeast, and in this case, olive oil.
How are Ciabatta rolls made?
Ciabatta is a yeast bread recipe but don’t let that scare you. This is a much quicker bread to make than most yeast breads. Let me explain.
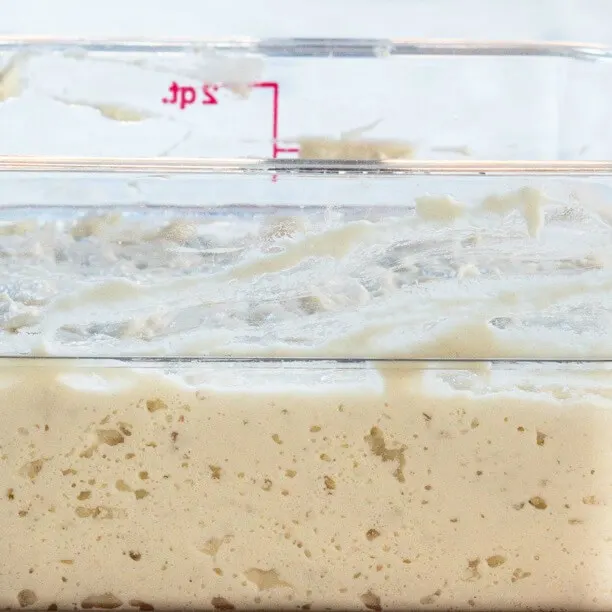
The day before you bake you will mix up a “pre-ferment” called a “Poolish”. I think of it as a starter. The next day it will be bubbly.
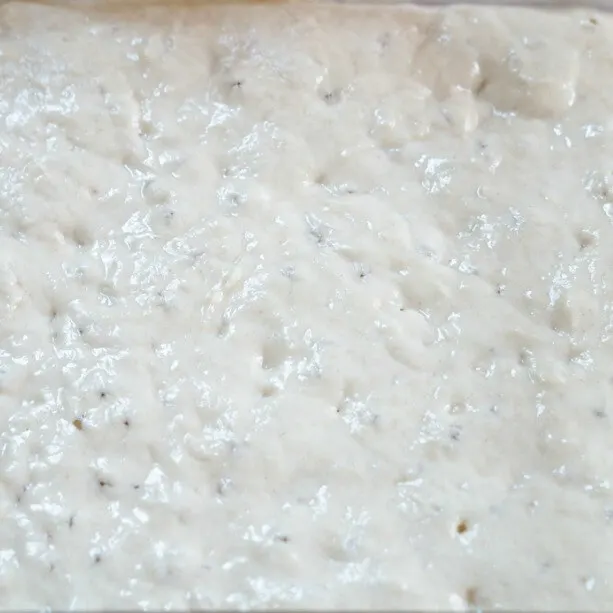
Remove the Poolish and let it sit at room temperature for an hour or more. Mix up the dough. Unlike other bread doughs, this dough is very sticky.

Stretch and fold the dough and let it rest for 30 minutes.
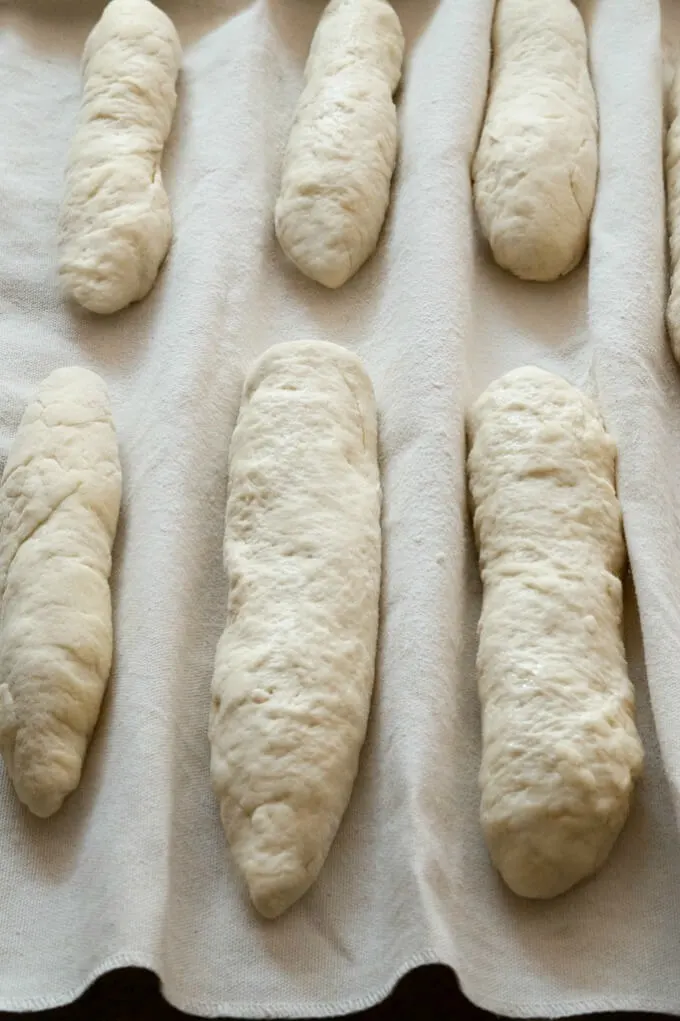
Shape the dough and let it rest for 45-60 minutes.
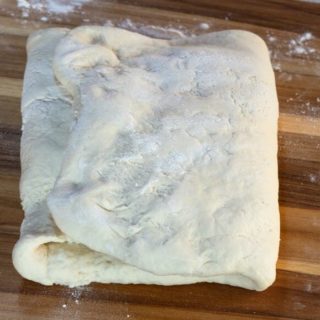
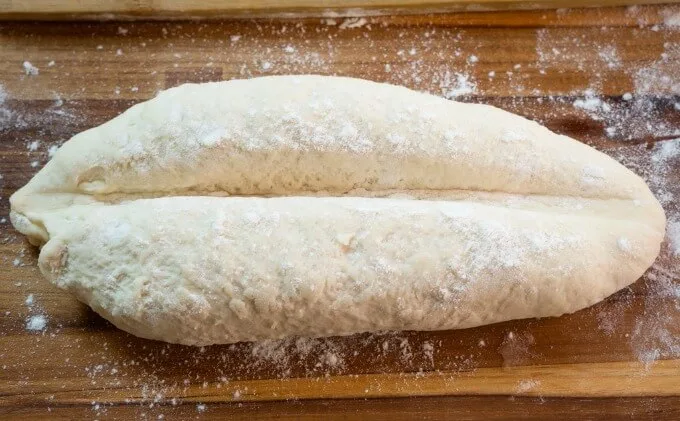
Shaping
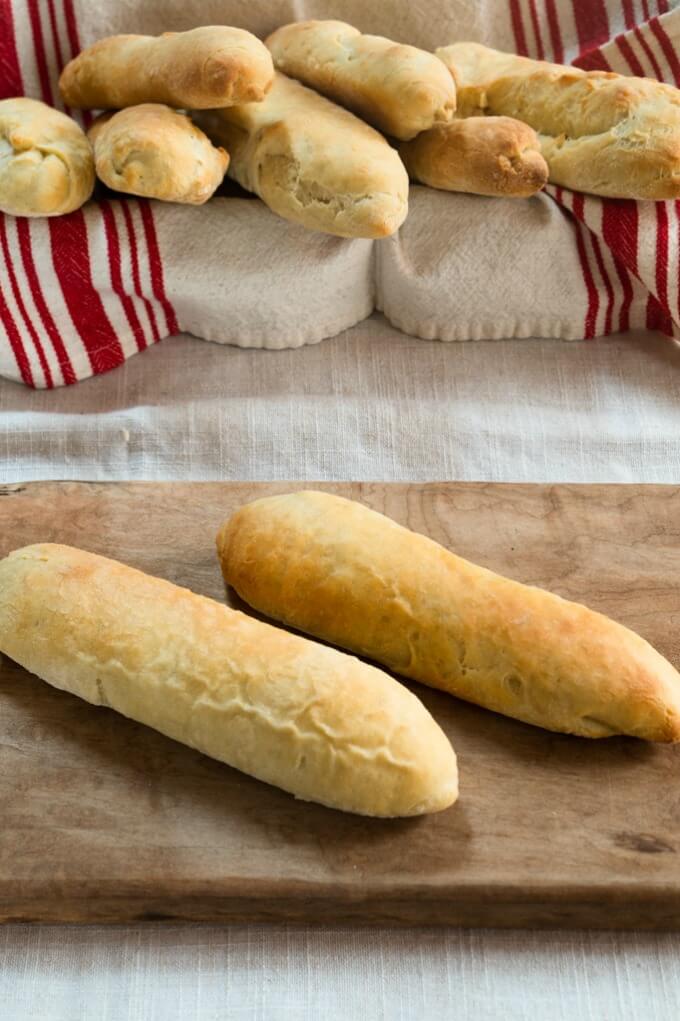
Simple Loaves

Want to save this recipe?
I'd like to receive more tips and recipes from Hostess At Heart!

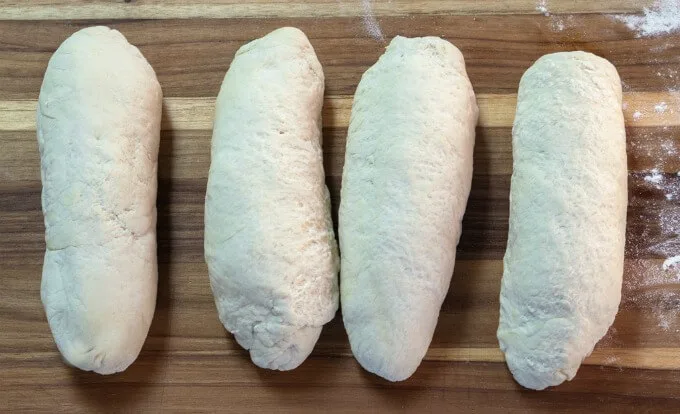
4 Soft Bread Rolls
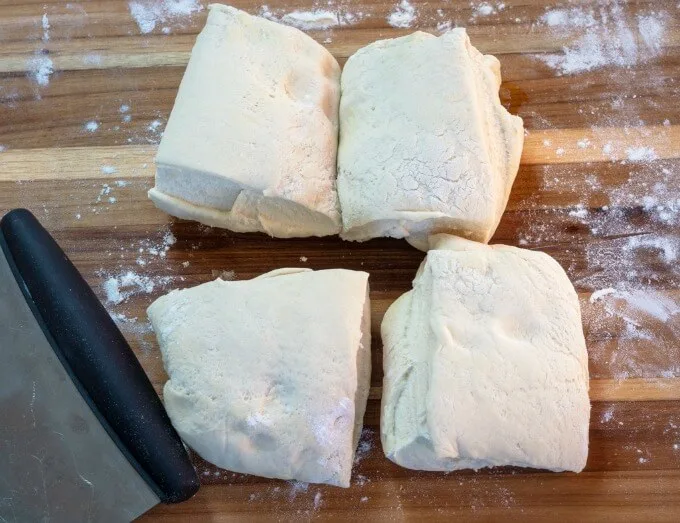
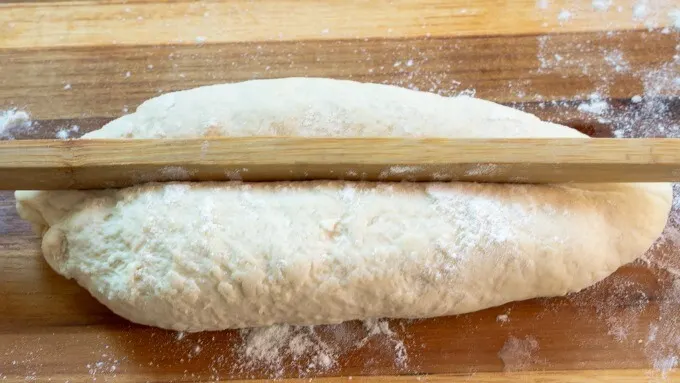
The above photo is called a *Fendu shape. You don’t have to roll the 4 pieces at all for a rectangular pillow shape.
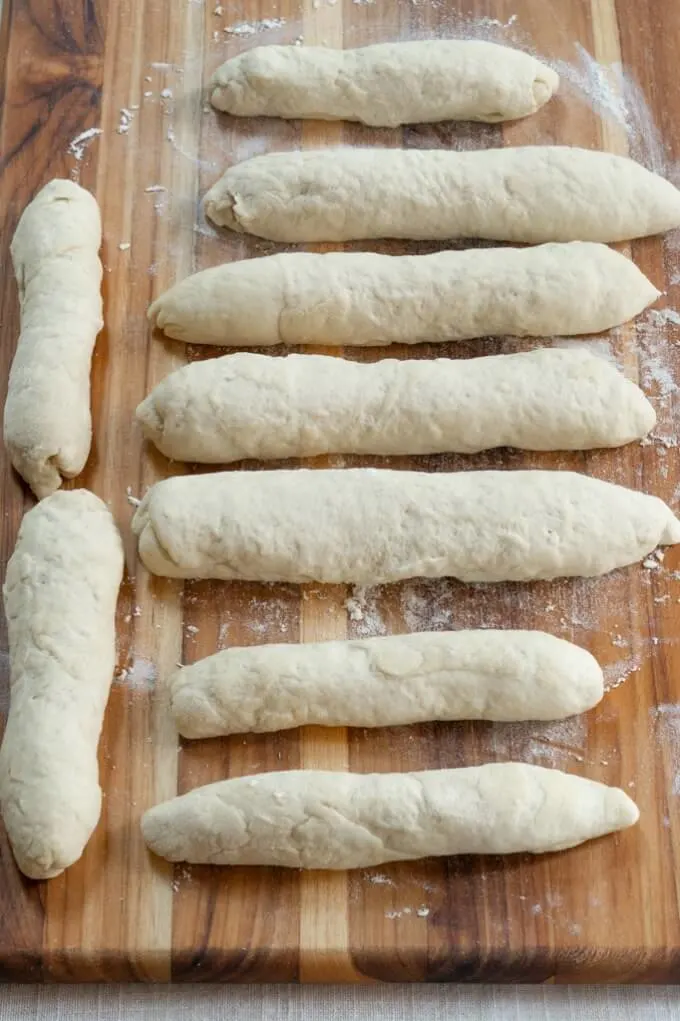
9 Breadsticks

What is Hearth Baking?
Hearth Baking is preparing your oven to recreate the environment of bread baked directly on a hearth. The purpose is to radiate heat directly into the bread as quickly as possible to create an oven spring and a crisp crust. This preparation replicates a professional hearth oven in your home.
How To Prepare the Oven for Hearth Baking

- Place a baking stone in the center of the oven.
- Put a steam pan (cast iron or a heavy-duty pan will not buckle under the heat) in the upper 1/4 of the oven.
- Preheat the oven to 500°F.
- Fill a clean spray bottle with room-temperature water.
- Put the bread dough on the baking stone.
- Put 1 cup of water in the steam pan.
- Using the spray bottle, mist the sides and back of the oven. (don’t get any water on the glass door! It can cause it to crack $$$. You can put a towel over the door or just be careful!
- Repeat the misting every 30 seconds for 3 intervals.
Tips for getting this Bread recipe into the oven
- There are 3 ways that make it easier to get the bread dough shapes into your oven.
- 1. I used a pair of tongs and just slide the dough onto the baking stone.
- 2. You can flour or add cornmeal to a pizza peel and slide the bread onto the stone.
- 3. Put a piece of parchment paper on the back of a baking sheet. Put the bread on the parchment paper and slide it right onto the stone or bake it right on the pan instead of the stone.

You may need
Hostess At Heart participates in affiliate programs. As an Amazon Associate, I earn a commission from qualifying purchases. Please refer to my disclosure page for more information.
- Baking Stone – I’ve owned this stone for 4 years. It is 12 lbs and so I just leave it in my oven for my hearth baking or pizza. It withstands temperatures of oven 500°F so there is less chance of it cracking.
- The Bread Baker’s Apprentice – This book is one of my constant companions when I’m looking for a recipe to try or have a question that needs answering.
- 2-Qt Container – you can use anything to make your Poolish but I love this container so I can see the progression. It’s a quality plastic that will last a long time. I have several in different sizes for my bread making.
- Couche – This stiff linen allows your bread to retain its shape while it rests. You don’t need this unless you like baking toys like me!

I hope you enjoyed this delicious recipe as much as we do. Drop me a comment below, and don’t forget to give it a star rating. ⭐⭐⭐⭐⭐. Your comments and ratings help others decide if this recipe is for them too.
Ciabatta Bread Recipe
Equipment
Ingredients
Poolish
- 2 1/2 cups unbleached bread flour
- 1 1/2 cups water I use filtered
- 1/4 tsp instant yeast
Ciabatta
- 3 cups unbleached bread flour
- 1 3/4 tsp salt
- 1 1/2 tsp instant yeast
- 1/4 cup olive oil
- 9 tbsp water *add one tablespoon at a time
Instructions
Poolish
- Stir ingredients together in a mixing bowl until flour is hydrated. The dough will be soft and sticky. Cover the bowl and let sit at room temperature 3 to 4 hours. Then refrigerate it until your ready to use it (up to 3 days).
Ciabatta dough
- Remove the poolish from the refrigerator 1 hour before making the dough.
- Add the flour, salt, olive oil, yeast, and *6 tablespoons of water into the bowl of an electric stand mixer with the paddle attachment. Add the poolish. Turn the mixer on low mix until the ingredients form a sticky ball. If there is still loose flour add another tablespoon of water and continue mixing (see notes).
- Continue mixing for 5 to 7 minutes or as long as it takes to create a smooth, sticky ball. Switch to the dough hook for the final 2 minutes of mixing. The dough should stick to the bottom but clear the sides. You may need to add a little more flour to firm up the dough but it will still be soft and sticky.
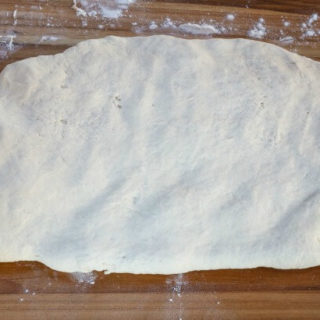
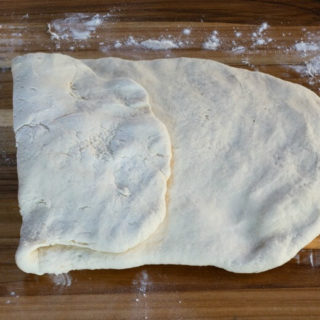
- Sprinkle the counter with flour in an 8-inch square. Using a dough scraper, transfer the sticky dough to the floured surface. Stretch the dough to form a rectangle and then use the stretch and fold resembling an envelope. Take the top third and fold toward you and then fold the left 1/3 side and fold over the center of the dough followed by the right side. Lastly, fold the top over the dough toward you. Mist the top of the dough with oil, again dust with flour, and loosely cover with plastic wrap.
- Let the dough rest for 30 minutes. Stretch and fold the dough again; mist with spray oil, dust with flour, and cover. Allow the covered dough to sit on the counter for 1-1/2 to 2 hours. It will swell but not noticeably rise or double in size.
- Carefully remove the plastic wrap. Cut the dough in 4 pieces for rolls or 9 pieces for breadsticks. Shape as shown above. Mist with oil spray and dust with flour. Cover with a towel.
- Proof for 45 to 60 minutes until dough has noticeably swelled.
- Prepare the oven for “Hearth Baking” and then preheat the oven to 500°F.
- Add the bread to the oven. Add water to the steam pan and mist the back and sides of the oven. Close the door and mist again every 30 seconds for 3 intervals. Bake the bread for 10 minutes or until browned.
- Transfer the bread to a cooling rack. Bread crust will soften as it cools. I rubbed butter onto the crust while it was hot. It adds flavor and helps the crust stay soft.
Notes
Nutrition
Nutritional Disclaimer
This recipe was calculated using the exact brands and measurements I used to make this recipe. If you are following a strict diet please note changing anything will cause the nutritional info to change. My calculations are intended as a guide only.
If you liked this Ciabatta Bread Recipe, I think you’ll also enjoy our Italian Baguette, French Bread and our Garlic Batard Bread recipes. Give them a try and let me know what you think!


When do you shape ciabatta into rolls? How do I prepare them for freezing?
Hi Amedia. The bread is shaped in step 6 in the recipe card.
I love your blog, amazing picture representation and information is too good Also all the tips are really working and special thanks for sharing two recipes
You just made my day, weekend, month and are my new bestie! Please let me know if there is anything you’d like to see covered on this blog.
There’s absolutely nothing like the aroma of bread baking when you walk into the house! it’s so cozy and inviting, and just makes the whole kitchen smell like the most wonderful bakery. Ciabatta is one of our favorite types of bread, both for sandwiches, and noshing with butter. I appreciate your step-by-step photos in this post! It will be so helpful to peek at them while I’m making my first rolls to make sure things are looking just right. 🙂
Oh man I love ciabatta bread! I’ve never made it at home, but I can imagine how much better it is than store bought. Thanks for the step by step pics, they are making me think I could actually make my own bread! Gonna try it!
Is there anything better than freshly baked bread? I love that this one you have here is so versatile too!!
This will be perfect for some leftover ham after easter! I love Ciabatta bread… cant wait to try it Julie!
Ciabatta is my favorite bread! Thanks for the easy recipe!!!
Love making ciabatta!! It is such a challenge. Although it’s a wet dough I love waiting for the end results to see those huge holes in the center. The sandwiches the bread makes is excellent. You’ve got me in the mood to start on my ciabatta bread again!! My kids go nuts over it.
I love ciabatta bread but had no idea that it can be shaped in so many different ways. And thank you for all the tips that you included in this recipe; I had no idea that adding steam to your oven was a crucial step in making bread at home. Now I feel more confident that when I try this recipe, it’ll come out right 🙂
Thanks, Daniela!
Fresh baked bread is the best. Thanks for all the tips on how to make this fabulous ciabatta bread..
Thanks Jennifer!
Thanks for showing us two ways to make these! Each way serves its own purpose, so it’s great to know. Nothing beats fresh bread. I’ve never made ciabatta—in fact, I’ve never strayed from my usual Dutch oven bread—so this is a great excuse for me to finally expand my carb-loving horizons 🙂
Thank you so much, Dana! Glad it was helpful. Please reach out with any questions you have.
Thanks for taking away the mystery of baking this from scratch. Your step by step with clear photos is so helpful. I know exactly what to expect now.
Thank you Debra! I’m glad that you found it helpful!
Thank you Debra!
I love a good ciabatta recipe and you can never have too many of them, esp when they make the perfect dough! I think the hardest part is the “waiting”, but that’s true of any yeasted bread 😉 Thanks for sharing this fun recipe!
Thank you so much, Traci!
I’ve made all types of bread, but never homemade ciabatta. Yours looks like perfection and I can imagine how good your house must smell while it’s baking. I love the idea of that poolish, too. What a cool starter that is. I actually have one of those containers (I use it for brining large cuts of meat, but now that I see it has another use, can homemade bread be far behind? I think not.
Thank you, Lisa!
Thank you so much Lisa!
I know it’s so easy to pick up a loaf from the store, but you’re right, the smell alone is worth making your own! My mom made bread often when I was growing up and nothing beats a homemade loaf right out of the oven. This recipe looks wonderful. Simple ingredients, lots of love, and pure deliciousness!
Thank you, Jenni! My mother was the pie maker and I loved the dough baking.
I love me some homemade bread! This ciabatta is perfect for my family. It’s so good!
Thank you, Kylee! I often look at your blog for bread inspiration!
Nothing tastes as good as homemade bread! Super detailed and informative recipe! My daughter is the bread baker in our family, so I’m going to share this recipe with her. You also gave me some gift ideas. The bread bakers’s apprentice for me and the couche for my daughter!
Thank you, Sandra! I took a class and that’s the book they use. It’s easy to read and I use it often!
These look soo delicious and totally worth the work. ESPECIALLY to go with those Baked Chicken Parmesan Meatballs – wow talk about a from scratch meal I am ALL about!!
Thank you, Tracy! They sure went well together!
What an informative and interesting post Julie. I had no idea that ciabatta bread was a relative new invention. It happens to be one of my favorites, well done.
Thank you so much, Karen! I love reading the history of foods almost as much as making them. So glad you enjoyed it too!
Homebaked bread is SO good. In fact, I just made some buns today, This recipe looks fantastic. I can imagine the aroma…it is to good.
Thank you, Gloria!
Thank you!
I can’t wait to try making this ciabattta! Homemade bread is the best!
Thank you Madi!
Now those loaves are calling my name. Yumm, so tempting Julie. Great recipe too 🙂
Thank you, Loretta! I can’t wait to hear all about you’re trip!