Modeling Chocolate Recipe
This post may contain affiliate links. Please read our Disclosure Policy.
If you liked playing with play doh as a child, you’re going to love this easy Modeling Chocolate Recipe!
When I was 23 years old, I wanted to take a cake decorating class. The only thing that stopped me was that I was 9 months pregnant. I always intended to take the class after my daughter, Sarah was born, but I just never got around to it. Fast forward approximately 27 years, and I finally took that class….with Sarah.
 The latest Daring Kitchen project was hosted by Shillpa Bhaambri from Cakeline the Journey, a Baker and Cake designer living in Mumbai, India. She challenged us to design a cake using homemade decorating clay. Decorating clay could be either fondant, Gum paste or modeling chocolate. I’ve used fondant and gum paste before, but I’ve never made my own. Being the chocolate nut that I am, I decided to give that recipe a try.
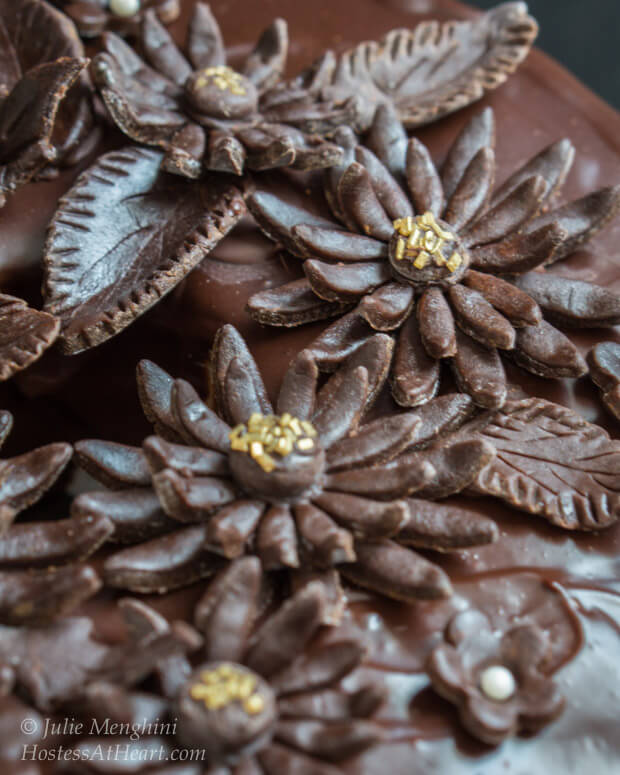
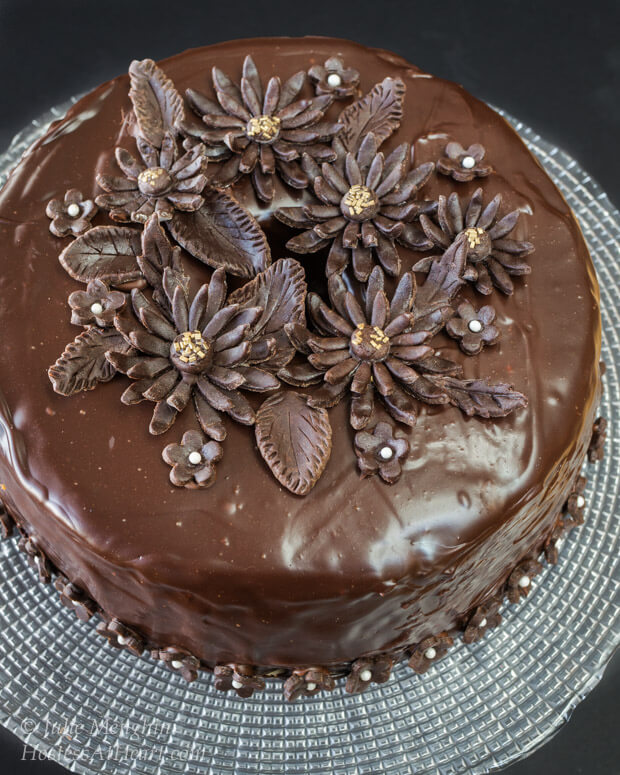
 Modeling chocolate can be used to cover cakes, make flowers, figures, stripes, polka dots or whatever your creative mind comes up with. Best of all, it tastes so much better than fondant or gum paste and doesn’t dry out as quickly. I read several other methods for making modeling chocolate, and one of the biggest cautions that I read was to not over mix it. If you do, there is no bringing it back. It becomes grainy and unusable. So, I followed the instructions step by step. My final product was a perfect modeling chocolate.
This is fun fun stuff folks, and it’s not hard to make. I used dark chocolate, but you could use white chocolate and color it with gel food coloring too. I really have to apologize for these photos. The lighting in my work space wasn’t the best.
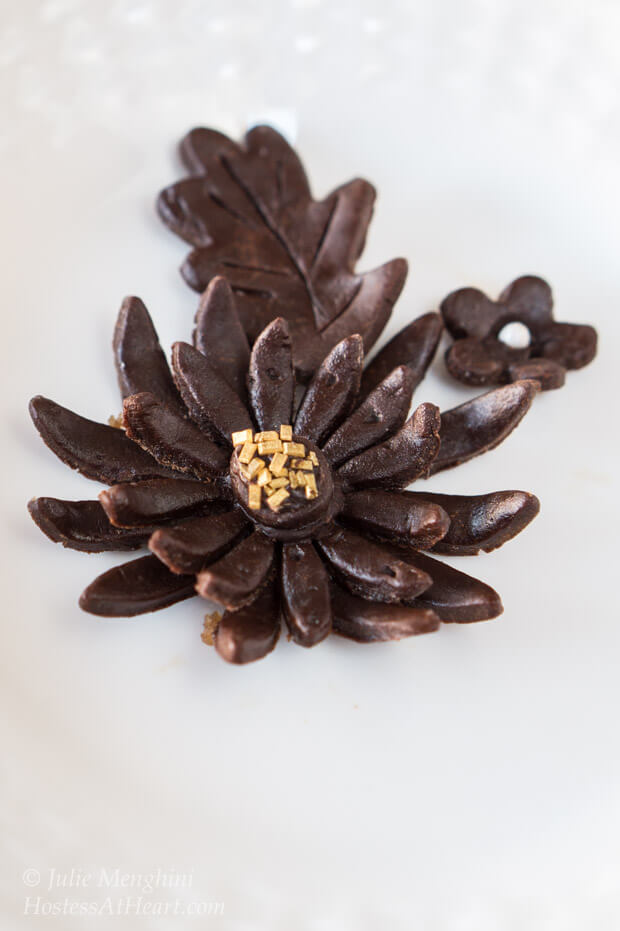
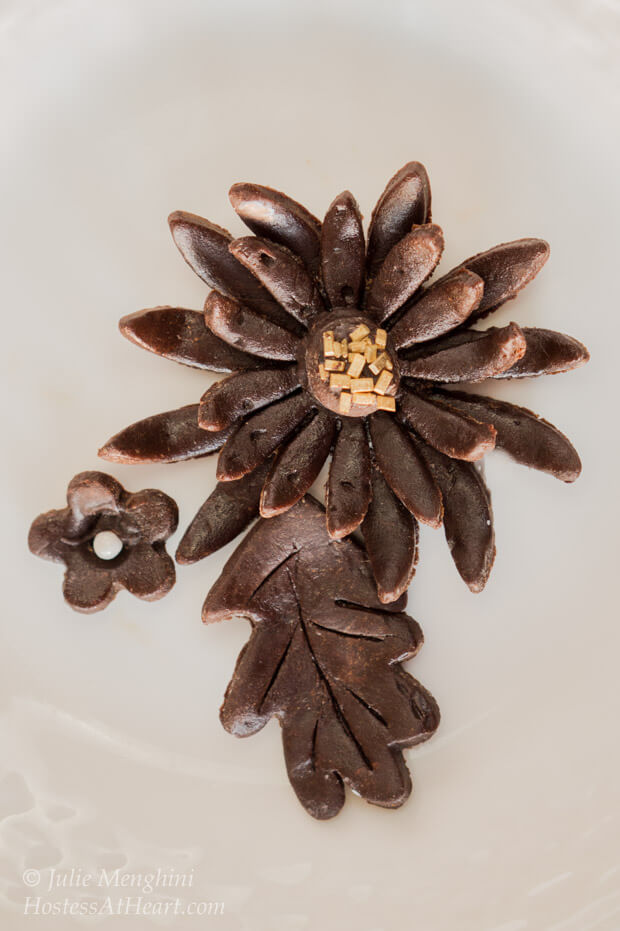
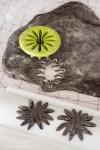
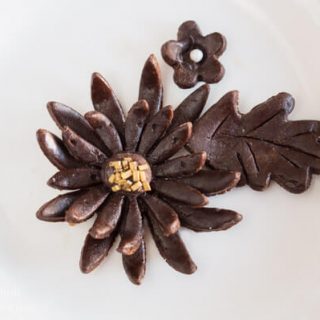
To make my cake decorations, I had two sizes of the same flower cookie cutter, and different leaf cutters. Dust working surface with corn starch, and dust your rolling pin. Pinch off a portion of your modeling chocolate and roll it thin. Dip cutter into corn starch and press into the dough. Continue until you have enough to decorate your cake. I also rolled some small balls and flattened them into disks as my flower center. This paste is sticky. I know it looks pretty tough, but it cleans up well.
Want to save this recipe?
I'd like to receive more tips and recipes from Hostess At Heart!
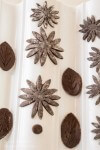
The glue that I used to put the flowers together, and to adhere them to the cake, is chocolate that I melted in the microwave. I just used chocolate chips for this. Place a small amount of this chocolate in the center of the larger flower and adhere the smaller flower onto the center of the larger flower. Put a little bit of chocolate onto the center disk and dip it into decorative sugar. Adhere the other side of the disk onto the center of the flower with more chocolate. Curl the petals slightly. Clean the corn starch off using vodka and a small paint brush. The alcohol will evaporate. Have fun!
Modeling Chocolate Recipe
Ingredients
- 450 gr/1 lb dark or white chocolate or coating chocolate roughly chopped into 1 inch pieces
- 110 ml light corn syrup 1 cup minus 2 tsp
- Gel color if using white chocolate
Instructions
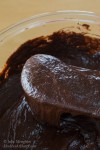
- Using a glass bowl, melt the chocolate in a microwave at 50% power for one minute at a time. Stir after each minute because chocolate will not look like it has started melting. This should only take about 2 minutes total. (You could also us a double boiler) Stir until smooth.
- Heat corn syrup in a glass cup or bowl for 30 seconds in the microwave.
- Slowly, while stirring, gently fold syrup into chocolate. Cut and fold two to three times. Mixture will initially look glossy.
- Fold two or three more times. Mixture will begin to loose it's shine and resemble soft serve ice cream. Stop stirring.
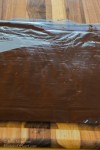
- Pour all of the modeling chocolate into a large zip lock bag. Flatten the bag and spread the chocolate out as much as you can into a thin layer.
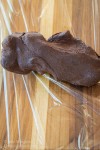
- Put the bag into the freezer for 30 minutes. After 30 minutes, remove from the freezer and break the chocolate into large pieces. Allow to sit out 20 to 30 minutes to slightly soften.
- Once malleable, start kneading it until soft and pliable.
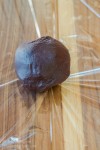
- Form into a ball and wrap with plastic wrap. Refrigerate until using. I formed mine into 6 individual balls.
- Store up to 6 months in the refrigerator or freezer for up to 2 years.
Notes
Original recipe provided by Lara Clarke of Tasty Treats and adapted by Shillpa Bhaambri from Cakeline the Journey
Nutrition
Nutritional Disclaimer
This recipe was calculated using the exact brands and measurements I used to make this recipe. If you are following a strict diet please note changing anything will cause the nutritional info to change. My calculations are intended as a guide only.
It’s amazing what a little modeling chocolate can do, especially on top of this Black Russian Cake!

This is so fun! It’s something I think I could try. Although my chocolate experiment in the past wound up splashed on the ceiling. Dropped a spoon into melted chocolate and kaflooie! Ha. Thanks!
Ha! It sounds like you would have a heck of a lot of fun!
This looks so amazing Julie. Really love the cake, and chocolate does make everything better! It’s great that you finally managed the class with your daughter. I love going places and doing things with my mum so I can imagine that Sarah also had a great time with you!
Thank you so much Roberta! I just love spending time with Sarah and feel so blessed that she enjoys hanging out with me. Your mum is blessed to have you as a daughter as well!
Amazing artistry!!! Thank you for sharing!!!
Thank you Cathy. You are so kind!
You make it sound easy. How fun you got to take the class with your daughter!
Thanks Patti! I had a great time with Sarah!
Wow Julie, I didn’t realize modelling chocolate was so simple to make. It looks so pretty and tastes better than fondant. Pinned for later!
It reminds me of tootsie rolls in flavor. My kids would have loved creating there own edible art with this stuff. Thanks Lily!
This is lovely and I am going to try this for sure! This sounds pretty easy and is gorgeous! Thanks so much Julie!
Thanks Lynz! I would love to see your creations!
Neat recipe! I hadn’t heard of modelling chocolate before, so this is fantastic.
Thank you! It is easy to use and a lot of fun too!
These are so gorgeous, Julie! They make your cake look so elegant!
Thank you Andrea. I loved how it turned out and how easy it is.
Stunning. Absolute PERFECTION!
Thank you Josette!
Great idea for decorating a cake. Instructions are nice and clear too.
Thank you Hilda. Glad that the instructions made sense.
Oh wow! Such an amazing, amazing cake, Julie. So gorgeous. And it is nice that you took that class with your Sarah. Sweet. <3 Thank you for sharing this beautiful and divine cake. Happy FF104! x
Thank you Juhls. I really enjoyed our class and it was twice the fun with Sarah. Happy FF to you!
Wow and Wow!!! It’s absolutely amazing!!! How only you dared to slice and eat that cake.. 😀 You’re truly an artist, Julie!
Thanks for bringing this beauty to FF party!
Thank you. I had a lot of fun making and eating that cake. And FF is always fun.
Beautiful! How awesome is it that you took the class WITH your daughter! Thanks for sharing this!
Thank you. I loved every minute of that class with my daughter. This technique is so much fun.
Thanks for sharing this, Julie. I’ve played around with fondant before, but always the store bought variety. Modeling chocolate sounds like way more fun 🙂 Your cake is a work of art, too. I don’t think I’d want to cut into it, lol
Thank you Natalie! I had a friend ask if we actually ate it and we sure did! It was delicious and a ton of fun to make.
Julie, your chocolate artwork is completely stunning! I have never even heard of this kind of chocolate, but then I have never really been much of a cake decorator! You have so inspired me – I think I must take a course! This is so gorgeous! 😀
Thank you! I just had online instructions for this modeling chocolate. It was easy and fun to do.
Glad you were able to take that class and best of all share it with your daughter! Such a pretty cake!
Thanks Debbie! Spending time with Sarah was icing on the cake.
Amazing Julie, your chocolate cake is beautiful. I love the idea of making your own chocolate fondant, pinned for later x
Thank you Sarah! It was so much fun. I’m making the white chocolate modeling chocolate next so I can play with color.
Julie, this is gorgeous! What a beautiful way to decorate a cake! And I LOVE that you ended up taking the class with your daughter … so special!
Thank you Anna! It was very special Anna. I just cherished every minute.
How fabulous, I love that you took the class together with your daughter, and your work is beautiful 🙂 you are so creative!
Thank you Elaine! I was actually a painter and taught for 10 years so I just love the fiddling work. I had the most fun sharing the time with Sarah though as I am sure you understand.
Aha! Now it makes sense 🙂 you are an artist x
How stunning! Now it all makes sense how you put it all together. What a wonderful treat to have taken the course with your daughter, like mother, like daughter eh? Perhaps she is just as good as you in the culinary department? I like your challenges, they definitely make one think outside of the box and forces one to research and learn more. Great stuff Julie, keep it up!
Thank you Loretta! I think Sarah is better than me. She has confidence that “it’s good enough”. She’s even done a couple wedding cakes. That would stress me out! I sure had fun with that girl though.
Oh don’t be so modest Julie, you definitely have the gift too!
You my friend are so sweet!
Julie
What an amazing experience must it have been to do a cake decorating class with your daughter. Priceless!
Thanks for sharing this technique with all of us :). This is precious. Have never heard of chocolate modeling before. I am Not a fan of fondant but absolutely love this!!
Thank you Sonal! I had the best time with Sarah. I agree about fondant. I just don’t care for it. It can be beautiful but what is the point if no one wants to eat it? I still have several dark balls in the fridge but want to try the white chocolate and coloring it. Have a wonderful day Sonal!
Julie,
What a beautiful cake and stunning chocolate flowers! I am going to try the modeling chocolate recipe- it sounds like so much fun!
I could relate so well to your story about wanting to do a class before your daughter was born. Once the kids were born, I don’t know where the years went. What a fabulous gift though to take the class with your daughter now!
Thank you Sandhya! I enjoyed it so much with Sarah. I sure wish that I would have known about modeling chocolate before now though. I would have had so much fun letting the kiddos help decorating cakes and cupcakes.
I’m so glad you shared how to do this, Julie! It really looks like a lot of fun. I am just amazed as I’ve never seen anything like this before. So interesting how you get the cornstarch off of the chocolate. I was wondering how you did that. Gorgeous, gorgeous cake and wonderful post!
Thank you Shari! That cornstarch just disappears and the vodka doesn’t flavor it at all. I want to try this with white chocolate and coloring it. I saw so many things from stripes to polka dots to figures. Now I just need a couple more hours in the day!
Your cake is a real piece of art. Who would dare to eat it!??? 🙂
Oh Ana, we definitely ate some and shared some.
Play doh was a regular activity when all of the kids were young and everyone had such a good time making different objects. How much better it would have been to use chocolate – especially since the kids often helped me decorate cakes. Thanks for sharing Julie…
I agree that I really wish I would have known how to do this when my kids were young. They would have really loved it. Some of our best memories are in the kitchen or at the dinner table.