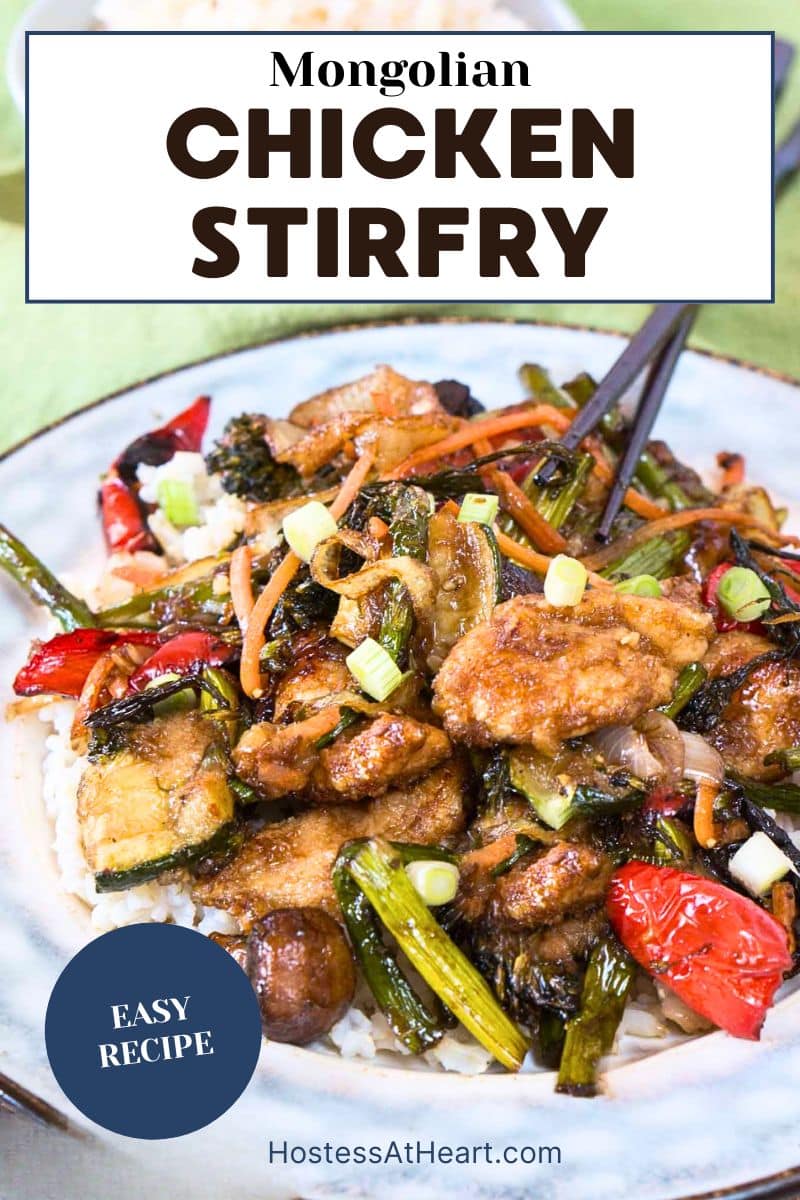
Mongolian Chicken Recipe – Better Than Takeout in 50 Minutes
This post may contain affiliate links. Please read our Disclosure Policy.

You know that craving you get for Chinese takeout — something saucy, savory, and just a little bit sweet? This Mongolian Chicken recipe hits every single one of those notes, and you can have it on the table in about 50 minutes.
John is a huge fan of this one. The sauce is bold and rich, the chicken comes out perfectly tender, and the vegetables stay nice and crispy. It checks every box for a weeknight dinner that feels special without wearing you out.
Whether it’s a busy Tuesday or you want to impress someone at the dinner table, this is the recipe to reach for. Let’s get into it!
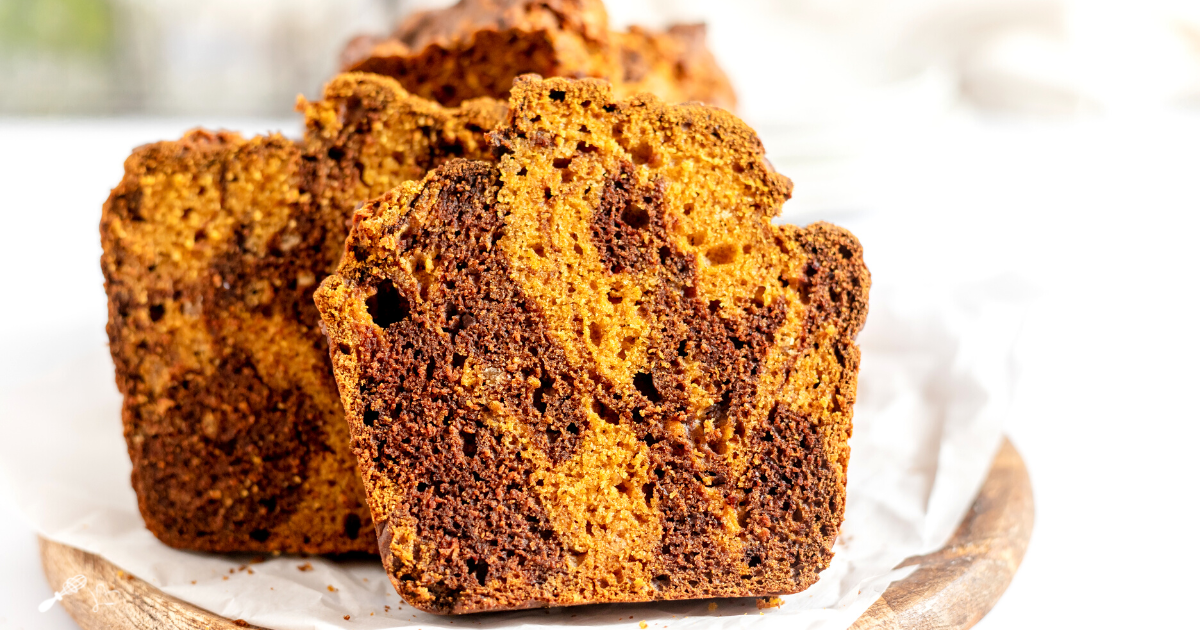
What Is Mongolian Chicken?
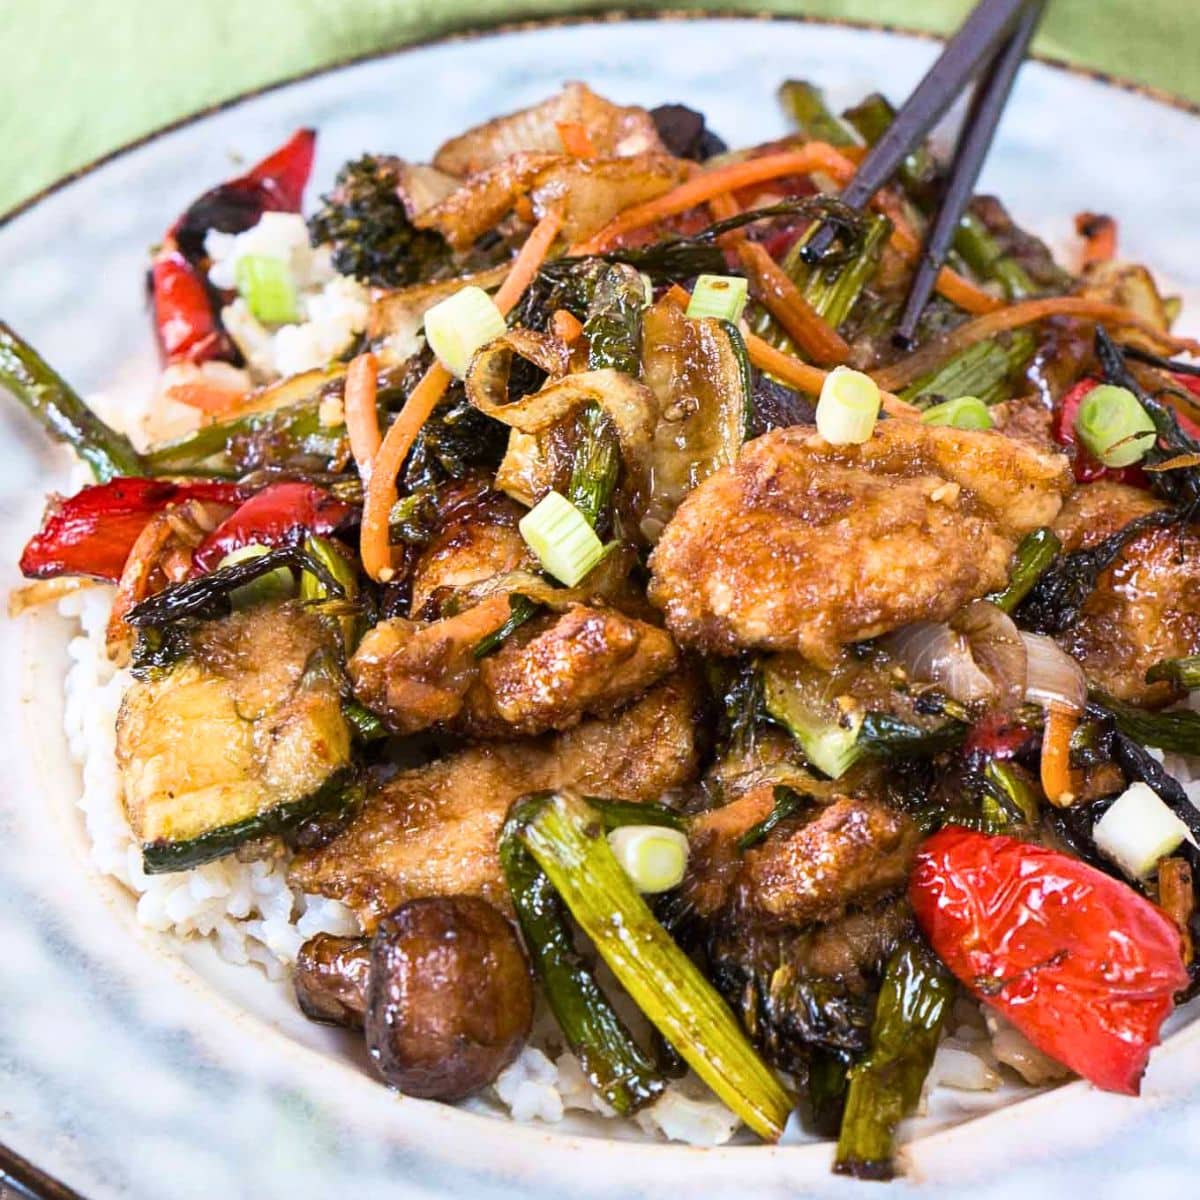
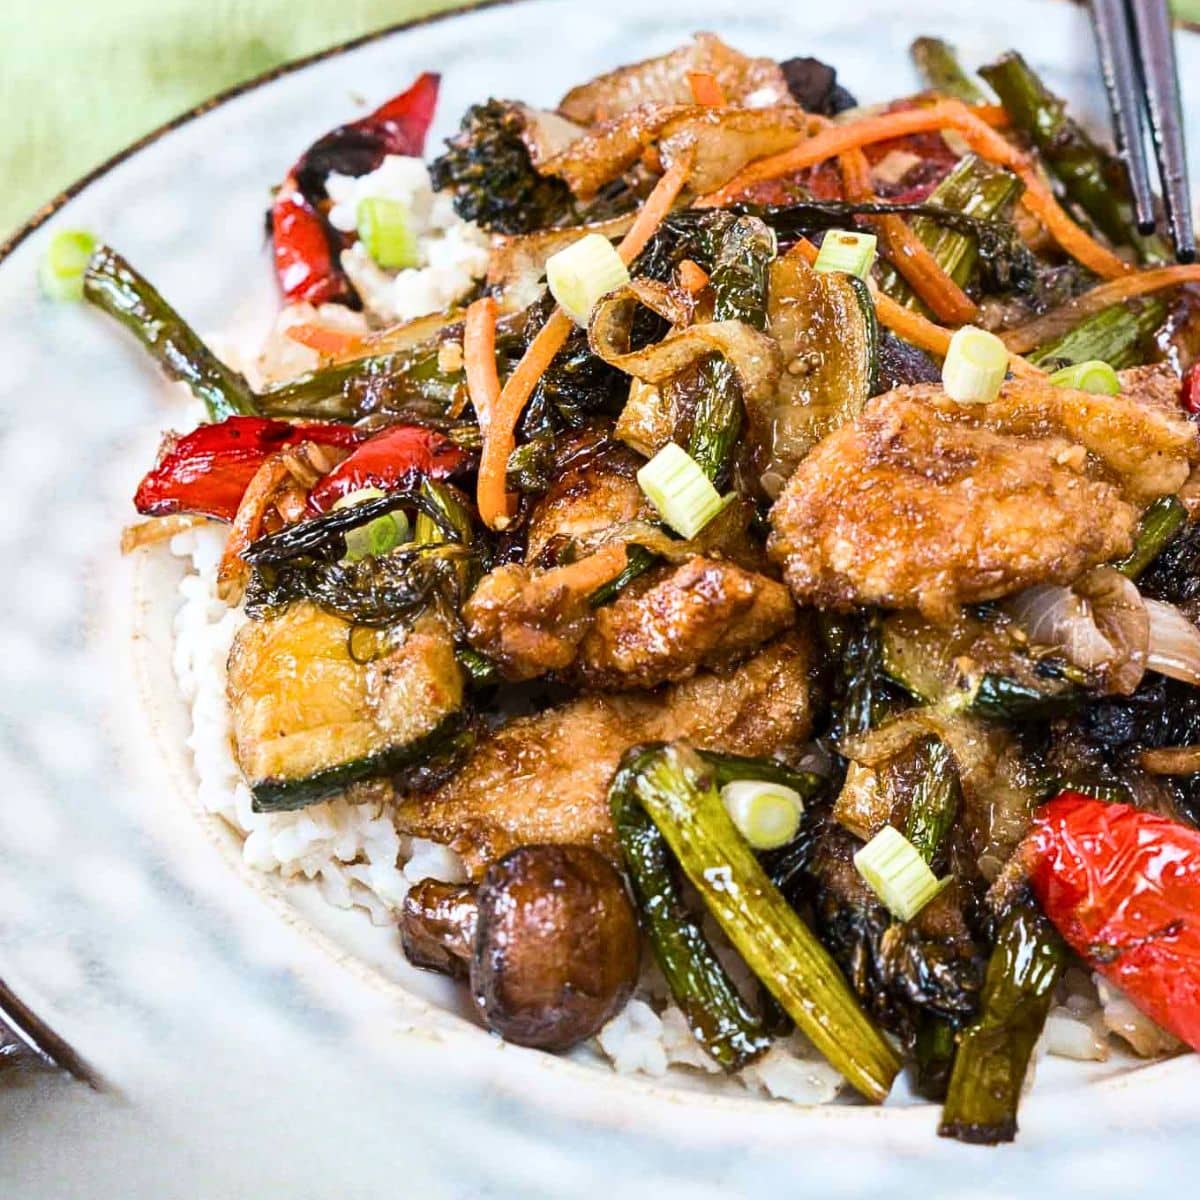
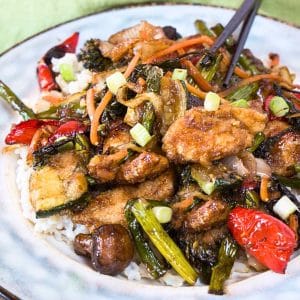
Mongolian chicken is a popular American-Chinese dish made with thinly sliced chicken breast coated in a savory-sweet soy-based sauce and tossed with crispy vegetables — all served over a big bowl of rice.
It’s inspired by Mongolian beef (a dish you’ve probably seen on plenty of Chinese restaurant menus), but uses chicken instead, making it a lighter, budget-friendly option. The sauce is where the magic happens — soy sauce, brown sugar, fresh garlic, and ginger come together into something truly special. And because you’re making it at home, you control the sodium and skip all the preservatives.
Why You’ll Love This Recipe
- Quick and easy — It comes together in under an hour, even on a busy weeknight. Better than takeout — You control what goes in it, so it’s fresher and lighter.
- Totally customizable — Use whatever vegetables you have on hand.
- One-pan meal — Less cleanup, more enjoying dinner.
- Family-friendly — Even picky eaters love that sweet and savory sauce.
Ingredient Notes
You’ll find the full ingredient list with exact measurements in the recipe card below. Here are a few things worth knowing before you get started.
Chicken breast — Boneless, skinless chicken breast works best here. Slice it thin, about ½ inch thick, cutting across the grain so it stays tender. Chicken thighs work great too if you like a little more richness.
Cornstarch — This is the secret to that slightly crispy coating on the chicken before the sauce goes on. Don’t skip it! It also helps the sauce cling to every piece.
Low-sodium soy sauce — Regular soy sauce can make this dish very salty. Low-sodium gives you all the flavor without the saltiness. If you’re gluten-free, tamari is a perfect swap.
Fresh ginger and garlic — These two together are what give Mongolian chicken its signature flavor. Fresh is definitely better than powder here, and both are easy to find in the produce section at any grocery store.
Brown sugar — This balances out the salty soy sauce and gives the sauce that slightly sticky, caramelized quality. Light or dark brown sugar both work just fine.
Red pepper flakes — Just a teaspoon adds a gentle warmth without making it too spicy. Adjust up or down to suit your family’s taste.
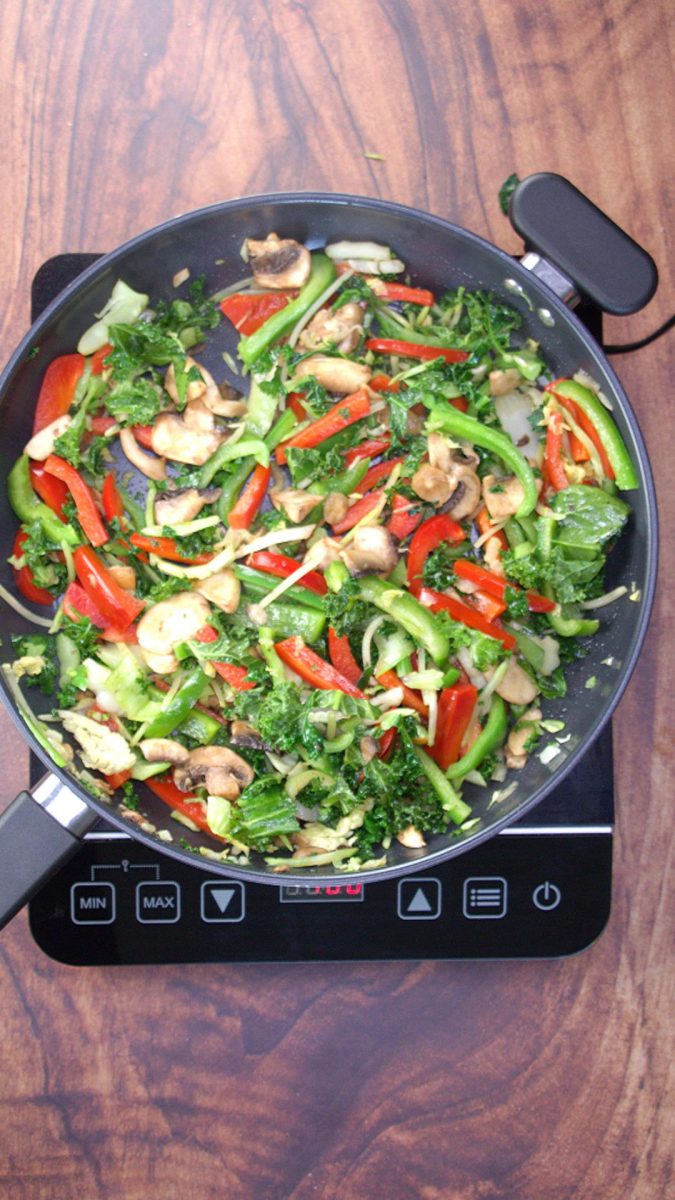
Vegetables — This recipe is flexible! Asparagus, mushrooms, broccoli, onion, bell peppers, and zucchini are all great choices. Cut them into roughly 1-inch strips so they cook evenly.
Oil — Canola, olive, or sesame oil all work. Sesame oil adds a wonderful nutty flavor that feels very authentic to Asian-style dishes.
Pro Tips for Perfect Mongolian Chicken
Dry your chicken before you coat it. Pat the chicken slices dry with a paper towel before tossing them in the cornstarch. Moisture is the enemy of a good sear — wet chicken will steam instead of brown.
Don’t crowd the pan. Cook the chicken in batches if needed. Crowding the pan drops the temperature and you’ll lose that beautiful golden-brown crust.
Make the sauce first. Getting the sauce made and set aside before you cook the chicken and vegetables keeps everything moving smoothly and prevents any burning.
Use medium-high heat for stir frying. Higher heat keeps vegetables crispy instead of soggy. Make sure your oil is hot before adding anything to the pan.
Keep your vegetables dry too. Just like with the chicken, pat them dry after washing. Wet vegetables will steam and turn soft instead of getting that nice sear.
Start your rice early. Brown rice takes 35–45 minutes, so get it going before anything else. If you have an Instant Pot, our Simple Asian Rice is ready in just 15 minutes and is the perfect pairing.
Step-by-Step Instructions
Start the rice. Get your brown rice cooking according to the package directions. It takes the longest, so starting it first keeps everything on schedule.
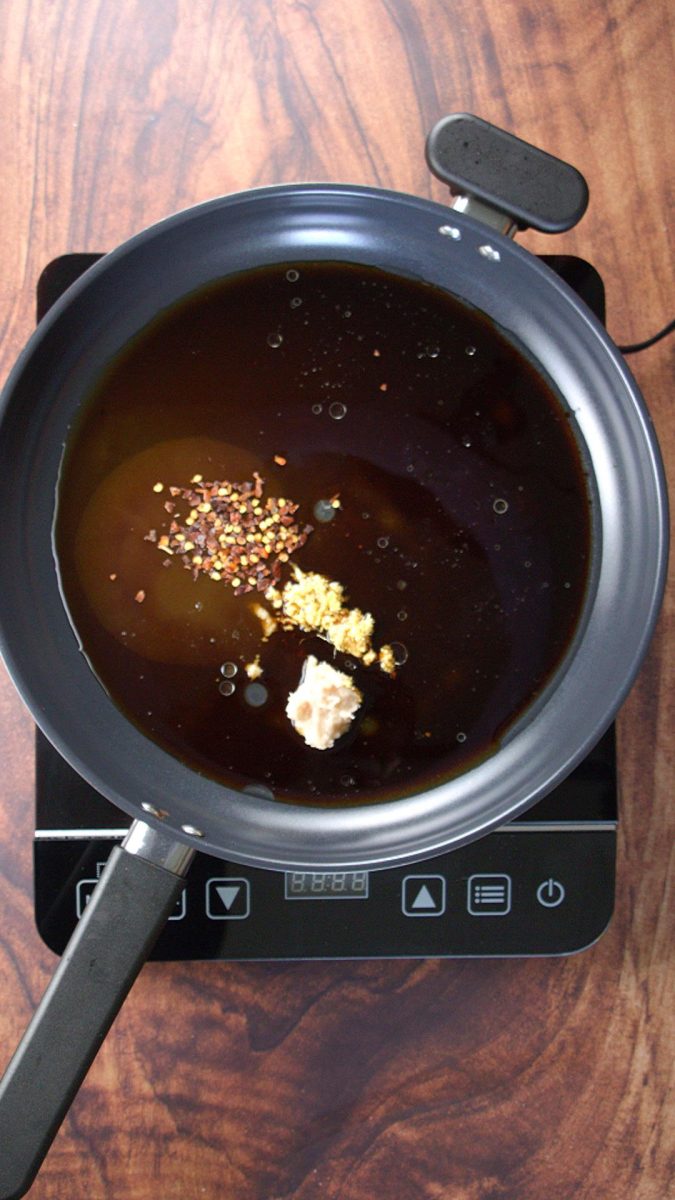
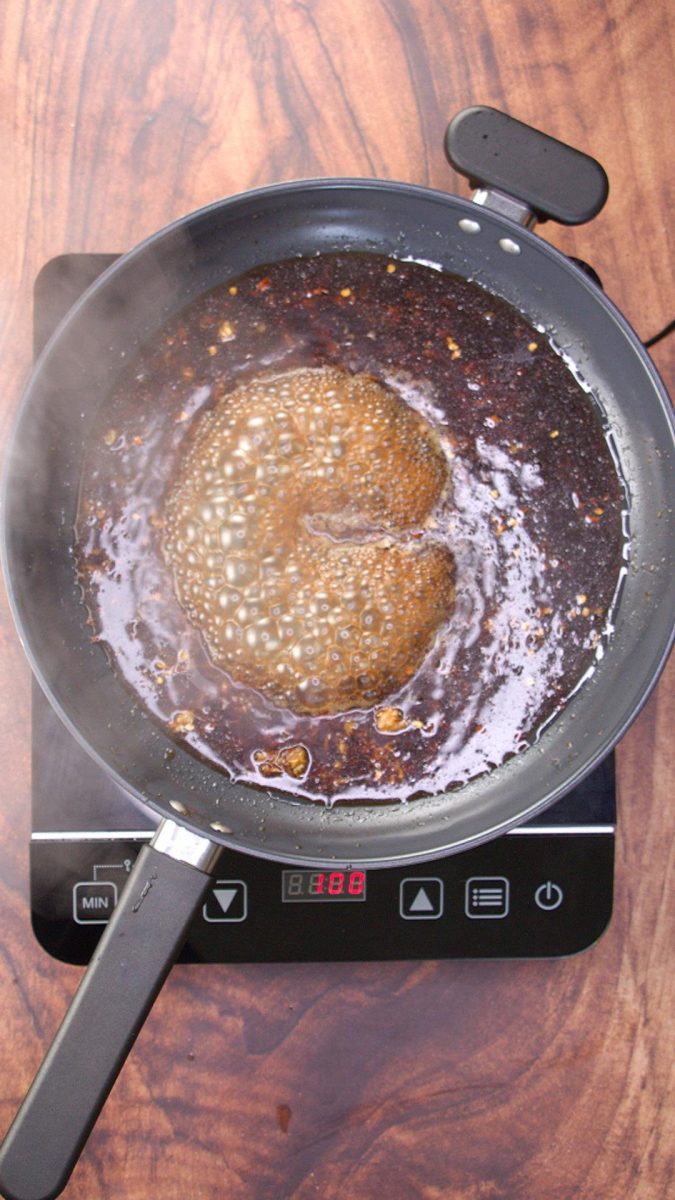
Make the sauce. Heat 1 tablespoon of oil in a large skillet or wok over medium-high heat. Add the minced garlic, grated ginger, soy sauce, water, brown sugar, and red pepper flakes. Stir and cook for about 2 minutes. Pour the sauce into a bowl and set it aside.
Want to save this recipe?
I'd like to receive more tips and recipes from Hostess At Heart!
Coat the chicken. Add your sliced chicken to a bowl and toss it with the cornstarch until every piece is coated. Shake off any excess.
Cook the chicken. Drizzle a little more oil into the same hot skillet. Add the coated chicken in a single layer and brown it on both sides, about 3–4 minutes per side. Transfer to a plate. It doesn’t need to be fully cooked through at this stage.


Stir fry the vegetables. Add one more drizzle of oil to the pan. Add your prepared vegetables and cook over medium-high heat, stirring occasionally, until they are slightly browned but still have some crunch — about 4–5 minutes.
Bring it all together. Add the browned chicken back into the pan with the vegetables. Pour the sauce over everything. Toss to coat and cook for 1–2 more minutes, until the chicken is cooked through and everything is glossy with sauce.
Garnish and serve. Spoon the Mongolian chicken over your cooked rice. Top with sliced green onions or matchstick carrots if you’d like a pop of color. Serve right away and enjoy!
How to Store Leftovers
Store leftover Mongolian chicken in an airtight container in the refrigerator for up to 4 days. Keep the rice stored separately so it doesn’t get soggy.
To reheat: Warm it in a skillet over medium heat with a small splash of water or chicken broth to loosen the sauce. You can also microwave it in 30-second intervals, stirring in between.
Can you freeze it? Yes! Mongolian chicken freezes well for up to 3 months. Let it cool completely, then store in a freezer-safe container. Thaw it in the refrigerator overnight before reheating. Freeze the rice separately for best results.
Make-ahead tip: You can make the sauce up to 3 days ahead and store it in a sealed jar in the fridge. You can also slice the chicken in advance. Both of these steps cut your active cooking time down significantly on a busy night.
Variations to Try
- Try it with beef. Swap the chicken for thinly sliced flank steak or sirloin and you basically have our Mongolian Beef Stir Fry — equally delicious and just as quick! Make it spicy. Double the red pepper flakes or finish the dish with a drizzle of sriracha if your family loves heat.
- Make it gluten-free. Substitute tamari or coconut aminos for the soy sauce and you’ve got a completely gluten-free meal.
- Add some crunch. Toss in a handful of toasted cashews, peanuts, or almonds right at the end for great texture.
- Switch up the vegetables. Snap peas, bok choy, baby corn, or shredded cabbage are all wonderful here. Use whatever looks fresh in your refrigerator!
- Low-carb option. Serve over cauliflower rice or zucchini noodles instead of traditional rice.
Ready to Skip the Takeout?
This Mongolian Chicken recipe is one of those weeknight heroes that earns a permanent spot in your dinner lineup. It’s quick, it’s satisfying, and it tastes like something you ordered from your favorite restaurant — except you made it yourself, and you know exactly what went into it.
If you try this recipe, I would love to hear how it turned out! Drop a comment below and tell me which vegetables you used. And if you loved it, please take a moment to leave a ⭐⭐⭐⭐⭐ rating on the recipe card below. Those five-star ratings help other readers find this recipe, and it means so much to me!
Mongolian Chicken Recipe
Ingredients
- 1 lb chicken breast skinless and boneless, sliced 1/2 inch thick
- ¼ cup cornstarch
- 3 tbsp oil canola, olive, or sesame, divided
- 1 tbsp ginger grated fresh
- 1 tbsp garlic minced
- ½ cup water
- ½ cup soy sauce low sodium
- ¼ cup brown sugar light or dark
- 1 tsp red pepper flakes
Stirfry Vegetables
- 4 cups vegetables sliced in 1 inch strips. (asparagus, mushrooms, broccoli, onion, bell peppers, and zucchini all work great)
Rice
- 1 cup Brown rice Cooked accordingly to package directions
Garnish, optional
- green onions thinly sliced
- matchstick carrots
Instructions
Rice
- Start your brown rice cooking according to the package directions. It takes 35–45 minutes, so starting it first keeps everything on schedule.
Make the Sauce
- Heat 1 tablespoon of oil in a large skillet or wok over medium-high heat. Add the garlic, ginger, soy sauce, water, brown sugar, and red pepper flakes. Stir and cook for 2 minutes.
- Pour the sauce into a bowl and set it aside. You'll add it back at the end.
Coat and Cook the Chicken
- Pat the sliced chicken dry with a paper towel. Add it to a bowl and toss with the cornstarch until every piece is evenly coated. Shake off any excess.
- Drizzle 1 tablespoon of oil into the same skillet over medium-high heat. Once hot, add the chicken in a single layer. Brown on both sides, about 3–4 minutes per side. Transfer to a plate. (It doesn't need to be fully cooked through yet.)
Stir Fry the Vegetables
- Add the remaining 1 tablespoon of oil to the pan. Add your prepared vegetables and cook over medium-high heat, stirring occasionally, until slightly browned and just tender but still crispy — about 4–5 minutes.
Combine and Serve
- Return the browned chicken to the pan with the vegetables. Pour the sauce over everything. Toss to coat and cook for 1–2 more minutes, until the chicken is cooked through (internal temperature of 165 °F) and everything is glossy with sauce.
- Spoon over cooked rice. Garnish with sliced green onions or matchstick carrots if desired. Serve immediately.
Notes
Nutrition
Nutritional Disclaimer
This recipe was calculated using the exact brands and measurements I used to make this recipe. If you are following a strict diet please note changing anything will cause the nutritional info to change. My calculations are intended as a guide only.
Related Recipes You’ll Love
If you love this Mongolian Chicken, here are some other Asian-inspired recipes from Hostess at Heart that belong in your weeknight dinner rotation!
Our Mongolian Beef Stir Fry uses the exact same delicious sauce but with tender slices of sirloin. It’s equally fast and just as satisfying.
Love a good chicken bowl? Our Grilled Teriyaki Chicken Bowl is sweet, savory, and wonderful for meal prepping through the week.
If you like a little more kick, our Thai Basil Chicken Noodle Bowl is creamy, spicy, and packed with incredible flavor.
And don’t forget our Beef and Broccoli Stir Fry — a 20-minute one-pan dinner that is a permanent fixture in our kitchen!
Did you enjoy this recipe? Don’t forget to pin it for later and follow me on Pinterest for more delicious recipes like this one!
Originally published: February 29,2016. Updated on April 7, 2026– Enhanced with more detailed instructions, tips, and serving suggestions. No changes were made to the recipe.


I had tried this recipe before (using the simmering method), but my family did not like the flavour and texture of the chicken. (The directions do not state to brown the drumsticks first, which resulted in an unpleasant odour in the dish).
Thank you for stopping Thomas. I did not use drumsticks. I used boneless skinless chicken breasts. The simmering method would not result in the stir fry texture that you get from using strips of chicken instead of whole pieces. I hope this helps and that you will let me know if you have questions about making this recipe.
This looks amazing! Can’t wait to try this recipe!
Thank you! We’ve made it a lot and really enjoy it.
Ugh, Julie. Sounds like a nightmare of an evening. 🙁 Happy to know that you got everything resolved with your Facebook account. ( I loathe hackers… Aren’t some people just awful?) This dish came out beautifully the second time around! I’m sure I would have loved it with roasted veggies as well. 😉
Thank you, Josette! In the whole scheme of things it really got to me more than it should have and I’m no longer on the ledge so to speak. I don’t understand people that do things just to cause havoc. Every fiber of my being is so totally opposite of that. Speaking of niceness, thank you for hosting FF this week!
I love Mongolian Chicken and I didn’t realize it was so easy to make. A definite must-try. Thank for sharing and pinned!
Thank you Lily and thank you so much for hosting FF this week!
Yikes! It sounds like you had quite an ordeal this week, with Facebook, your thumb, and the first version of this not turning out so well. The end product looks delicious, though!
Thank you! I kept reminding myself that all of that other stuff was minor compared to the obstacles others face, but it sure seems like wen it rains it pours!
This looks beautiful too Julie! I love Mongolian Chicken. You’re right about Asian meals… we love it too, but hate asian take out because it tastes too “artificial”. We end up making it at home every single time 🙂
I hope your Thumb is ok! I once sliced my Thumb on the mandolin, and it partially cut through my tendon – that wasn’t fun! Hope you didn’t have to get any stitches 🙁
Oh my Dini! My mandolin scares me and I keep the fingers a long way away! I listened to your videos on creating gifs today. You are a natural born instructor!
Sorry you had such a stressful week! I hope your thumb is ok! Looks like a delicious dish!
Thank you Lynz! All is well really. I hope you have a wonderful weekend!
Owwie…your thumb! I’m so glad you didn’t give up on this dish, because it looks great!
Thank you Nancy! I’ve had a heck of a run the last couple of weeks. It seems like everything is a stuggle! Do you have weeks like that?
Thank you Nancy! I’ve had a heck of a run the last couple of weeks. It seems like everything is a struggle! Do you have weeks like that?
I have heard of Mongolian chicken but never tried it Julie. I am bookmarking this recipe because it looks fabulous!!!
Thank you so much skd! Have a wonderful day!
As soon as I saw this dish, I knew I would love to try it. I like to order mongolian beef at Chinese food restaurants. Chicken is even better! I could so relate to the problems you were having with getting a post done. I can’t even tell you how many times lately the recipe that looked so wonderful came out so terrible or it was really good, and I just couldn’t get any decent pictures. The life of a blogger, huh! 🙂 It is so frustrating sometimes, though. It may have taken awhile, but you ended up with great pictures and a great recipe. I hope your thumb is okay!
Thank you Shari! The thumb is healing! I can’t believe how difficult it is to work without that appendage! Tomorrow I am remaking a cupcake recipe for the 4th time! It seems like that’s been my mo lately too. It’s tough because it’s just 2 of us a home so I can only cook so much anyway. My neighbors are always willing to do taste tests though.
I’m glad your thumb is getting better. I bet it is difficult to cook with not being able to use your thumb! Sorry about the cupcakes. Those take a lot of time, too. I know what you mean, as there are only 2 of us at home as well. I don’t like to waste food, and it gets so expensive to buy new ingredients.
Mongolian style dishes are some of my favorite in Asian cuisine Julie. And I agree, it ALWAYS makes you feel better when you make it for yourself. This dish looks yummy, great job 🙂
Thank you so much Jess!
What happened to the FB page?! I just now finished the 2-step verification, then came back here. People are just so nuts! And sorry about the thumb, too. Such an important finger! The chicken looks awesome, better than take out! Roasting the vegetables is such a great idea. I’m going to have to give it a try, and your pineapple tarts, too
Thank you Angie! Someone created a fake Julie FB page and then used my friends list. The idea is when you confirm the fake julie friendship they are now a part of your FB page and will do the same to you. There isn’t any reason to do this other than creating havoc. I’ve reset my passwords and now I’m a bit smarter. I actually didn’t love the roasted veggies in the stir fry. Let’s keep em crunchy! Have a great day Angie, Thank you!
This looks so wonderful, Julie! I can completely relate to what you are saying about “take-out” — I often feel the exact same way! So sorry about your thumb! Hope it’s feeling much better! 🙂
Thank you Anna! The thumb is healing and I’m not whining any more either.
Ouch Julie!! I hope nothing too serious? Stitches? Hopefully NOT! Still, your Mongolian Chicken recipe came through just perfect. Too bad the roasted veggies didn’t work out. I’ve been doing all my veggies in the oven these days. Do you have any tips when you have to cook on your stove top on high heat? I know when I do a stir fry of any kind, you do have to cook on high heat in a wok, and I find the juices and oil splattering all over the place, it is pretty frustrating even though I have a mesh over the wok. Anyway, yours looks delicious, love the colors.
Thank you Loretta! The thumb is healing. It’s amazing how much you use your thumb! I used a medium high heat and keep a coating of oil on the bottom of the pan. Also make sure your oil is hot when you add your ingredients to the pan. Also make sure your veggies and meat aren’t wet. Water and oil really splatters. I think you just have to expect spatter when stir frying too.
Love this dish Julie – anything with roasted veggies tastes better. I hear you about eating Chinese out – I always need lots of water to recoup. I don’t even like Panera much because so many of their sandwiches/soups are too salty 🙂
Thank you Judi. We just ate at Panera on Saturday and they use a lot of pressed lunch meat on their sandwiches which I think is so disappointing. I can make those at home.
This looks so good!
Thank you Debbie!
That looks absolutely a-ma-zing! What a feast for the eyes! I can only imagine the flavors…
Thank you Ana! We really like stir fry and it is a great way to get John to eat his veggies.
The dish looks really good. Hope your thumb is healing well!
Thank you Johanne! The thumb is healing. It’s amazing how much you realize you use something when it’s hard to do so.