How To Make Basket Weave Cupcakes with Bird Nests
This post may contain affiliate links. Please read our Disclosure Policy.

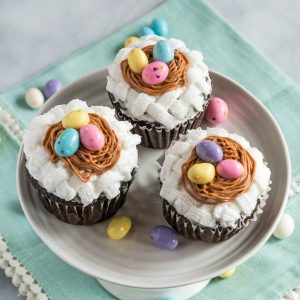
Learning how to create these Basket Weave cupcakes with Bird Nests, is not only fun, it’s not difficult. These adorable cupcakes only use two decorating tips and are perfect for Spring or Easter!
This delicious recipe was first published 4/2017 and has been updated to improve the reader experience.
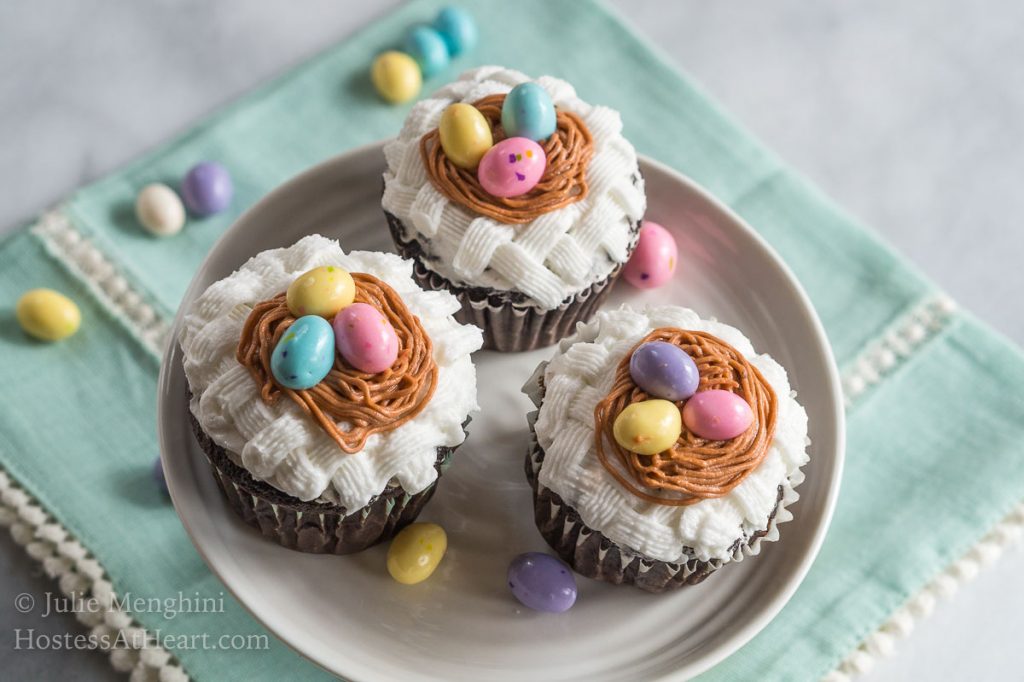
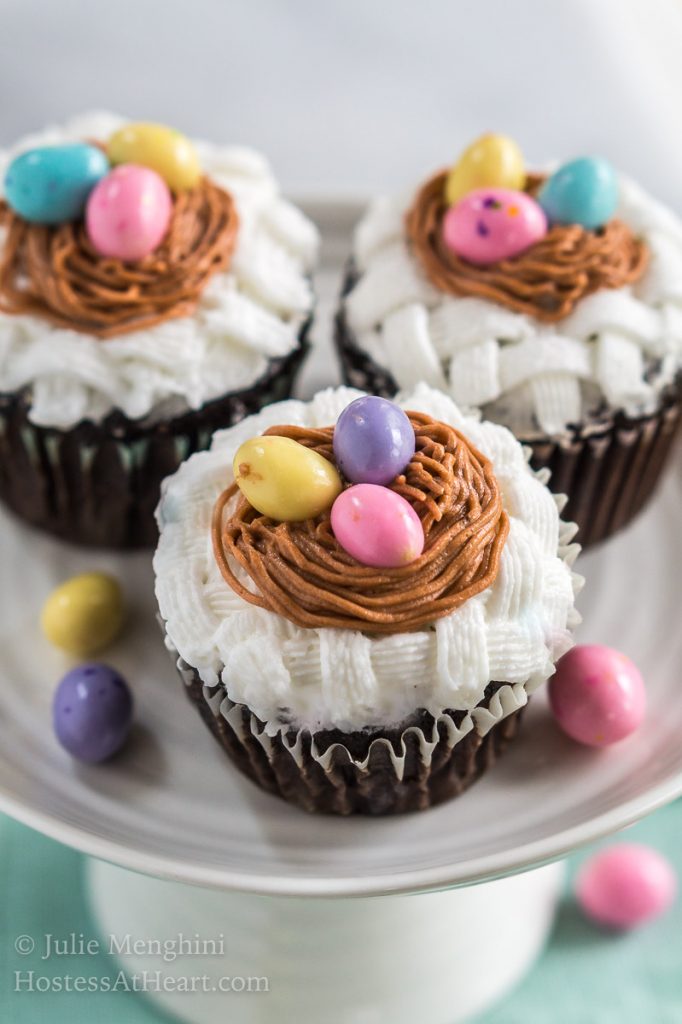
Basket Weave cupcakes make the perfect perch for these cute little bird nest cupcakes. They’re perfect for spring, Easter, or just because.
This basket weave technique always impresses people and the
You may need
- 12-cup Non-stick muffin pan – I love these muffin pans and have three of them so I can get them all filled and baked at once. They’re great for egg cups too!
- Decorating Tips – This set of two is all you will need for this cupcake but if you’re just getting started this is a nice beginner kit.
- Gel-Based Food Color – A little bit goes a long way and the colors are pure. Best of all they can be consumed with people that have peanut allergies like my little baking buddy next door.
- 3-Tier Cupcake holder and Cake carrier – This baby holds 36 cupcakes. It’s great when you have to transfer a cake or cupcakes or to just store at home.
What tips should I use?
Tips to make Basket Weave Cupcakes with Bird Nests
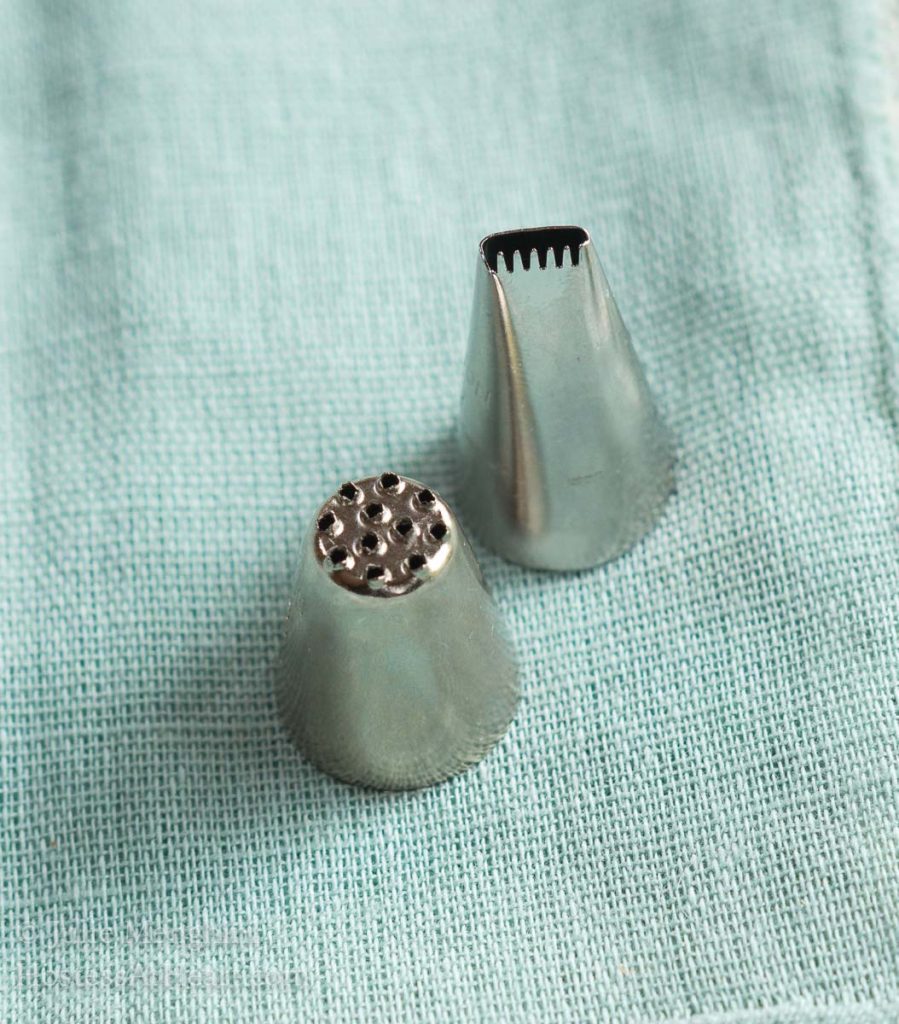
- Basket Weave tips
I started with a basket design made with a #47 decorating tip and White Butter Cream frosting mixed to a medium-thick consistency.
If your consistency isn’t thick enough, you will lose your lines in the weave and if it’s too thick it’s difficult to squeeze through the decorating tip. If you stood a spatula into a container and shook it slightly, it would begin to lean but not just flop over. - Bird nests tips
For the bird nests, I used a #233 tip and colored my frosting with gel paste food color. It’s also good to know that your color will intensify as it sits so I usually go a bit lighter knowing this. You can make your nests as large or small as you want. No two bird nests are alike!
Want to save this recipe?
I'd like to receive more tips and recipes from Hostess At Heart!
Step-by-step instructions
- Tip #47 with the smooth side next to the cupcake pipe a stripe vertically down the center of the cupcake.
- Turn the cupcake so center line runs horizontally. Make short hatch lines over the center stripe (like football laces)
- Turn the cupcake vertically again and make another stripe over the ends of the short lines.
- Turn horizontally again and from the empty spaces next to the center line, pipe over the second vertical line.
- Repeat until the top is covered.
Don’t have time to make it now? Pin it for later!
Cupcake Decorating Tips
- All ingredients should be at room temperature. (cupcakes and buttercream)
- Make sure you don’t overfill your cupcakes. You want a level cupcake. If they dome, slice the top flat and immediately eat the cake so you have enough energy to decorate them. Spread a thin layer of frosting over the top to seal in the crumbs.
- Cupcakes can be made ahead of time and frozen prior to decorating. I do this if I’m making them for a big event. Just make sure they return to room temp prior to decorating.
- Buttercream can be made up to two weeks ahead of time and stored in the refrigerator. I don’t color it until I’m getting ready to use it. Again, make sure that it returns to room temperature.
- Frosted cupcakes can be made the day before you need them. Just store them at room temperature. They don’t need refrigerated if you don’t use eggs in your frosting. A little milk will stabilize and be fine to leave out.
I hope to bring you more tutorials on other techniques. Most of them are quite easy once you’ve seen how they’re done. If there are some that you’ve seen and would like to see them here, I’d love it if you would let me know.
- Lemon Cupcakes with Blackberry Filling
- Mini Mouse Cupcakes
- Easter Basket Kit Kat Cake
- Black Russian Cake with Kahlua Filling
- Easter Bunny Butt Cupcakes
- How to Dye Easter Eggs without a Kit
- How to Make a Basket Weave Cake
- 4th of July Cupcakes
If you like this recipe, we would appreciate your comment and a 5-star ⭐️⭐️⭐️⭐️⭐️ review!
Buttercream for Basket Weave Cupcakes
Ingredients
- 1 cup solid vegetable shortening
- 1 tsp clear vanilla extract
- 1 lb powdered sugar sifted
- 1 tbsp Meringue Powder
- 7 tsp milk or water
Instructions
- Combine shortening, water, and extract into the bowl of an electric stand mixer fitted with the paddle attachment. Blend on medium-high until blended and becomes shiny (up to 5 minutes).
- Add powdered sugar and *meringue powder. Blend until combined.
- Add additional water or milk to thin the buttercream if necessary
Notes
Nutritional Disclaimer
This recipe was calculated using the exact brands and measurements I used to make this recipe. If you are following a strict diet please note changing anything will cause the nutritional info to change. My calculations are intended as a guide only.
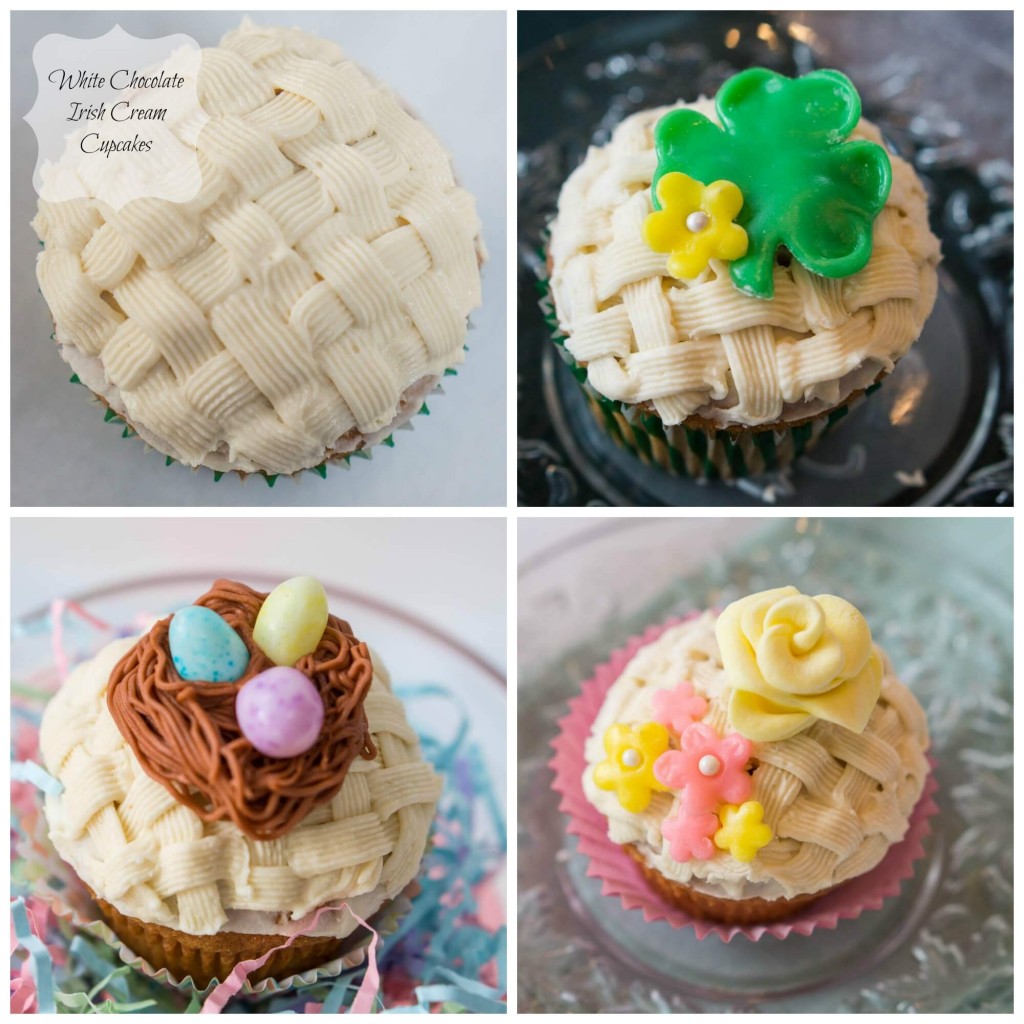
When I posted a White Chocolate Irish Cream cupcake that I made for my Mother-In-Law’s birthday. I posted the pictures of what they looked like and promised a tutorial on how I did it.
I’ve always enjoyed decorating cakes and cupcakes, and when I was very young I wanted to give it a try. My success was pretty hilarious. I covered the entire cake with royal frosting stars. What I didn’t realize is that when royal frosting dries it turns hard. If you buy those hard cake decorations that say things like Happy Birthday, that is royal frosting. It took a while to live that one down. It also took a while to break into that cake!
Whether you’re making Easter cupcakes or celebrating life, it’s all about having fun and enjoying yourself. Don’t forget to enjoy yourself!


The grandkids love helping to bake and decorate these cupcakes
This is such a cute Idea for spring cupcakes
Thank you, Misbah!
Thank you!
Love this…. so cute
Thank you, Christine! Are you a cake decorator?