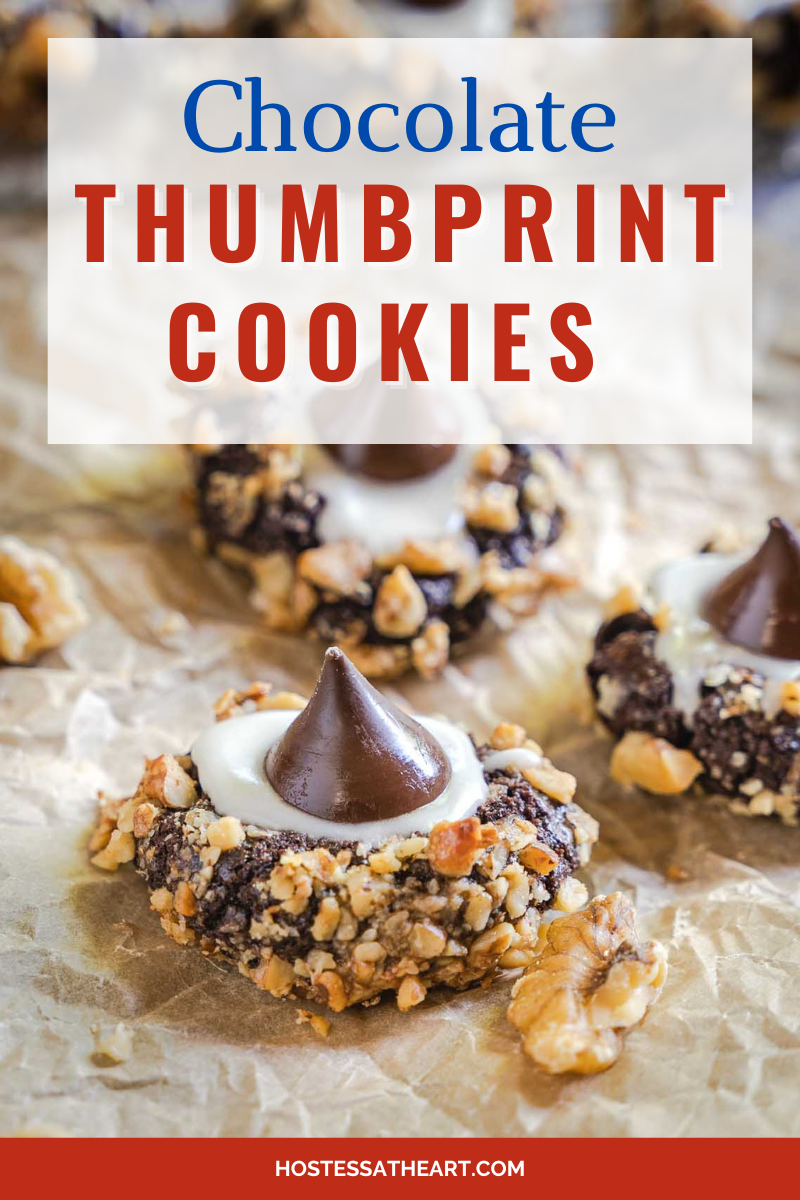
Chocolate Thumbprint Cookies Recipe (with Kisses)
This post may contain affiliate links. Please read our Disclosure Policy.
If you like a classic thumbprint cookie, you’re going to go nuts over our Dark Chocolate Thumbprint Cookie recipe. A rich and chewy cookie rolled in nuts and topped with a Hershey’s Kiss, this cookie has a special filling that takes it over the top and makes it a cookie to remember.

My 97-year-old mother-in-law and I have always shared our love for cooking including gifting each other subscriptions to Taste Of Home cookbooks. She gave me this recipe years ago but I believe that’s where she got it. It’s such a great recipe!
Why You’ll Love This Chocolate Kiss Thumbprint Cookie Recipe
- Make-Ahead Convenience. The cookie dough can be made up to 3 days in advance and refrigerated.
- Deliciously Impressive. We love the traditional thumbprint cookie with Hershey’s Kisses, but these dark chocolate thumbprint cookies are a chocolate lovers’ dream. They make the perfect Christmas cookie and are always the first to disappear. Look ahead to Valentine’s Day and make these chocolate cookies for that special someone.
Chocolate Kiss Thumbprint Cookie Recipe Ingredients

With just a handful of ingredients that you more than likely already have in your pantry, you could be munching on these delicious cookies in no time.
- Butter. We used room temperature unsalted butter for this recipe, but salted will work too.
- Sugar. White sugar.
- Egg. Large eggs are what we use for consistency. Separate the egg. You will use the yolk in the dough and the egg white for rolling the cookie.
- Unsweetened Cocoa Powder. We sift our cocoa powder with the dry ingredients which makes it easier to blend.
- Heavy Cream. Milk or half and half will also work.
- Vanilla Extract. Pure vanilla is what we prefer. It’s so aromatic and adds a delicious flavor. You can use what you prefer.
- All-Purpose Flour. Use a gluten-free one-for-one substitute if needed.
- Salt. This is one cookie you will definitely want to intensify the flavor! So much yumminess.
- Chopped Walnuts. Other kinds of nuts will also work.
Filling Ingredients for the Chocolate Kiss Thumbprint Cookie
- Powdered Sugar. Confectioner’s sugar.
- Butter. Softened.
- Cream. Milk or half and half also work
- Vanilla Extract. Pure vanilla is always best.
- Dark Chocolate Kisses. Use milk chocolate if you have a strong preference. Otherwise, I encourage you to try the dark chocolate version.
Please note, that the printable recipe card has the full list of ingredients, quantities, complete instructions, and nutritional information. The following is a quick overview of the recipe.
How To Make Chocolate Thumbprint Cookies
We use an electric stand mixer fitted with a paddle attachment whenever we cream butter and sugar together until it’s light and fluffy.
Cream the liquids.
Beat the butter and sugar together on medium-high speed until light and fluffy (3 to 5 minutes). Add the egg yolk, cream, and vanilla mix until blended.
Mix the dry ingredients.
In a separate medium bowl, whisk the flour, salt, and sifted cocoa together.
Combine wet and dry ingredients.
 Add dry mix to sugar butter mix.
-
Thick chocolate thumbprint cookie batter
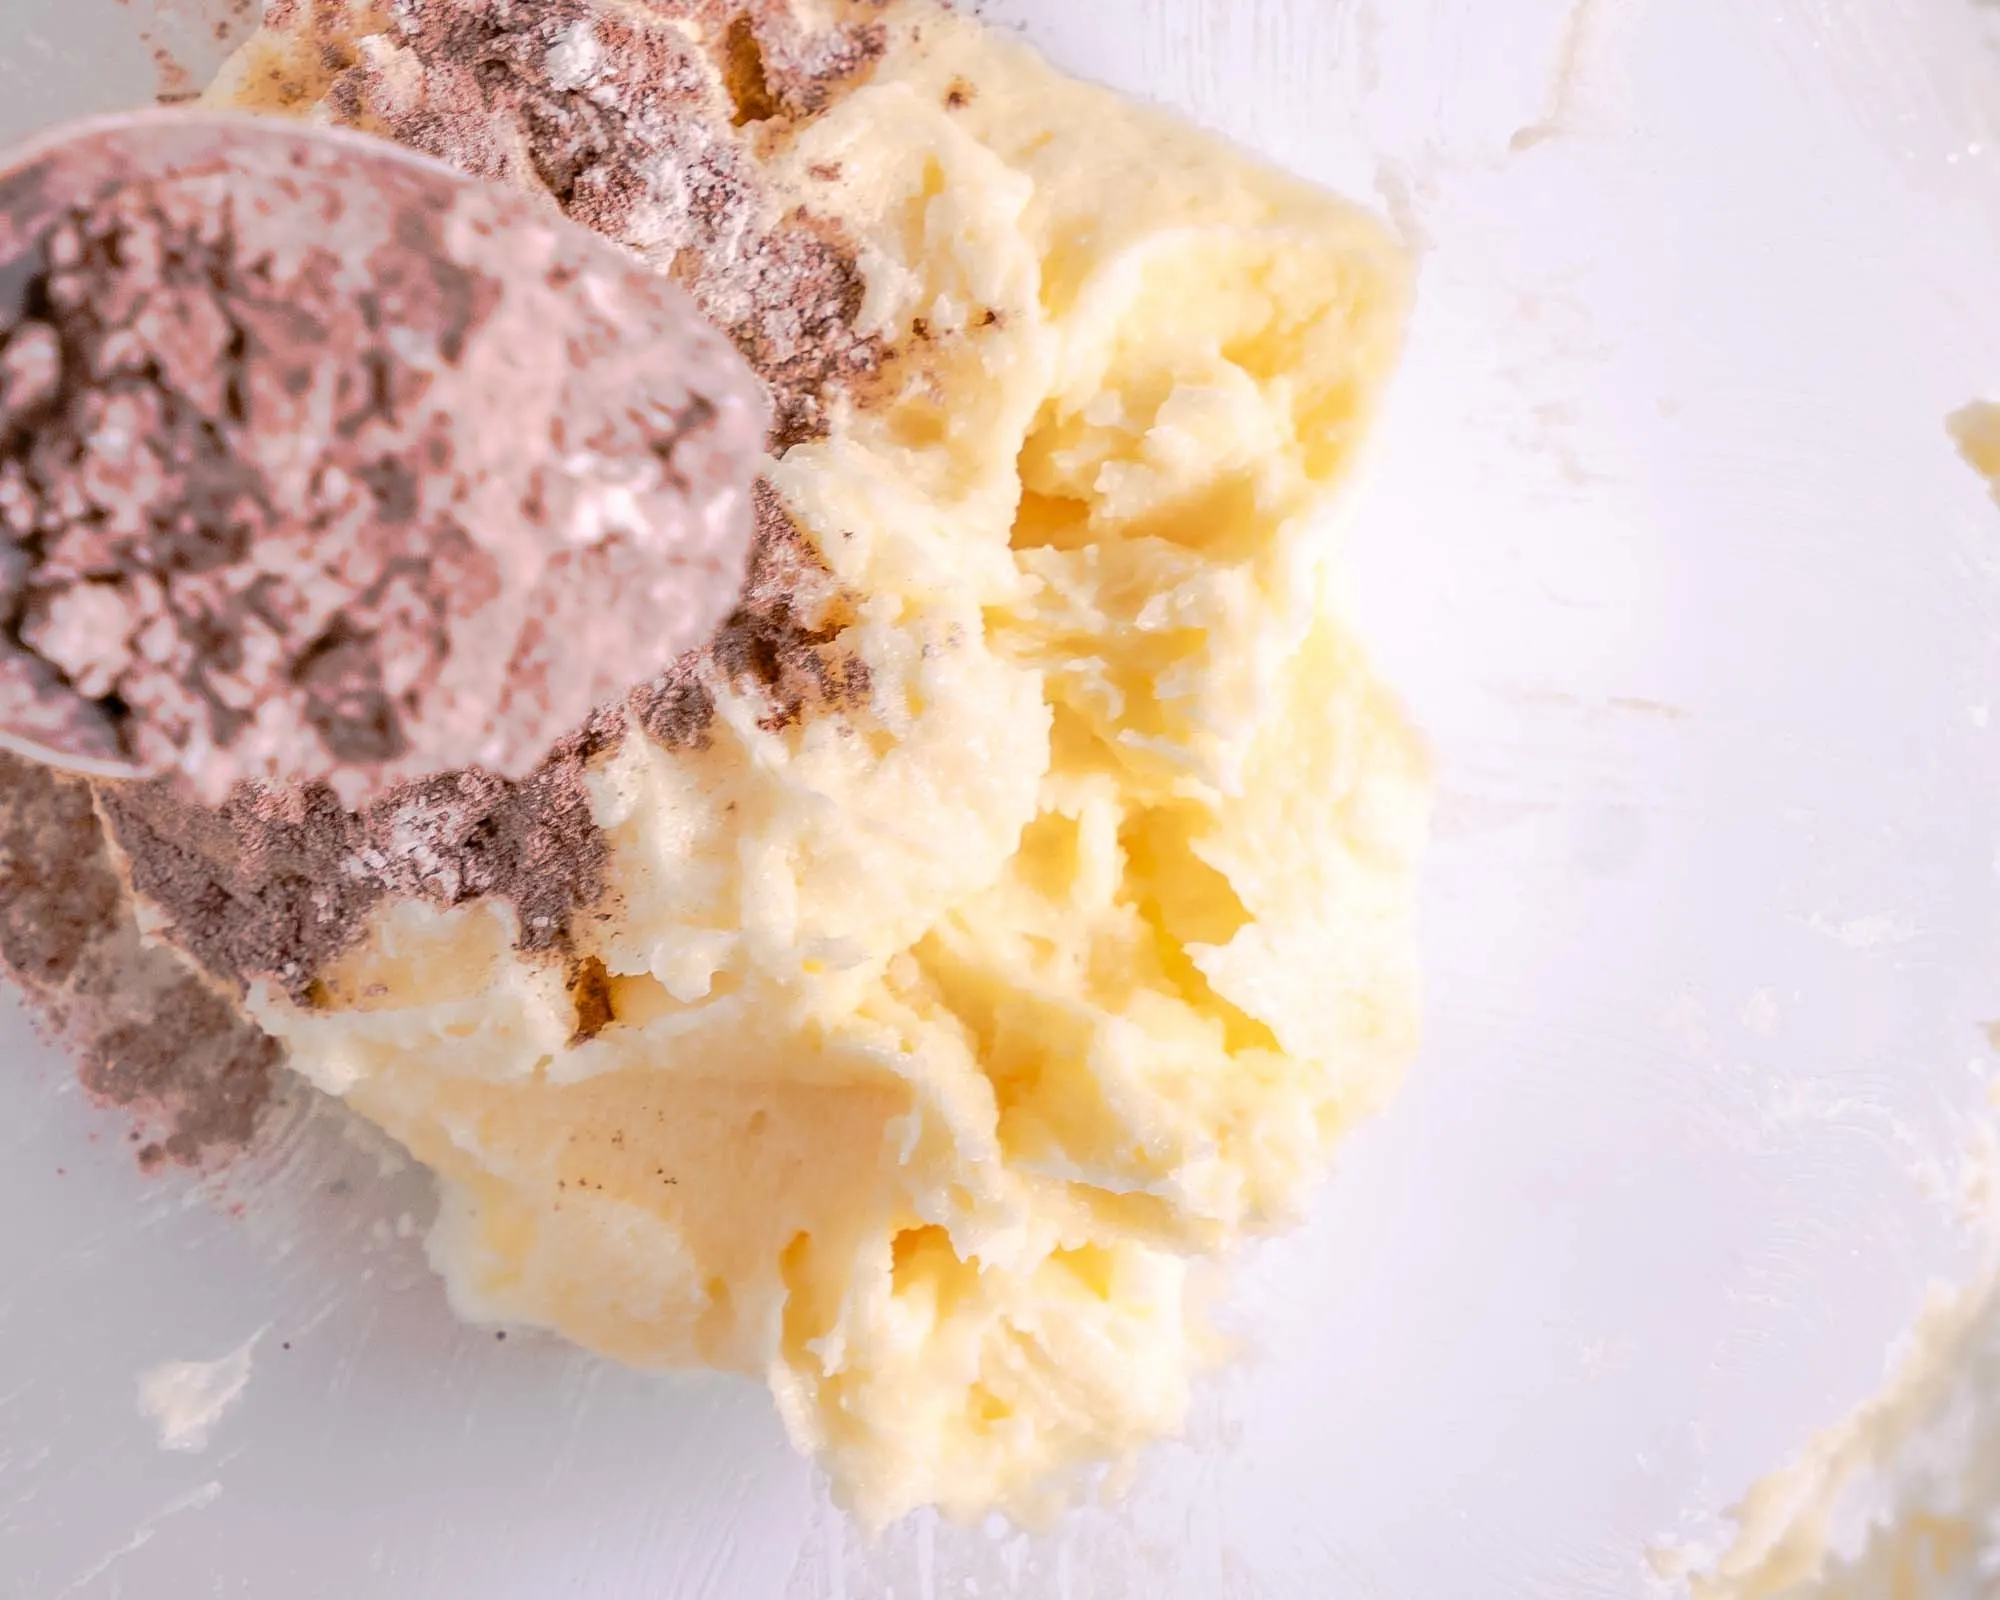
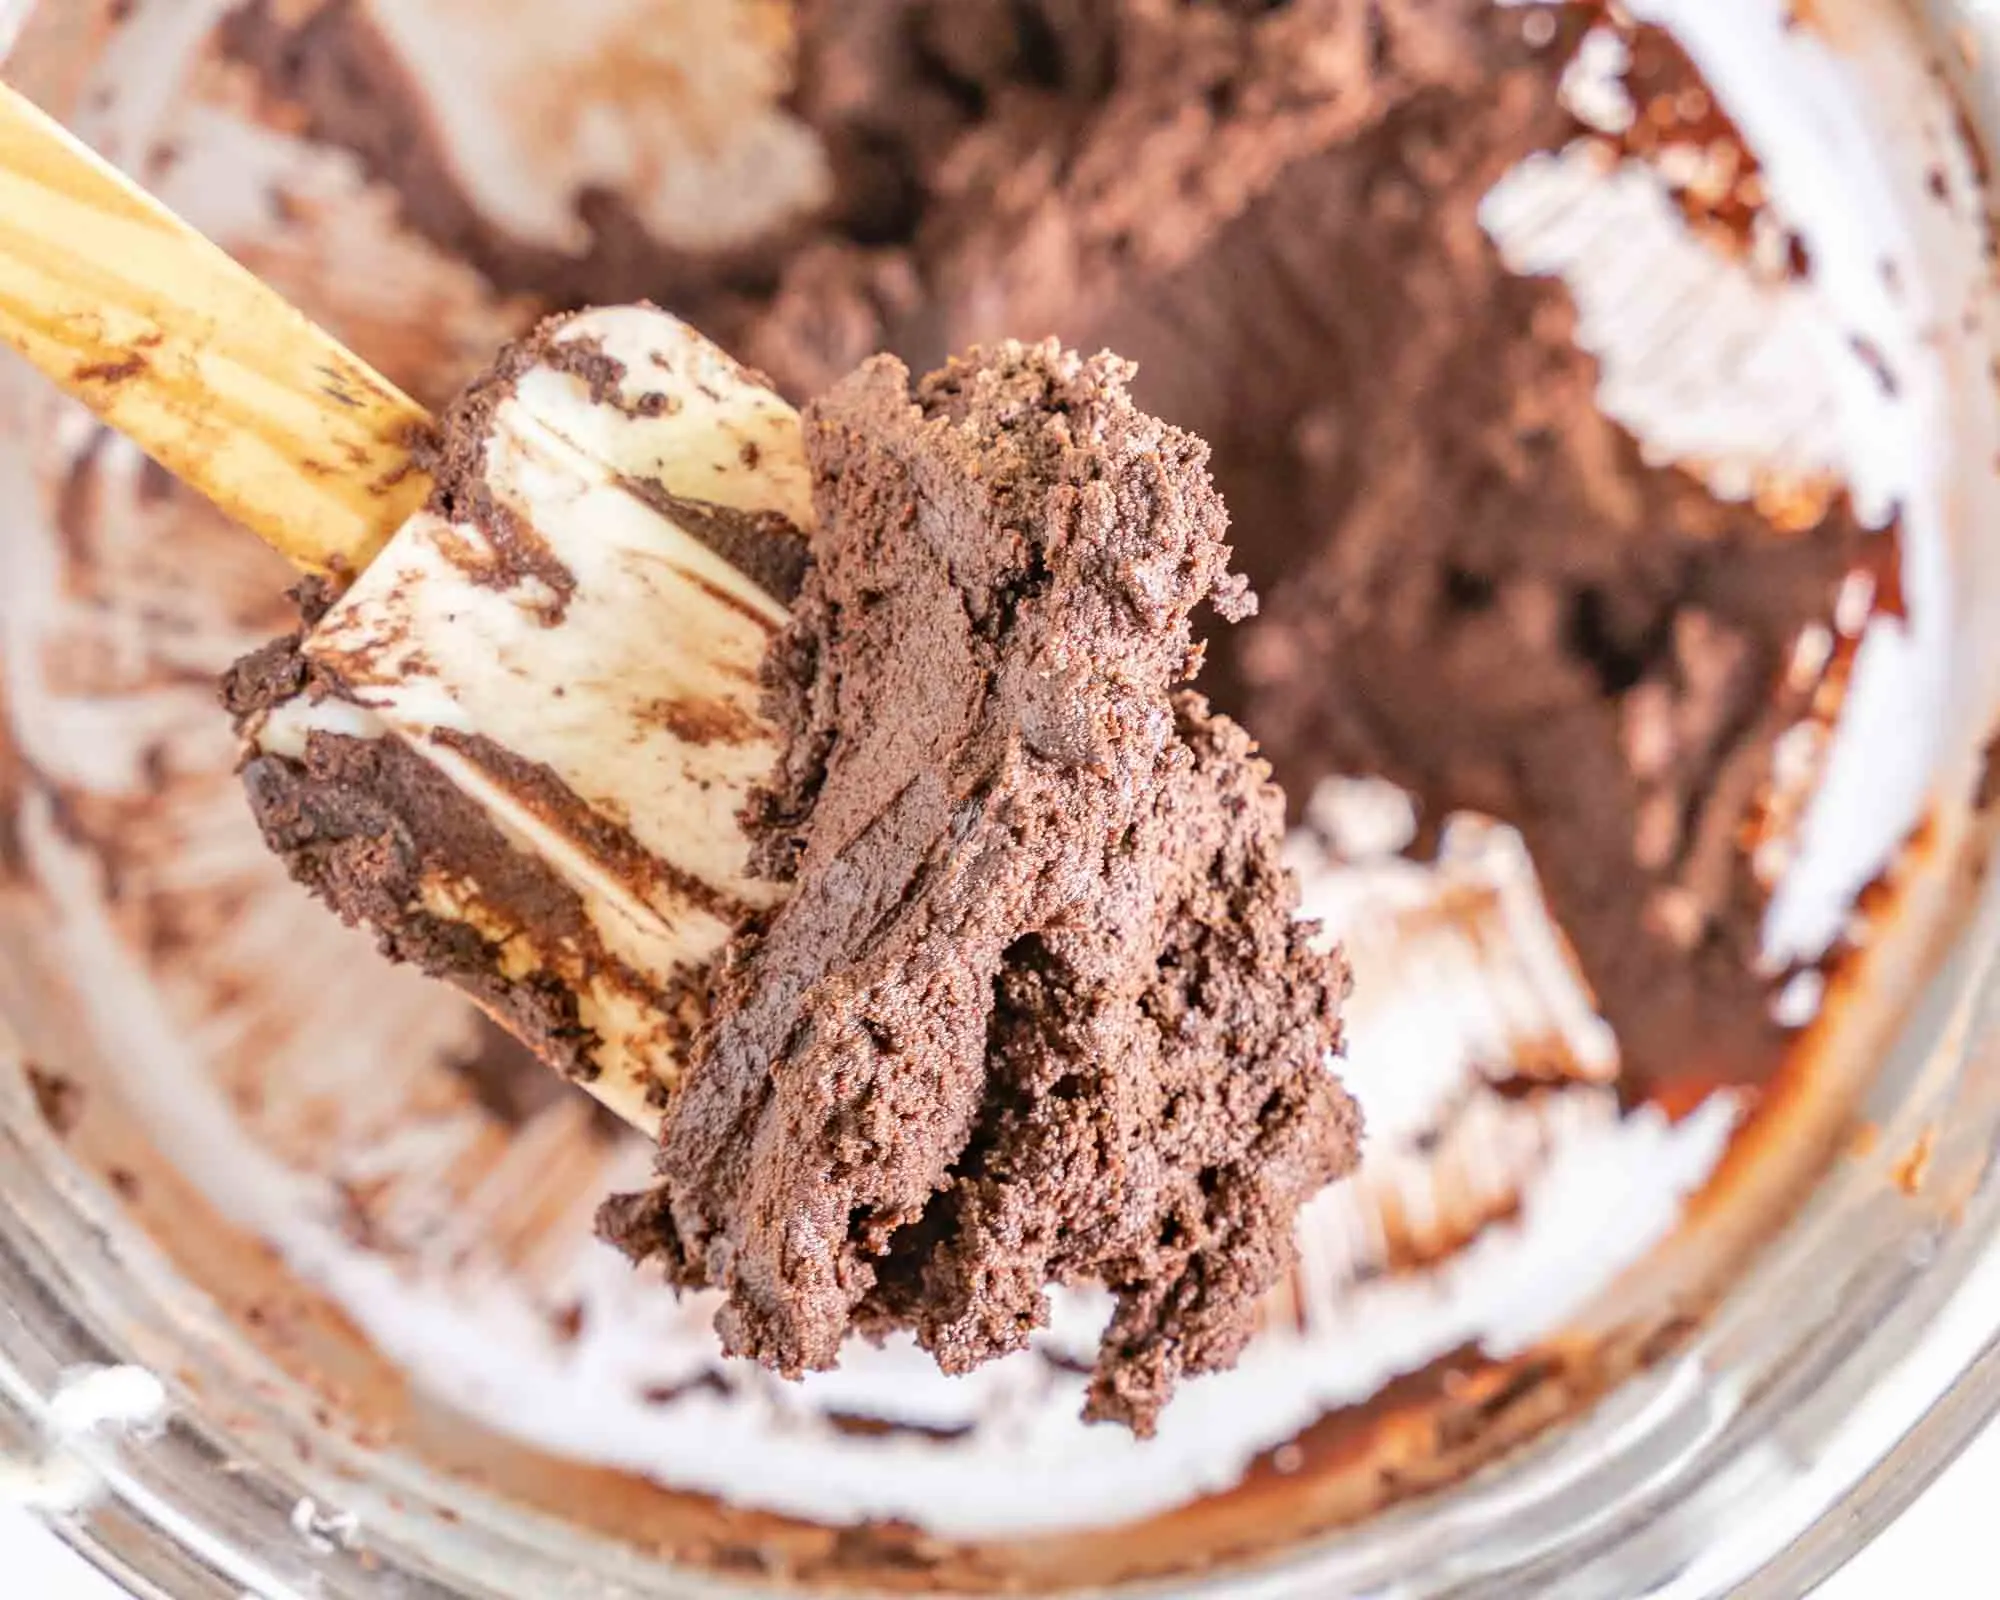
With the mixer on low, spoon the flour mixture in with the butter mixture until combined. The batter will be thick. Cover and chill for 1 hour.
Get ready for baking.
Preheat the oven to 350°F and grease baking sheets or line them with parchment paper.
Whisk the egg white.
Whip the egg white with a whisk or fork in a small bowl until frothy.
Roll the cookie and bake.
-
Cookie dough rolled in egg white
-
Rolled Chocolate Cookie Batter in Crushed Nuts
-
Indented thumbprint cookies
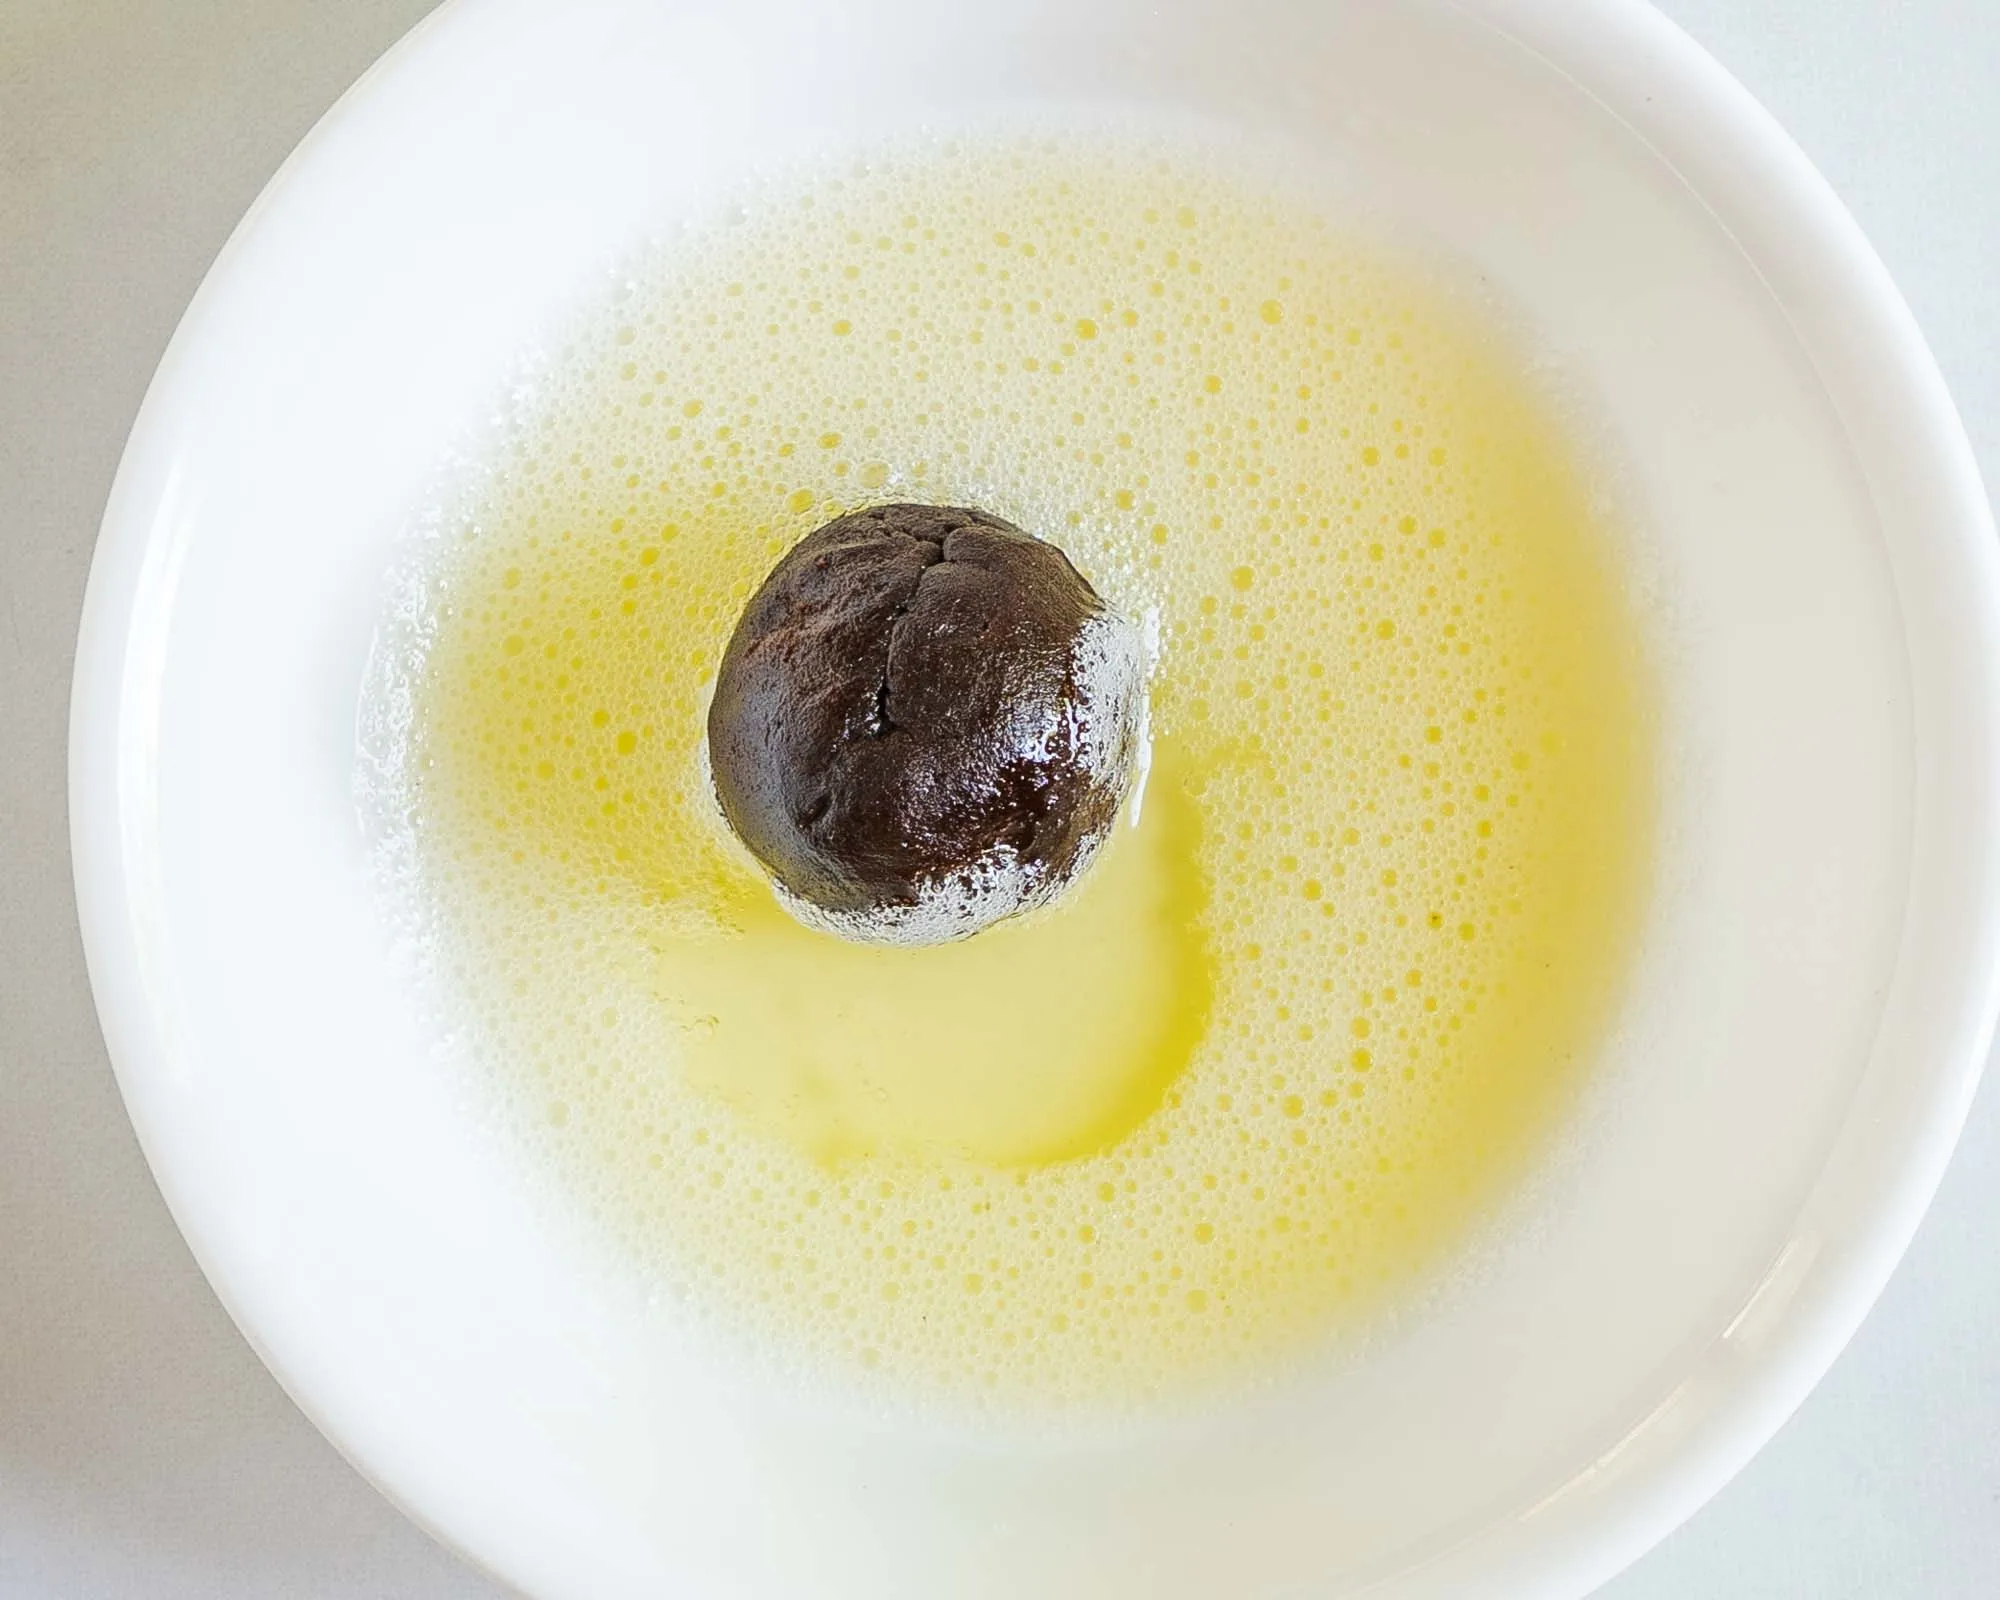
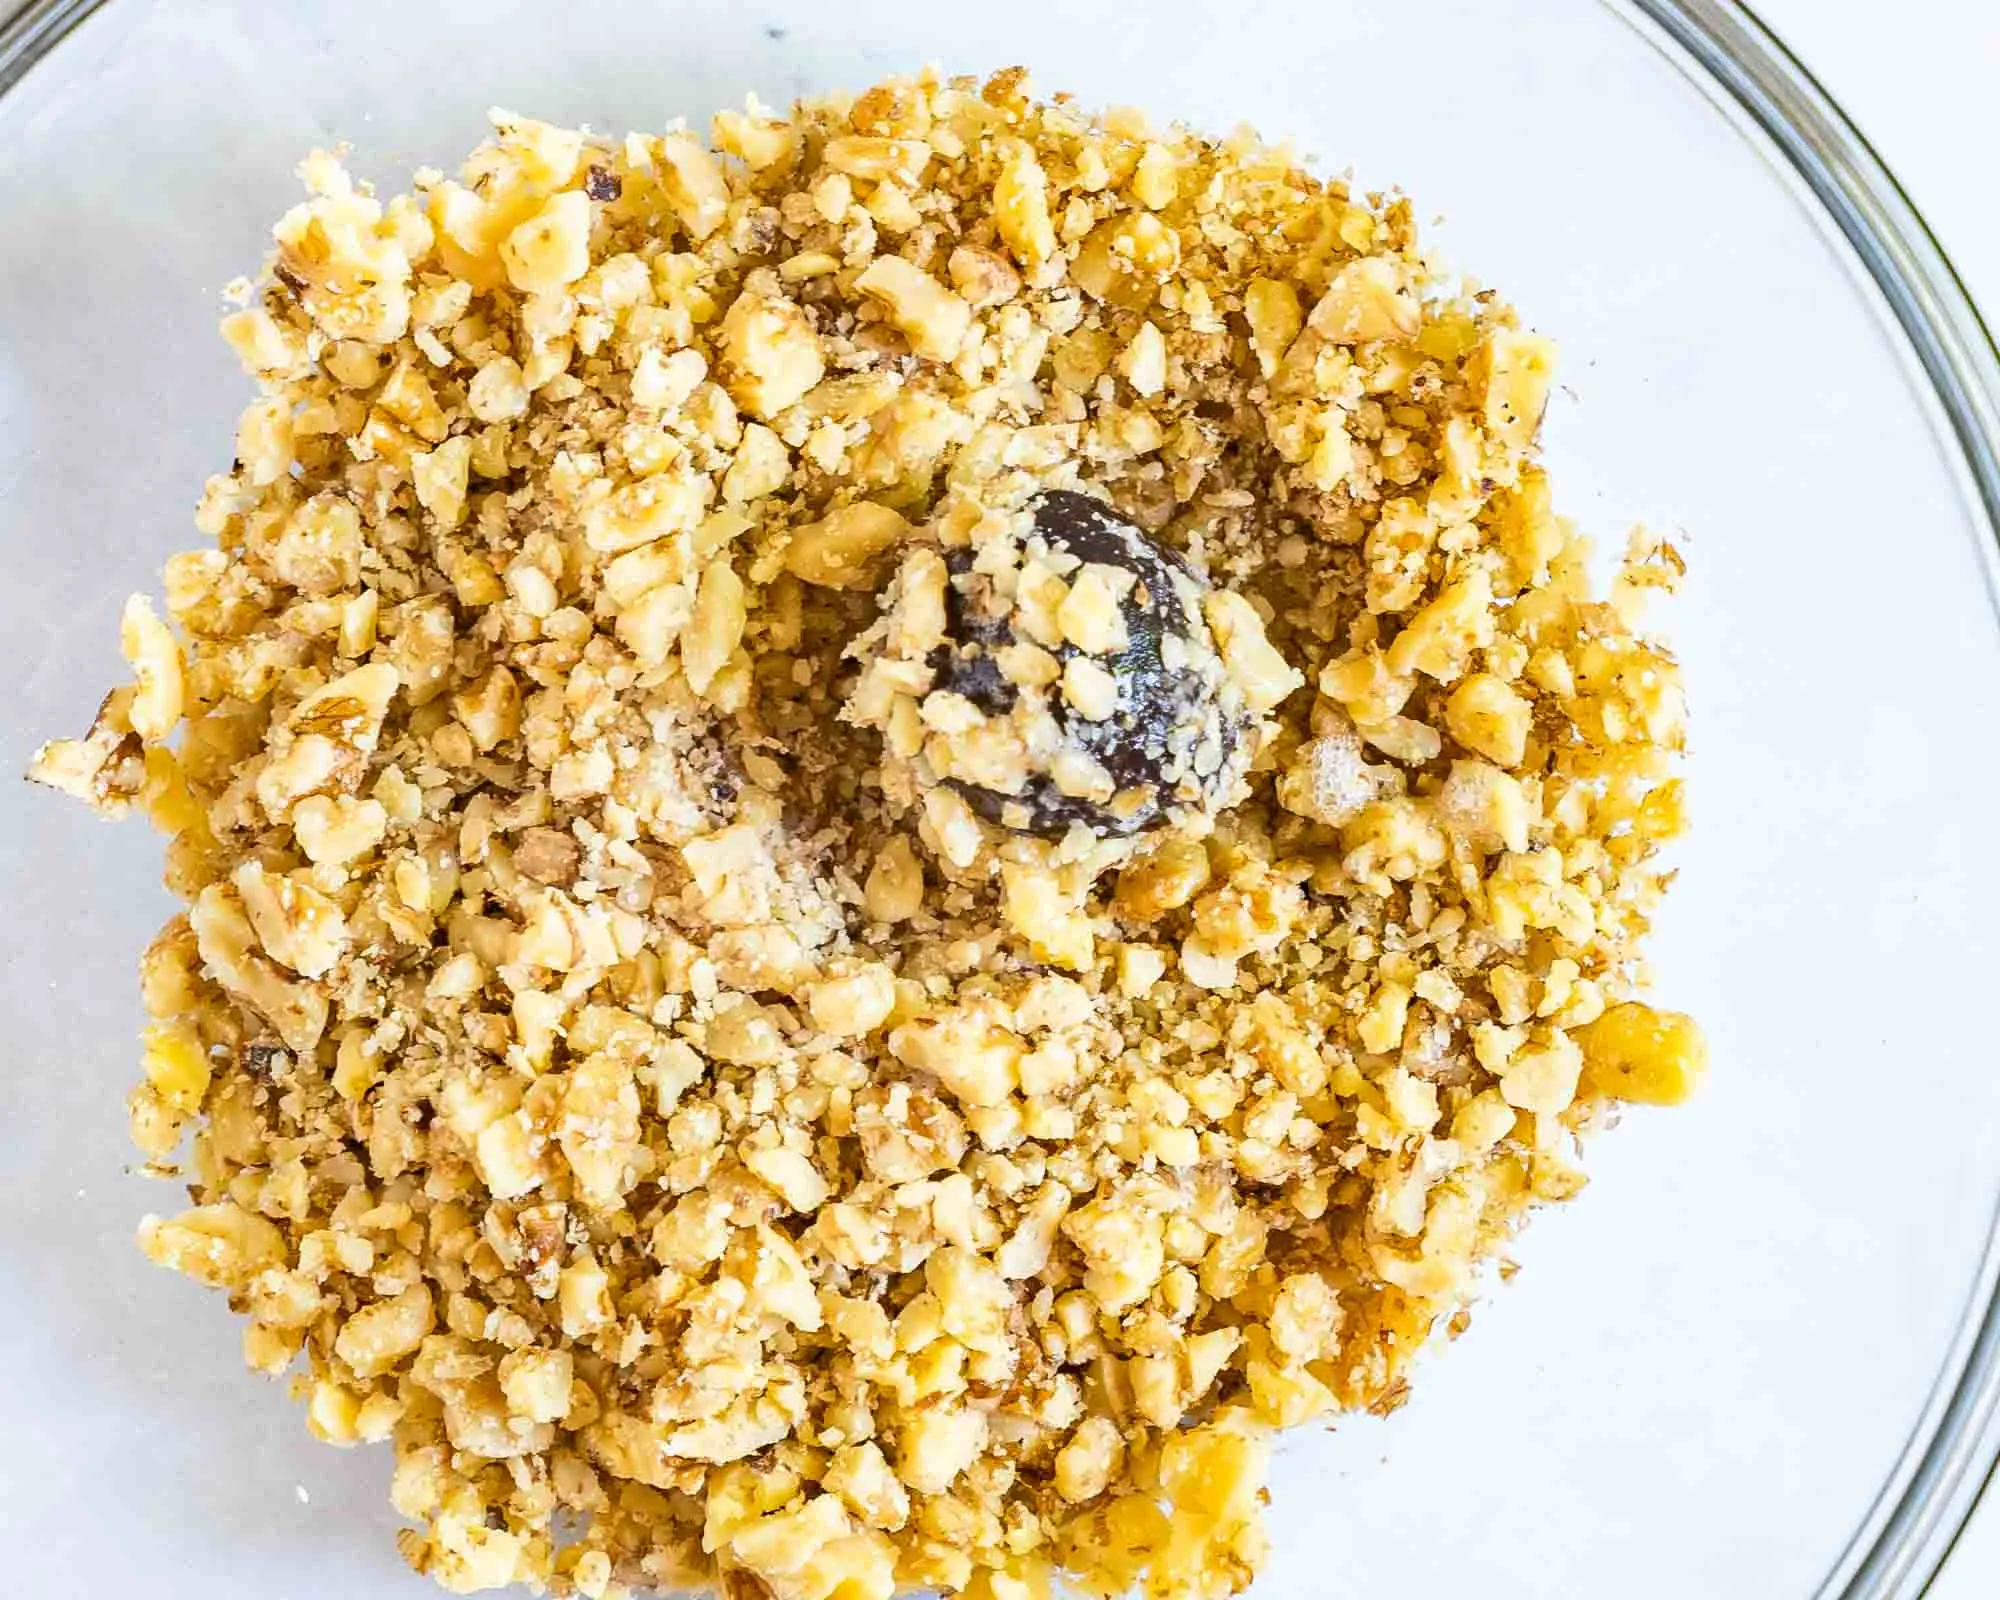
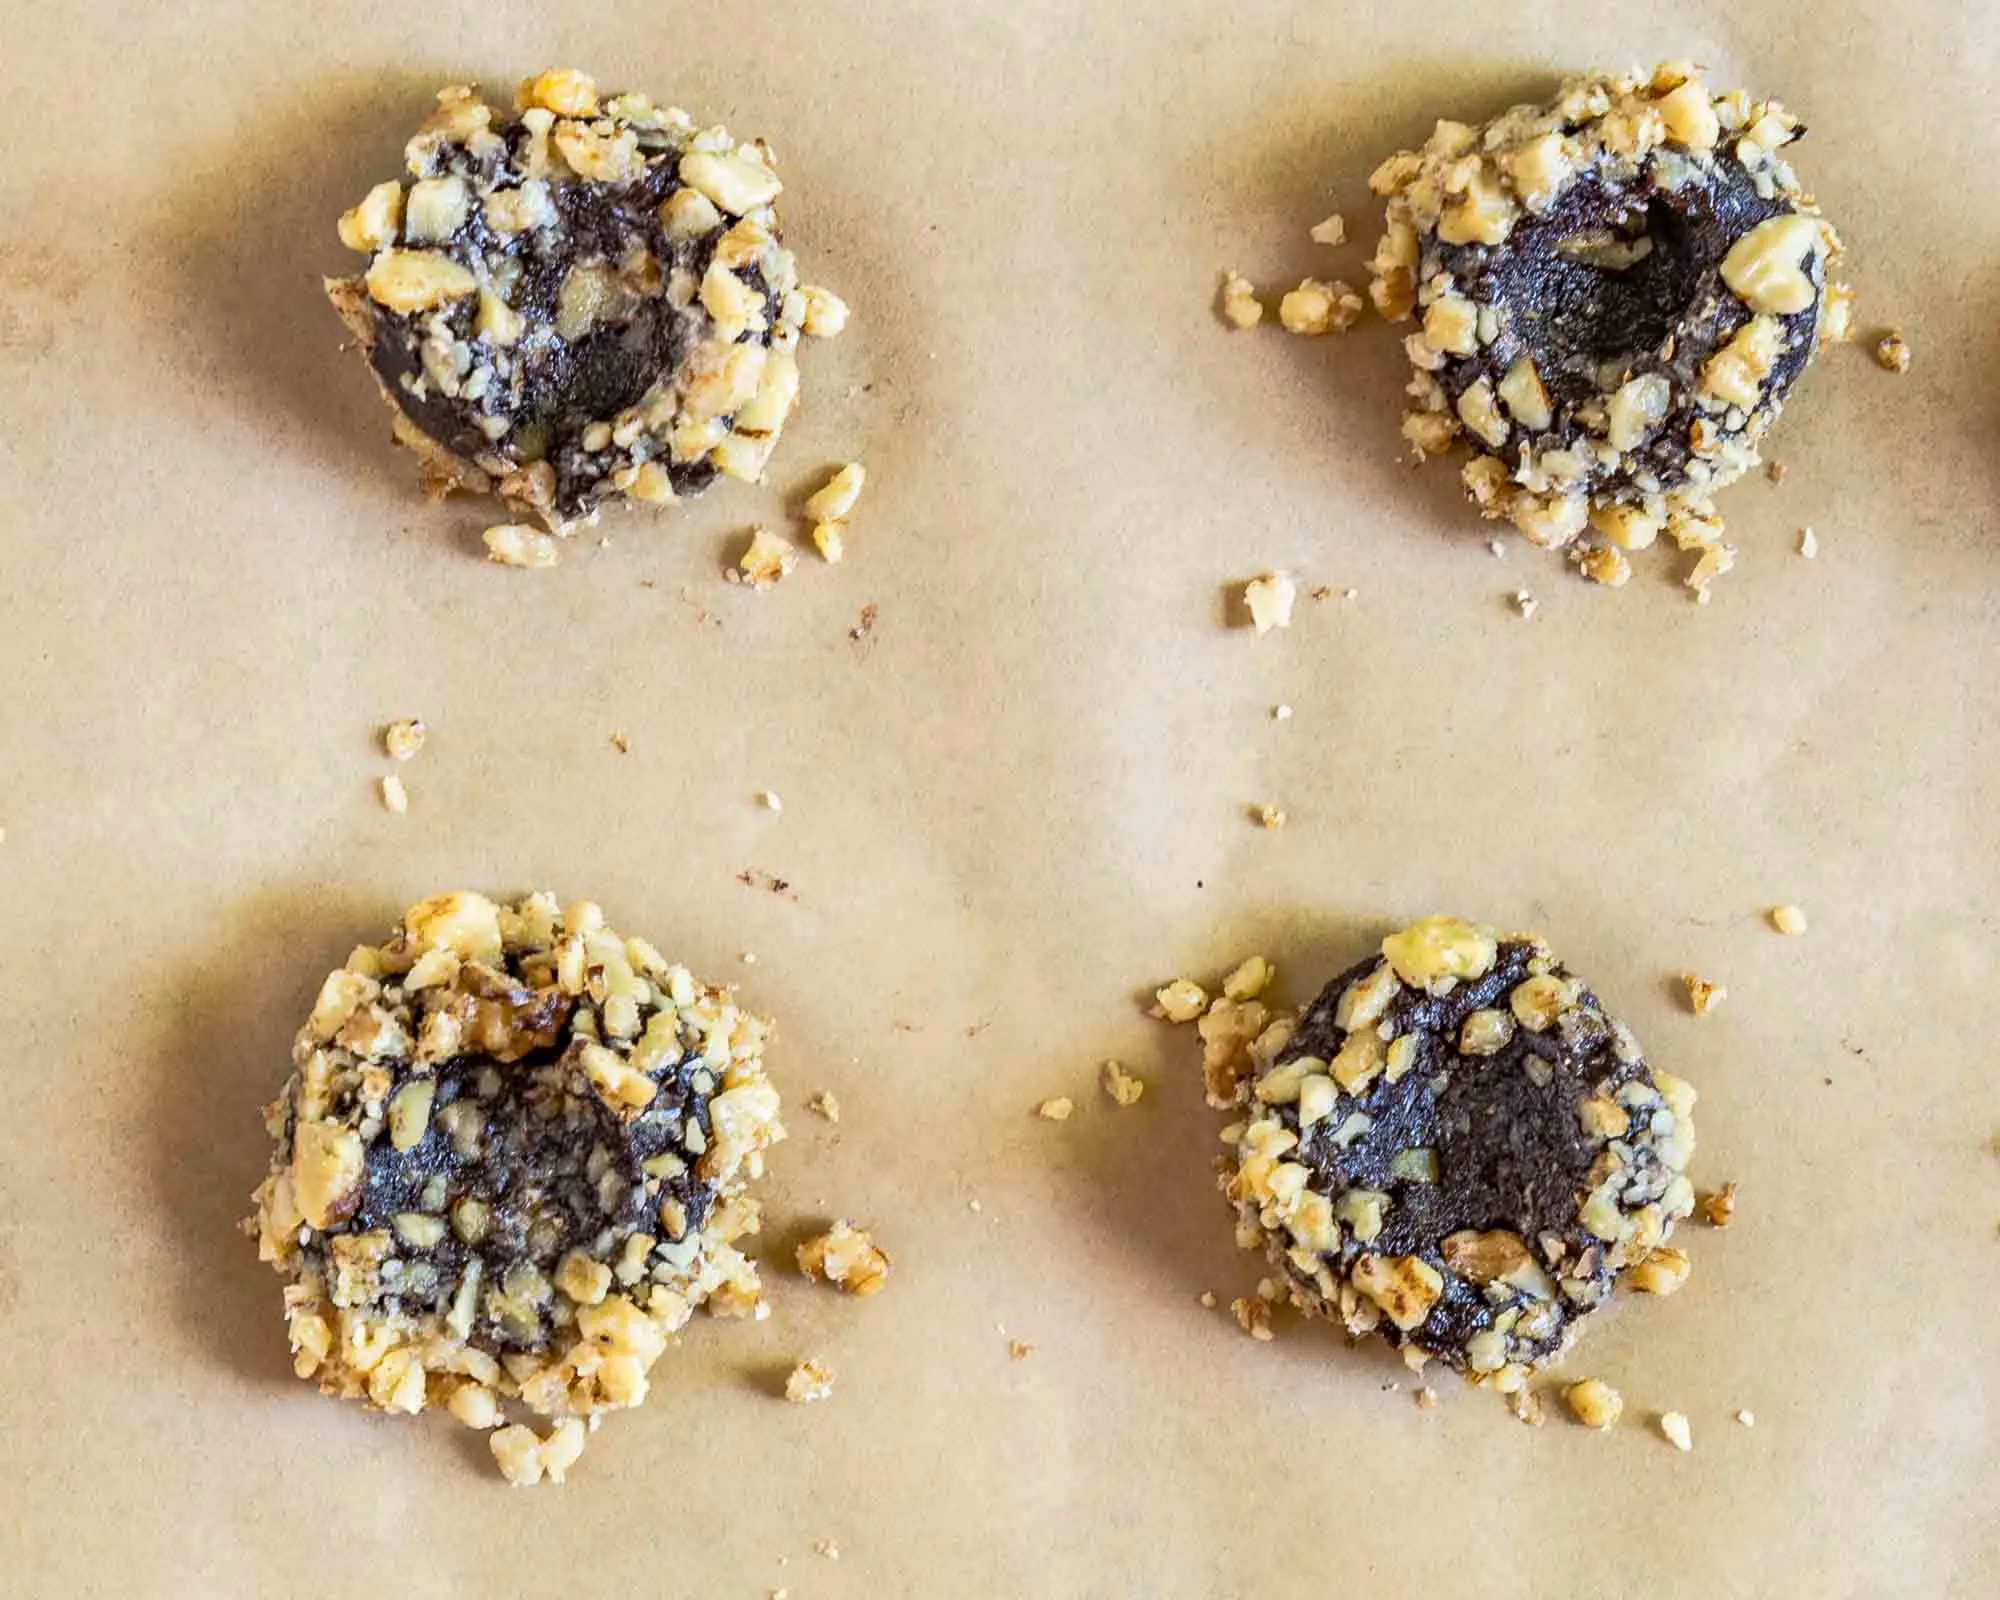
Scoop the dough using a small cookie scoop and roll the dough into balls. Roll the cookie dough balls in egg whites followed by the crushed nuts. Place the rolled cookies on a cookie sheet and indent the center of each cookie with the back of a measuring spoon or another round object. Be careful not to go through the bottom of the cookie and bake. Cool completely on a wire rack before filling.
Prepare the filling while the chocolate thumbprint cookies are baking.
Mix the first four ingredients.
Add the filling after the cookies are finished baking.
Remove the cookies from the oven. Add 1/4 teaspoon of the filling into the indentation of each cookie and carefully top it with a candy kiss. Remove the cookies to a cooling rack and cool completely.


Popular Substitutions & Additions
- Change out the type of nuts
- Use coconut instead of nuts.
- Use a peanut butter kiss or other variety.
- Skip the nuts and roll them in sprinkles for a Halloween or Christmas-inspired cookie.
How To Reheat & Store Chocolate Thumbprint Cookies
Best Way To Store Thumbprint Cookies With Chocolate Kisses
These cookies are best stored at room temperature in a single layer in an air-tight container for up to 5 days.

How Long Will Chocolate Thumbprint Cookies Last In the Fridge?
If you refrigerate these cookies they may get hard and inedible because of the filling and the chocolate. I recommend storing them at room temperature.
Can I Freeze Double Chocolate Thumbprint Cookies
Yes. Freeze your cookies on a sheet pan in a single layer. Once frozen, you can combine them all into a single airtight container, They will keep for up to 3 months.
How To Reheat This Chocolate Kiss Thumbprint Cookie Recipe
Thaw the cookies at room temperature or reheat the cookie in the microwave. Ten seconds is usually enough to refresh a slightly stale cookie. For a frozen cookie, microwave in ten second increments until thawed to your liking.

Double Chocolate Thumbprint Cookies FAQs
Yes. This recipe requires a minimum of 1 hour, overnight is fine. Chocolate Thumbprint cookies are fluffier and will hold their shape if chilled. Don’t bring them to room temperature before baking.
Allowing the cookie to form a crust before indenting or pressing too hard can cause cracking. I recommend that only a few cookies be rolled at a time before indenting so they don’t form a crust. You can always do damage control by pushing the cracks together before baking. Also, the crushed nuts will cover up most of the cracks.
Tips to Make the Perfect Chocolate Thumbprint Cookies
- Don’t press too hard when indenting the cookies, the bottom will become too shallow to hold the filling and is more apt to crack.
- Make sure the dough is chilled which will keep these cookies from spreading too much.
- If the cookies lose their indentations upon baking, you can lightly press the center of them again immediately after you take them out of the oven. I use the flat end of a wooden spoon or kitchen utensil or even a 1⁄4 measuring spoon.
- Let the cookies cool a little before adding the filling. That will also help keep the chocolate kiss from melting too much.

If you enjoyed this decadent cookie recipe, check these out.
I hope you enjoyed this delicious recipe as much as we do. Drop me a comment below, and don’t forget to give it a star rating. ⭐⭐⭐⭐⭐. Your comments and ratings help others decide if this recipe is for them too.

Chocolate Thumbprint Cookie Recipe
Ingredients
Cookie Dough Ingredients
- ½ cup butter softened, salted or unsalted
- ⅔ cup sugar
- 1 egg – separated
- 2 tbsp cream – milk and half and half also work
- 1 tsp vanilla extract
- ⅓ cup cocoa
- 1 cup all-purpose flour
- ¼ tsp salt
- 1¼ cup chopped walnuts
Filling Ingredients
- ½ cup powdered sugar
- 1 tbsp butter softened
- 2 tbsp cream – milk and half and half also work
- ½ tsp vanilla extract
- 26 dark chocolate kisses – unwrapped (can also use milk chocolate kisses)
Instructions
- In the bowl of an electric mixer, beat butter, sugar, egg yolk, cream, and vanilla together until light and fluffy, approximately 3 minutes.
- In a separate bowl sift the flour, salt, and cocoa together.
- With the mixer on low, spoon the flour mixture in with the butter mixture until combined. The batter will be thick. Cover and chill for 1 hour.
- Preheat the oven to 350 °F and grease baking sheets or line them with parchment paper.
- Whip the egg white with a whisk or fork until frothy.
- Using a 1-tablespoon-sized scoop, scoop dough and roll it into balls. Roll each ball in the egg white and then roll it in the chopped nuts. Place the cookie ball on a baking sheet and press an indentation with your thumb or the end of a round utensil into the center of the cookie. Repeat until you have 12 cookies on a baking sheet. Bake for 10 to 12 minutes or until the center is set.
- While the cookies are baking, whisk the 1st 4 ingredients under "Filling" together.
- Remove the cookies from the oven and if necessary, re-indent the cookie with the back of a round utensil such as a measuring spoon or wooden spoon. Be careful not to go through the cookie.
- Add 1/4 teaspoon of the filling into the indentation of each cookie and carefully top it with a candy kiss. Remove the cookies to a cooling rack and cool completely.
Nutrition
Nutritional Disclaimer
This recipe was calculated using the exact brands and measurements I used to make this recipe. If you are following a strict diet please note changing anything will cause the nutritional info to change. My calculations are intended as a guide only.
This post has been updated with minor clarifications for our readers. No changes have been made to the recipe.
Did you enjoy this recipe? Don’t forget to pin it for later and follow me on Pinterest for more delicious recipes like this one!
- Caramel Tassies by Jolene’s Recipe Journal
- Chocolate Caramel Peanut Butter Thumbprint Cookies by Red Cottage Chronicles
- Chocolate Covered Cherry Cookies by Karen’s Kitchen Stories
- Chocolate Thumbprints by Hostess At Heart
- Christmas Shortbread Cookie Bars by Kathryn’s Kitchen Blog
- Date Sugar Walnut Cookies by Magical Ingredients
- Earl Grey Snickerdoodles by The Spiffy Cookie
- Easy Cake Mix Biscotti by Hezzi-D’s Books and Cooks
- Gingerbread Crinkle Cookies by Best Cookie Recipes
- Gingerbread Penuche Sandwich Cookies by That Recipe
- Ginger Molasses Cookies with Caramelized Ginger by Family Around the Table
- Hot Chocolate Cookies by Blogghetti
- Iced Gingerbread Bars by Art of Natural Living
- Maple Doodles by A Day in the Life on the Farm
- Mini M&M Cookies by Palatable Pastime
- Oatmeal Shortbread Cookies by Shockingly Delicious
- Orange Ginger Refrigerator Cookies by An Affair from the Heart
- Peppermint Meringues by Cheese Curd in Paradise
- Peppermint Mocha Cookies by Sweet Beginnings
- Reese’s Macaron by A Kitchen Hoor’s Adventures
- Sugar Plum Pinwheel Cookies by Faith, Hope, Love, and Luck Survive Despite a Whiskered Accomplice
- Texas Sheet Cake Cookies by Jen Around the World
Want to save this recipe?
I'd like to receive more tips and recipes from Hostess At Heart!


oooh these look SO YUM! I love the way how you rolled them with nuts. These are a winner here.
Thank you, Radha!
Mmmmm, perfectly baked and spot on flavors and textures. Love these!
Thank you, Rebecca!
How much cocoa do you add? I don’t see it in the recipe.
I must have written this one in my sleep. I used 1/3 cup of cocoa. Heading over to update the recipe. Thank you for bringing this to my attention.
Thumbprint cookies are always tasty but you’ve made them so pretty too!
I love these chocolate thumbprint cookies with the kiss in the middle! These are the perfect holiday cookie! They are gorgeous too 🙂
Thank you!
This is my favorite cookie of this week’s event! It has everything I love in a cookie.
Thank you, Lisa! I’ve just loved seeing all of those delicious cookies!
This is the kind of cookie I want to see on my cookie plate this holiday season! Absolutely heavenly!
Thank you, Colleen!
The dark chocolate kisses are the best! These will disappear quickly here!
I have a stash in my pantry lol! Thanks, Jolene.
These sound delicious! I love the idea of the kiss in the thumbprint.
Thank you, Hezzi! The combination is yummy.
I love all of the layers of flavors in these cookies! The Kiss is the perfect addition!
Thank you!
I’m sure these would be the first to be eaten on a cookie tray!
We really enjoy them. Thank you, Karen!
I love the addition of nuts to this classic cookie recipe.
It’s a fun twist. Thank you Wendy.