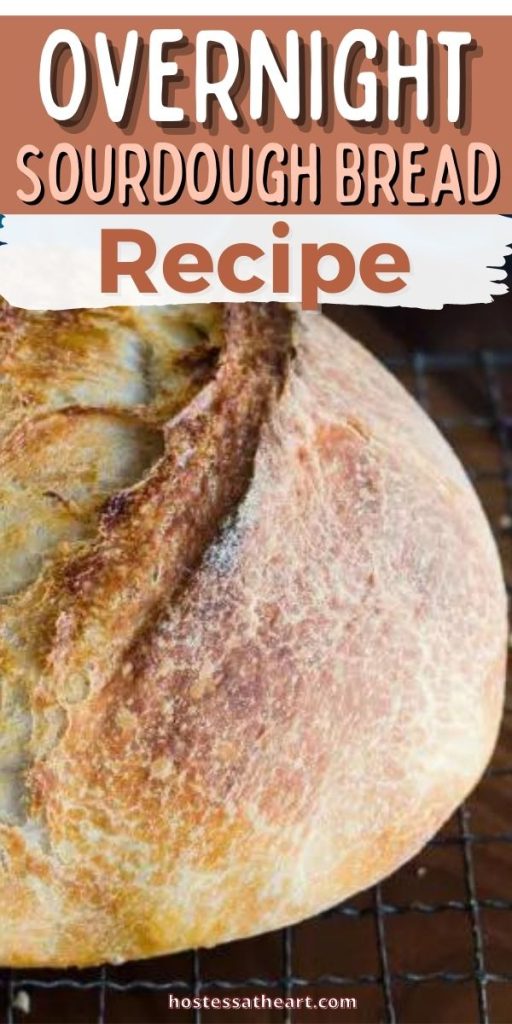
Overnight Sourdough Bread Recipe – Easy Enough For Beginners!
This post may contain affiliate links. Please read our Disclosure Policy.
Learn how to make delicious overnight sourdough bread at home with a step-by-step video that’s perfect for the beginner and that your family will love.
Overnight Sourdough Bread recipe is the perfect recipe to learn baking with a sourdough bread starter. Our step-by-step instructions and video will have you creating an amazing loaf of bread at home in no time.
This Sourdough Bread recipe couldn’t be easier to make and it’s a lot quicker compared to other sourdough bread recipes from starters.
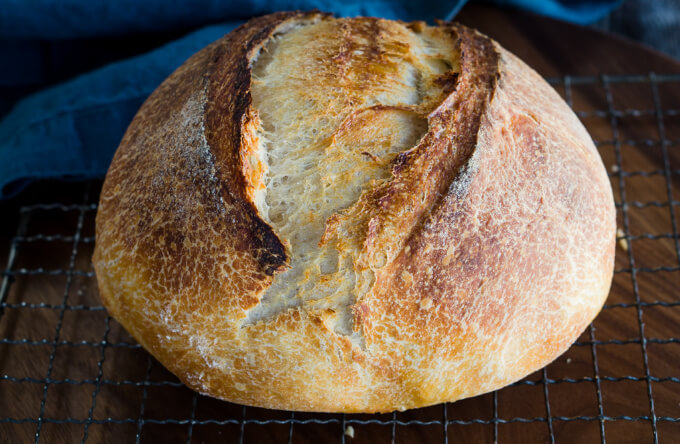
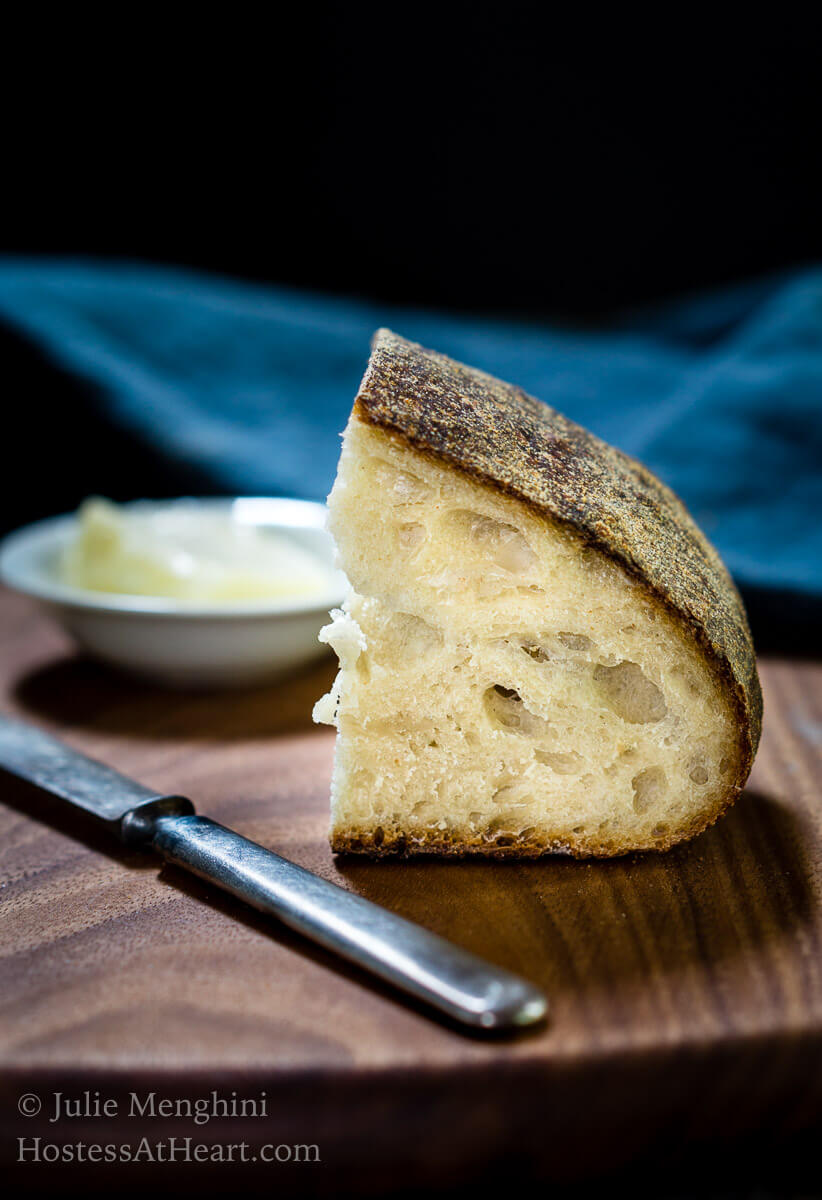
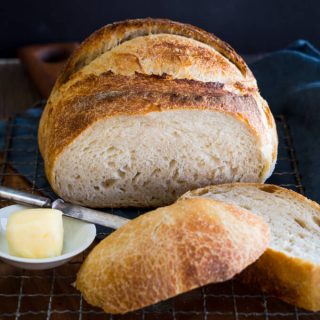
This 500g homemade sourdough recipe has a tender crumb with a slightly sour flavor surrounded by a beautiful crisp crust that has that pull you want in artisan bread.
Hello, Julie. Just wanted to say thank you for sharing your overnight sourdough recipe as it really works well for me, a lot of people have shared their methods and this one is simply the best one I have come across so far. So thank you again!”
Kris T
What is Sourdough Bread
Sourdough bread is made by fermentation of dough using naturally occurring lactobacilli and yeast. Sourdough bread has a mildly sour taste not present in most bread made with baker’s yeast and keeps better than other bread due to the lactic acid produced by the lactobacilli. Wikipedia
What is different about sourdough bread?
The difference is in how they are made. Regular bread is made using store-bought yeast that reacts with gluten, making the dough rise. Sourdough bread is made with a “starter“. This starter is made from a combination of yeast and bacteria growing inside a paste made of flour and water.
Make your own starter!
Need help with your sourdough starter? Our Complete Sourdough Baking Guide covers everything from creating a starter from scratch to maintaining it long-term, plus advanced techniques and troubleshooting.
Health Benefits of Sourdough Bread
The fermentation that occurs from using a starter has been shown to lower blood sugar, be easier to digest and can even be tolerated by gluten-resistant individuals.
However, that’s not to say it is gluten-free. Sourdough bread contains higher levels of folate and antioxidants than other bread. Healthline is a very thorough reference regarding the health benefits of sourdough.
Ingredient Tips:
- Bubbly starter – I recommend feeding your starter and letting it sit out at room temperature 4 to 6 hours or until it increases in volume by about 30% and passes the float test.
- If your dough is runny it can be because your starter was actually starving when you used it.
- Bread Flour – Bread flour has a higher protein content than AP flour. That higher protein provides more structure to your loaf.
- If you substitute, they will both be delicious, and the texture will be the same but you may find the loaf made with AP flour balloons out more or doesn’t rise as high.
- Water – There’s a lot of controversy regarding water in bread making. Some experts say if you can drink it you can use it to bake with. Other experts say the chlorine can inhibit yeast activity.
- Mineral content (hardness) can reduce extensibility (elasticity and ability to stretch) of the dough.
- Salt – I use fine sea salt. It is easier to incorporate and dissolve than a coarser salt.
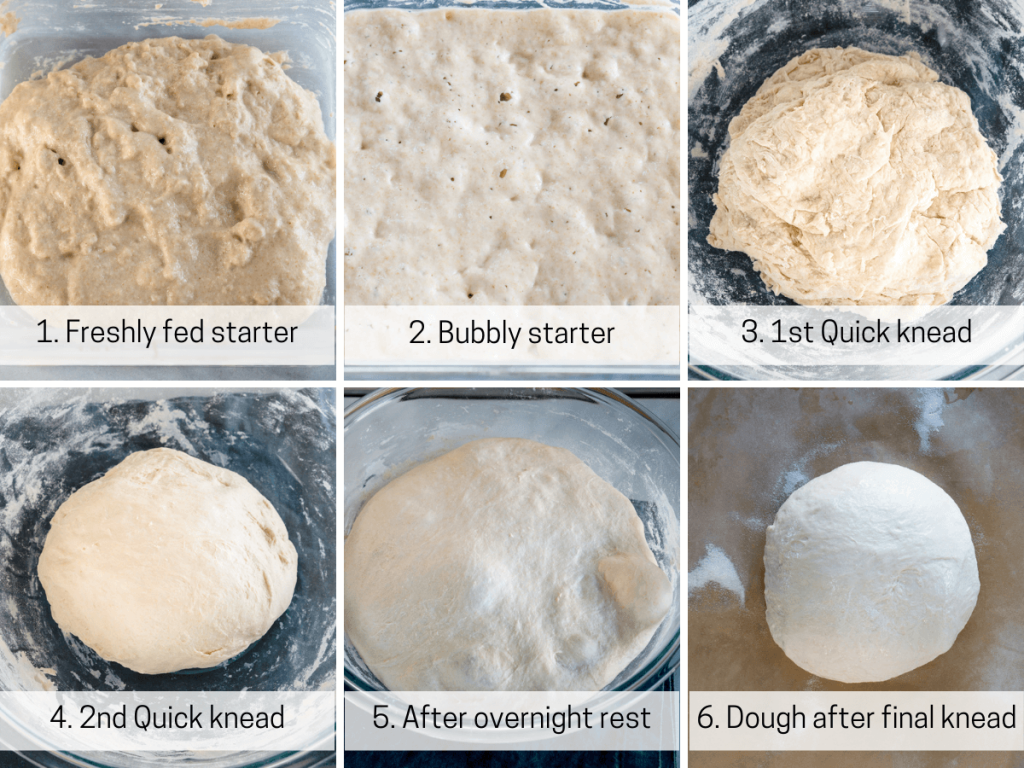
The above pictures from top left to bottom right.
- The freshly fed starter is thick.
- The Bubbly starter is ready. when bubbly and passes the float test.
- 1st quick knead just to combine ingredients (about 1 minute). The dough is thick and heavy.
- 2nd quick knead after a 30-minute rest. The dough is softer and smoother.
- Dough after 8 hours is full of air bubbles.
- Dough after final delicate knead is smooth and silky.
Absolutely! We love adding dried fruit such as apricots or cranberries, chopped nuts, cheese, olives, or herbs such as rosemary or thyme.
We recommend that you start by adding no more than 20%. So for this 500-gram loaf that would be
500 x 20% = 100 grams. You shouldn’t have to adjust your baking time.
Be careful that you don’t add a lot of moisture. Semi-hard cheeses such as cheddar shredded or diced into smaller pieces work well. Drain fresh fruit or olives of excess juice.
Sourdough Baking Guide is a comprehensive resource covering starters, fermentation, shaping, scoring, troubleshooting, and advanced baking methods.
Recipes using a bread starter
- Multi-Grain Wheat Bread Recipe
- Spelt Sourdough Bread
- Sourdough Sandwich Bread using Bread Starter
- Multi-Grain Wheat Bread
- 750gr All-Purpose Flour Sourdough.
Pro tips for Overnight Sourdough Bread
Resting times
Want to save this recipe?
I'd like to receive more tips and recipes from Hostess At Heart!
Don’t let bread rule your life! Here are some resting times that may help you to bake according to your schedule
- Counter rise – Written as is, this recipe has a counter rise of 3 to 8 hours. I’ve shaped it and let it rest in a banneton or you can carefully shape it just before baking it. The rise time is variable. If you have a warm kitchen, it may be ready sooner. Press your thumb into the dough, and if it bounces back slowly, it’s ready to bake. If it bounces back quickly, it needs a little more time to rise. If it stays dented, it’s probably over-proofed.
- Refrigerator proofing – If you don’t choose to bake your bread at the 3 to 8 hour counter proof, we recommend a 90 minute to 4 hour counter proof. Shape the dough and place it seam-side up into a banneton basket or a bowl lined with a kitchen towel that’s dusted with flour. We like dusting ours with a 50/50 mix of wheat flour and rice flour. We’ve actually left our bread in the refrigerator for up to 18 hours with no problems.
- When you’re ready to bake, remove the shaped dough from the refrigerator and let it sit on the counter while your oven preheats. Place it in the dutch oven, score it, and bake as usual.
If you do the full counter proof and then refrigerate the dough, it will be over-proofed. For that reason, try a much shorter counter rise and then refrigerate it.
More helpful tips
- Feed your starter earlier in the day. When it’s bubbly, do the test float. If it’s runny, it’s used up all its energy and needs to be fed again before you can use it. To see if your starter is ready, put a small amount in a bowl or cup of water. If it floats, it’s ready!
- Your bread can be cooked in a cold Dutch oven but I like the color and oven rise I get from preheating my lidded pot.
- To properly bake the bread we rely on an instant-read thermometer. The bread is finished baking when it reaches an internal temperature of 205ºF to 210ºF.
- This bread freezes beautifully. I wrap it in plastic wrap or a ziplock bag and then heavy-duty foil.
- Each time you bake, we keep a notebook and write down anything we do differently such as resting time, baking time, or adding additional ingredients. It’s so difficult to remember what worked the best unless we can look back and see what we were happy about or wanted to do differently the next time. This will also help you to determine what resting times work for you.
YOU MAY NEED
The following are affiliate links. Hostess At Heart is a participant in the Amazon Services LLC Associates Program, an affiliate advertising program designed to provide a means for us to earn fees by linking to Amazon.com and affiliated sites. You can read my full disclosure.
6 Quart Enameled Cast Iron Dutch Oven. – I love this Dutch oven. I have three that are triple the price of this one and it’s my favorite. It bakes my bread perfectly and makes a mean ragu recipe.
Zatoba 1003 Black Walnut Bread Lame Decorative Dough Slasher, 2x2x8 inches – I started out with a lesser quality lame and while this one isn’t expensive it’s definitely better quality and has made a prettier slash in my dough. You can also use a sharp knife.
Instant-read Thermometers aren’t just for meat! I use them to know when my bread is baked. I bake until I get an internal temperature of 205º F to 210º F or anywhere in between.
I have two books (out of several) that I’ve learned so much from. I recommend them exclusively to help in your bread experience. They are easy to read and will help you get that beautiful loaf on the table!
This is a 500gr loaf of bread which isn’t large. Baking bread is all about percentages. If you want a larger loaf, you can adjust the “Servings” in the recipe card and it will calculate your ingredients. (Thank you, Daniel, for this question!)
I hope you enjoyed this delicious recipe as much as we do. Drop me a comment below, and don’t forget to give it a star rating. ⭐⭐⭐⭐⭐. Your comments and ratings help others decide if this recipe is for them too.
Conversions are listed below the recipe card
Overnight Sourdough Bread Recipe
Ingredients
- 150 g bubbly starter
- 285 g *purified water or filtered water at room temperature
- 500 g bread flour organic
- 9 g sea salt fine
Instructions
- Squelch all of the ingredients together briefly (just for a minute is enough) with your hand. Cover the bowl with plastic wrap and let the dough rest for 30 minutes.
- Stretch and fold the dough into the bowl several times for about a minute. Cover and leave it out on the counter overnight, 6 to 8 hours. In the morning it will have doubled in volume at least.
- Pre-heat the oven to 475 °F (240/250C) (I preheat to 475°F and place your lidded pot inside to heat up. You can use an enamel Dutch oven or aluminum roaster. You can also put the dough into a cold pot.
- Dust your counter with flour. I use a rimmed baking sheet lined with parchment paper and then dusted with rice flour. It makes it easy to pick up the dough. Scrape the dough out onto the counter. Don’t punch it down. You want to keep as many of those bubbles as you can.
- Pull the outside thirds into the middle and shape as you wish. Try to pull the outside of the dough as tightly as possible so it will hold its shape well. I shaped mine into a ball also known as a boule.
- Cover with some oiled plastic wrap loosely. Allow the dough to rest for 30 minutes. Set the timer as this is the only proofing that should NOT be overdone.
- Remove the plastic wrap and slash with a sharp knife or lame.
- Carefully remove the pot from the oven and remove the lid. Carefully place the dough into the pot. I lift mine by the edges of the parchment paper and put the whole thing into the pot. Replace the lid and place in the oven.
- Reduce the heat to 425 °F 220C (425°F convection). Bake for 20 minutes. Remove the lid and bake for an additional 20 to 25 minutes or until the internal temperature reaches 205 °F ri 212 °F when tested with an instant-read thermometer.
- Immediately remove from the pot and cool on a cooling rack completely before slicing.
Video
Notes
- If you want to mix bread earlier in the day. After rising for 90 minutes or up to 4 hours at room temperature, shape and set the covered dough in the refrigerator to bake the next day. Remove the dough from the refrigerator to sit out while the oven preheats.
- Feed earlier in the day. When it’s bubbly do the test float. If it’s runny it’s used up all its energy and needs to be fed again before you can use it. To see if your starter is ready, put a small amount in a bowl or cup of water. If it floats it’s ready!
- Your bread can be cooked in a cold dutch oven but I like the color and rise I get from preheating my lidded pot.
- This bread freezes beautifully. I wrap it in plastic wrap or a ziplock bag and then heavy-duty foil.
Nutrition
Nutritional Disclaimer
This recipe was calculated using the exact brands and measurements I used to make this recipe. If you are following a strict diet please note changing anything will cause the nutritional info to change. My calculations are intended as a guide only.
Conversions for Overnight Sourdough Bread recipe
We realize that many of you aren’t comfortable using a scale. The closest conversions are the following.
- 4 cups flour
- 1 1/4 cup water
- 2/3 cup starter
- 1 1/2 tsp salt
A disclaimer is that I’ve never made this recipe without weighing the ingredients so I can’t guarantee or possibly troubleshoot any problems you may have with the recipe.
If you like this recipe you may enjoy these too
- Homemade Crusty Bread recipe
- 6 Ingredient Simple Classic Italian Bread Recipe
- Soft Buttermilk Sandwich Bread
- Simple Ciabatta Bread Recipe – Made 2 Ways!
- Spiced Apple Star Bread
This bread was made possible by the resources and recipes shared by Elaine, Selma, and Celia! Please visit all three of these blogs for amazing bread information!
Did you enjoy this recipe? Don’t forget to pin it for later and follow me on Pinterest for more delicious recipes like this one!


Hi- I’m starting this project with COVID-19 Stay at Home orders as well! I made one batch from another recipe and experimented with the three loaves it made (1000 g flour). I have a steam oven which proofs normal dough beautifully; I used it for two loaves and let the other sit probably too long at room temp for the second rest. Looking to make more, I fed my starter last night and watched it grow, I allowed to to sit out for the 8 hours (as the cookbook said to do) and by then the level dropped to where it was shortly after feeding. It’s still bubbly and thick. I’ve seen pictures/video of thinner examples. Also mine didn’t float before my first dough attempt and I decided to wing it. Anyway with that said- how long after feeding can the starter be used? Is it something you can use daily? What happens if you accumulate too much starter- is that a thing? I saw people fry it like a pancake with scallions as a snack instead of throwing out. I’m open to suggestions. I wanted to start your version tonight, but I’m nervous. Tomorrow is a new day. Thanks!
It’s great to be a bread maker right now indeed, and you’ve asked some great questions!
If you aren’t going to bake your bread after the proof time, put it in the refrigerator to slow down the proof time. Also, it sounds like your starter is starving when you use it. I would feed it and test it in about 4 hours. If it doesn’t float, give it another 30 minutes.
If you feed your starter every day you can bake with bubbly starter every day. Just measure out what you need, feed the leftover, and bake with it once it’s strong and bubbly.
I have some new recipes coming out for using starter. We have some new folks growing theirs right now but aren’t interested in learning how to make bread like this. I think these recipes will be helpful for using that starter.
Thank you for your questions, and I hope this has helped. If not, please let me know. ~Jules
I’ve made this several times now and we love it!
I’m so glad Yolanda! Thank you for commenting and 5-stars! Woo hoo!
Hey, Julie! I am a brand new sourdough convert, with my first starter freshly ripe. I have done the first steps of the recipe, and my dough qas REALLY wet. I had to add a LOT of extra flour to get it to look like the pictures. Will that ruin my bread? I did convert the metrix to cups, so maybe that is my problem? I’m going to try weighing next time. This is my 3rd attempt at sourdough – the other recipes I’ve tried have been epic failires. I won’t give up! Thanks for helping a newbie!
Ok Julia, how much flour are you using and how much bubbly starter are you using? My dough after mixing is usually on the dry side, especially before the first 30-minute rise. You’ll need 4 cups of flour but it’s hard to measure the starter. I don’t think the extra flour will be an issue, bread is pretty forgiving. Keep me posted!
It turned out BEAUTIFULLY! I couldn’t believe I had actually made the artisan loaf in front of me and it tastes like heaven. My dough was puffing over the sides of my bowl after only 5 hours of rising, so the starter must not have minded the extra flour. 🙂 I am making bread again today, and have shared your recipe with my friends. Thank you for a fantastic recipe!!
Julia, your comment just warms my heart. I’m so glad that your bread was so successful! It’s definitely what keeps me baking and sharing too!
Hello! Newish to bread baking and am excited at the ease of your recipe. I started this recipe this morning after a horrible failed attempt last night and am curious if it can be baked after the 8 hours instead of going into the fridge? I also have used a banneton in the past for shaping and wasn’t if it can be used in this process as well. Thank you!
Hi Jenna! Oh know what happened last night? Can I help? It sounds like the instructions for our wheat bread recipe might be what you’re wanting to try and it will work with this recipe too. https://hostessatheart.com/multi-grain-wheat-bread/. I’m here if you have any questions.
My heart sank when I saw the metric system in this recipe. It frustrates me to even see it. We have a perfectly accurate and simple measuring system in the United States that has been successful for years. Why are people wanting to Europeanize the USA. Where is the slider to translate the measurements? I am just tired of seeing this and trying to figure it out. Your recipe was recommended and I would like to try it.
Some measurements don’t convert exactly and there are several converters online that help. Here goes: 225 grams starter total 1 cup, 427.5 grams water is roughly 15ounces, 500gr bread flour is about 4 cups, and 9 grams salt equals 1-3/4 teaspoons.
Disclaimer is that I’ve never made this recipe without weighing the ingredients.
I just got the same measurements converted except for the flour I got 2 cups. Does that sound right? Excited to try!!
Got it!! It is four cups. This site was the best: https://www.weekendbakery.com/cooking-conversions/. Thanks!
Thank you for sharing Amy! The Hostess At Heart community is THE BEST!
There are approximately 125 grams per cup of flour so closer to 4 cups.
Measurements can be easily translated via Google. Personally, I only use recipes that have measurements in grams, as they are more precise and frankly, easier in my opinion (use a scale for everything). I just made the bread tonight and look forward to baking it in the morning!
Thank you, Kristin! You’re right that it’s easy to do. It can be intimidating to get started trying new things for us, but if I can do this, anyone can lol!
Metric weights are the most reliable and most bakers in the US DO use the metric weights system! One cup of flour is not the same as a CUP of water. Also, depending on how active your starter is, it might WEIGH more or less than, someone else’s cup of starter. I got a digital scale and it is SOOO much easier than using cups and teaspoons, etc. I have much fewer dishes when I am done. so that’s a big positive!
Thank you, Elizabeth! The starter is definitely an ingredient that can really vary if you don’t weigh it.
The measuring system in the USA is actually not as “perfectly accurate” as you claim. I live in North America and used the imperial system for years. I recently bought a kitchen scale and my baking has changed drastically (for the better!). Baking is an exact science and getting the precise measurements for recipes makes a world of difference. Also, FYI no one is trying to Europeanize the USA. If you do not want to buy a kitchen scale then download a unit translator app and go from there.
Thank you for explaining this so well. It’s really difficult getting people to try measuring, but as you state, it can make a huge difference.
Oh my goodness, I used to to think the same thing until I tried it, and now baking by weight has changed my life! I used to hate to bake because of all the sifting and spooning and leveling and dry cups and liquid cups and measuring spoons. Now, I just sit a bowl atop a digital scale, add an ingredient until it reaches the required weight and then zero it out for the next ingredient. No muss, no fuss. My friend asked me why her cookies come out different every time. It’s because she bakes by volume. A cup can vary so much in volume depending on how compacted the flour is, but the weight is the weight no matter what. This way of baking isn’t about Europeanizing anything, it’s just so much more accurate, and SO much easier! Give it a try! I have converted all my recipes to weight because it saves so much time and effort! And my digital scale was like $16.00 on Amazon I use it every single day, multiple times a day.
You’re a convert Erin! Way to go and thank you for inspiring others to try it!
Measuring by weight is 100% consistent, measuring by volume (cups, tablespoons, etc) is NOT. My cup of flour can have more or less than yours, depending on if I fluffed the flour first, if I spooned it into the measuring cup and leveled it or scooped it out of the canister and tapped it down. I started using a digital scale several years ago when I was needing to do specific calculations for a special diet my husband was on, and now I LOOK for recipes that use weights, because I know I am matching them exactly.
Thank you Dawn, you are correct.
I tried other recipes and had epic failures! Tried this one and boom! Huge success! Wish I could put a picture of my bread. It’s beautiful!
Thanks for a fantastic recipe!
You rock you, bread ruler! Congratulations!
Just finished 2 more loaves! Best recipe! Thanks again
Excited to try this bread tonight! I think COVID-19 is bringing out the baker in all of us. Just an FYI, the US/Metric converter isn’t working on your page. I tried loading and reloading several times, but it wouldn’t change. I know I can use the internet to convert, but it’s so much easier to just click a button! Many thanks!
Let me know how it goes Julie! I know about the button thing. It will take a US recipe to a metric but not the other way around! Thanks for the heads up though!
I had not made sourdough bread in ages but tried this today and it is wonderful!! Thank you for your recipe!!
Thank you for letting me know Bev! Welcome back to the sourdough world!
Hello
My name is Brett and I have just finished making my first starter. With the Covid19 issue here in UK no yeast is available. I have been baking bread for years and I don’t have a crock pot, may have to get one, but wondered if I can use a tray of water in the oven as an alternate.
Thank you
Congratulations Brett on the new starter! Yeast isn’t available in many stores here in the US either. Not all of these breads are baked in a dutch oven which I think is what you called a crock pot? But, if you can, you can mist the oven with water and close the door to create steam. Be very careful not to touch any glass (lamp or door) with the water because it can shatter. Please let me know how it goes for you! Stay safe, Julie
Hi there. Well 4 loaves later I have achieved the most amazing loaf. Bought a crock pot. Crusty loaf. Picture of your first matched mine and my 4th like your recent. I used a colander but have ordered some bannatones. I adapted it a little by using a Paul Hollywood tip by needing the bread first on oiled board and freezing cold water. The starter worked twice as hard but the rest, timings and all the tips to cook all you. So you have a fan. I am using to make pizza bases and make amazing bagels too. Only adaptation is to add small amount of yeast to support the dough on the boil in bicarb.
Thank you, Brett! So glad that you shared your experience! I’ve never heard of the frozen water so I will definitely be looking up Paul Hollywood. I like the oiled board too since we don’t want additional flour making it tough. Bagels are on my list too!
Julie,
My house is fairly cool 68f – 69f…. do I need to let the last rise go more than 30 min? Should it be doubling in size? I have baked your recipe a couple times with ok turn out but I’m wondering if a longer last rise would help because my house is cooler than most?
Thanks
Hi Debbie. When my kitchen is cold I will heat a cup of water in the microwave and then put my bread dough in the microwave to rise away from drafts and it’s a little warmer. I get lots of nice bubbles after the 8 hours but my loaf isn’t a lot bigger after I shape it. You get quite a bit of spring during the baking. Let me know if you have any more questions.
Hi! First time trying your recipe. I made it earlier today and it’s been on the counter for 8 hours. If I want to wait until tmrw to cook, so do I put it in the fridge after step 3 or do I so steps 4-7 and then put it in the fridge overnight?
Thank you!
If it’s already been out 8 put it in the fridge Danielle! I hope you love it as much as we do!
Hi, so after it has risen for 8 hours at room temp, do you shape it before refrigerating or the next day after it has come up in temp?
Hi Verna. I shape it after the 8 hours and then it’s ready to bake or you can put the shaped dough in the fridge and bake it the next day. Does that help?
Yes, thank you very much, Julie. Be safe and well.
Thank you Verna!
I made the overnight sourdough bread. Finally! A loaf leavened only with sourdough, that wasn’t a failure! I was getting tired if feeding my failures to Herschel, the wild possum that inhabits our yard. I can’t find an option to send the photo, or I would.
That’s great, Marilyn! I’m so glad it worked for you. Poor Herschel may get a little hungry now that you’ve perfected your sourdough! Congratulations!
My dough is really sticky after the overnight raw. I have trouble making it into a nice round shape. It’s spreads when in lays out. Should I just flour my hands or should I add more flour and knead more?
Hi Merilee! Your dough shouldn’t be sticky. In the video, it shows you my consistency. Are you measuring your ingredients?
Hi. Mine is extremely sticky as well. I’ve made your recipe 6 times. The first 3 were excellent. The 4th ok. The 5th and 6th terrible. The 7th is just coming out of oven. It looks ok but not fabulous like the third was. But all but 1 were very wet and sticky. I measure with a digital scale. Any ideas?
Hi Claire! Are you letting your starter sit out at room temperature after you feed it until you use it? I’m asking because I found some people were feeding it and then putting it in the refrigerator, and that doesn’t work. It needs to sit at room temperature until you use it. If you are, does your starter pass the float test? Is it sticky during the first mix or does it become sticky as it sits? If your starter is performing well, I would add just enough flour to allow it to resemble the texture in the video. Room temperature and the differences in flour protein count can make a difference. Bread is more about feel at some point so don’t be afraid to adjust the ingredients. You could also give it another turn after 30 minutes after the first turn to see if it gains strength. Keep me posted Claire and we’ll see what works for you.
I have to tell you, I love this recipe!!! It is so simple and we really enjoy the bread. After a day or so, I slice and toast it and we have avocado toast with an egg on top. Perfect!
Thank you so much Yolanda for sharing your sweet comment with me! I have a few more to share soon!
What.are the measurements for the.starter ?
To make one? https://hostessatheart.com/bread-starter/. If you want to know the US conversion from Metric, this is tricky since this ingredient varies in volume depending on how much gas your levain contains. 225 grams is about 1 cup but that being said I can’t guarantee success because I recommend weighing it.
Hello, Julie! I’ve been doing sourdough since last fall (dark rye) but I find that anytime I tested it today or yesterday it did not float. Would you know why? I tried this recipe, anyway, and had multiple problems. It needed more water so I added that but it didn’t double overnight so I did a second rise in my Instant Pot on the yogurt setting. Then I think it was too wet so it was an inch thick instead of a nice ball. Both times it liquified onto the parchment paper. It still had good flavor and crunchy crust so I’m glad I still baked it in the Dutch oven to try that out. I’ll try again in a couple of weekends when I have time, again. Thanks!
Shoot Erica, it sounds like your starter isn’t very strong. I would get it good and vigorous by feeding it a couple of times a day for a few days before trying to bake with it again. Use filtered water if you can at the recommended 100gr water/100gr flour. Rye is usually very vigorous! Let me know if you think this could be an issue. If not, we’ll keep brainstorming.
Thanks for the tip! I was using someone’s advice to feed maintenance amounts of 1T water and rye 2x a day and then boost it before using so I prob should have boosted it more. Do you maintain with such a small amount like I was told? Otherwise I will put it in the fridge until the weekend. Thanks!
I feed approximately 1-2 tbsp of starter with 100gr filtered water and 100gr flour. I’ll then put it in the fridge and just refeed it approximately once a week or every other if I’m really lazy. There’s no need to keep more than that. I can’t imagine the 1T water working at all! Definitely remove it from the fridge and feed it for a couple of days before baking so it can get strong and vigorous. Thanks, Erica!
So following the other advice I had gotten was definitely starving my starter. I’ve been reading it for a couple of days and it is doubling and very bubbly but still doesn’t float. By the time I get it unstuck to drop it has lost bubbles. Should I still try baking with it?
Your starter is used to make the levain which is what should float. Is that what you are testing?
Thanks so much for this step by step tutorial…..this is my first time making sourdough bread with my own starter and it came out perfect!!! This is my go to recipe – simple, easy to understand.
Thank you so much Tricia! I love comments like this and if you have any questions, just let me know. Welcome to the sourdough club! It’s a great place to be!!
If you are going to eat the loaf over a couple days what is your recommendation for storing out at room temperature – ziploc, brown bag?
I actually just put mine in a plastic bag so it stays soft enough for sandwiches, Tricia. Since this is a smaller loaf it doesn’t last very long.
I cannot thank you enough for this recipe!! I am new to sourdough, and with this recipe my first loaf was a huge success! There is so much intimidating and overwhelming information on line, but you have made sourdough bread easy and delicious. Thank you again from my WHOLE family.
Avery, you made my day with this comment. I know exactly what you mean about sourdough being intimidating! I’m so glad that you pushed yourself to try it and that it worked for you. The hard part is over. Let the sourdough fun begin!
Ciao! I’m new at making breads, and found your starter and overnight sourdough bread recipe. I named my starter Carrie Fisher, and she was officially used today (post 8 days of creating) and I must say, “WOWZER!” The flavor, crusty outside, and lovely inside are all a big hit with my husband and me. I will continue using both recipes from here on out.
I utilize the helpful hints with both recipes.
Grazie Mille (Thank you)
Welcome to the Sourdough world Samantha! I love making this bread. Another recipe that you may enjoy is the Multi-Grain version when you’re ready to try something new. As always, please let me know if you have any questions or suggestions! Love your starter name. Thank you for sharing!
I began with a sourdough starter about a year ago and have been disappointed with the results or overwhelmed with all of the steps. I rejuvenated it last week determined to try again and found your recipe. With some skepticism I stuck my hand in and mixed according to the directions, folded and let it set overnight. The bowl of bubbly dough this morning got my hopes up but the fragrant, crunchy, golden orb that came out of the oven had me jumping with joy. I can’t wait to bake the next loaf that is fermenting an extra day in the frig.Thank you for posting this simple recipe, my bread baking confidence has risen too!
Jayna, this just fills my heart with JOY! Thank you so much for sharing. I just shared with another reader that if you’re putting it in the fridge to shape and proof first and then just take it out and let it sit while the oven preheats. Thank you so much for sharing!
I love this recipe and it’s my go to for every day bread, I make it a lot, so thank you very much! My question is: we have people coming and a very busy festive season ahead, do you think if I pre-made dough I could freeze it? It would just save me so of the thought process and timing.
Hi Cath! I get the frenzy! I’ve never frozen the dough so I can’t say. I actually have 4 loaves rising now that I’ll bake later today and put in the freezer. They freeze well.
Hi Julie, thanks so much for this recipe! It is now my go-to sourdough recipe. One quick question I was hoping you could help me with. I’m trying the “refrigerate over night after an 8 hour rise & bake in the morning” method. I saw that you wrote to let it proof while the oven is pre-heating for this method. Is there a general timeframe for this final proof? I know you said max 30 mins for the traditional rise overnight and bake method but wasn’t sure how the proof time changes when it’s a refrigerated dough…
Thank you for stopping by! That is a great question. I will pull it out of the refrigerator 30 minutes before baking in the morning. You could just pop it in too but I loke letting it warm up just a bit. I wouldn’t let it sit out an overly long time because there is such a thing as over proofing. Does that help? Let me know how it goes! Julie
Hello! When you rise for 8 hours and then more in the fridge should you shape the dough before it goes in the fridge or leave it as is, then when you take it out of the fridge shape it then leave to warm up for that 30min proof?
Hi Jessica! If you are going to refrigerate the dough overnight, shape it and give it the 30-minute proof time before you put it in the refrigerator. I take it out and let it come to temperature while my oven preheats. My oven is pretty slow so that can be up to an hour. Great question! I’ll update my post to help others with this question.
Look no further for your first try at sourdough bread! So easy and it turned out delicious! Trust me when I say: if I can do it, you can do it. Impatient, distracted mom over here quarantined with 3 kids and my bread turned out great! The overnight rise and Dutch oven baking made it foolproof. I’m anxious to try a bigger loaf – this one was devoured in the 1st day. Will doing 50% more with all ingredients yield the same delicious bread? I see the serving adjustment bar, but just curious if anyone has tried.
Leah, you’re awesome! You’ve definitely got your hands full and still pulled off sourdough! A first-timer no less! You can easily make a bigger loaf using the slider. I’ve doubled it before. Congratulations Leah and thank you for sharing!
I love this recipe! I’ve made it several times and each time it has been wonderful. I even made it once for a work potluck and my colleagues raved about it without knowing that I had made it. I love how easy it is to throw it together the night before and the floating sourdough trick helped me to know if my starter was ready for the recipe.
Thank you so much Mary for your amazing comment! People don’t realize that bread like this can be made at home. I hope you took all of the credit and I’m glad that the floating technique was helpful.
Good morning. I found your recipe by doing a google search. I adapted it slightly and posted it on my blog with credit back to you. It turned out amazing, thanks. If you would like to see my post it can be found at https://adayinthelifeonthefarm.blogspot.com/2019/12/overnight-sourdough-boule-breadbakers.html
Hi Wendy! I’ve admired your bread skills for so long and am honored that you found one here to try! I’ve commented on what a wonderful job you did! Thank you!
Thank you, this was my first time making bread with your recipe and it turned out perfectly both times! Made them for Thanksgiving. At what point would you suggest adding other ingredients such as olives or artichokes? I’m afraid to experiment and go off of the exact recipe (I’m a newbie baker)!
Hi Karen! Great news on the bread. Thank you for sharing. If you want to add additional ingredients, I would do it when you put everything together with this recipe since it really has a minimum of kneading. Make sure that whatever you add doesn’t add a lot of liquid or your dough will become too wet.
Your starter doesn’t need to be fed before using. In fact, it will actually work better if it is hungry.
Thanks Fred! I’ve used it in recipes that call for active dry yeast without feeding it but have never used it in bread that calls for a Levain. I’ll have to do more experimenting and appreciate your insight!
I have made this recipe a handful of time and it is now my go-to, thank you!
I’m wondering about making rolls with this recipe for The upcoming holiday. Thoughts? Tips?
I haven’t done this yet, Emily but I have readers that have! I’ve got to do it so I can report how it goes!
THANK YOU THANK YOU THANK YOU
I love simple elegant design and this was easy!
I only added egg wash and sesame. Dutch oven perfection! THANK YOU!