Spiced Apple Star Bread Recipe
This post may contain affiliate links. Please read our Disclosure Policy.

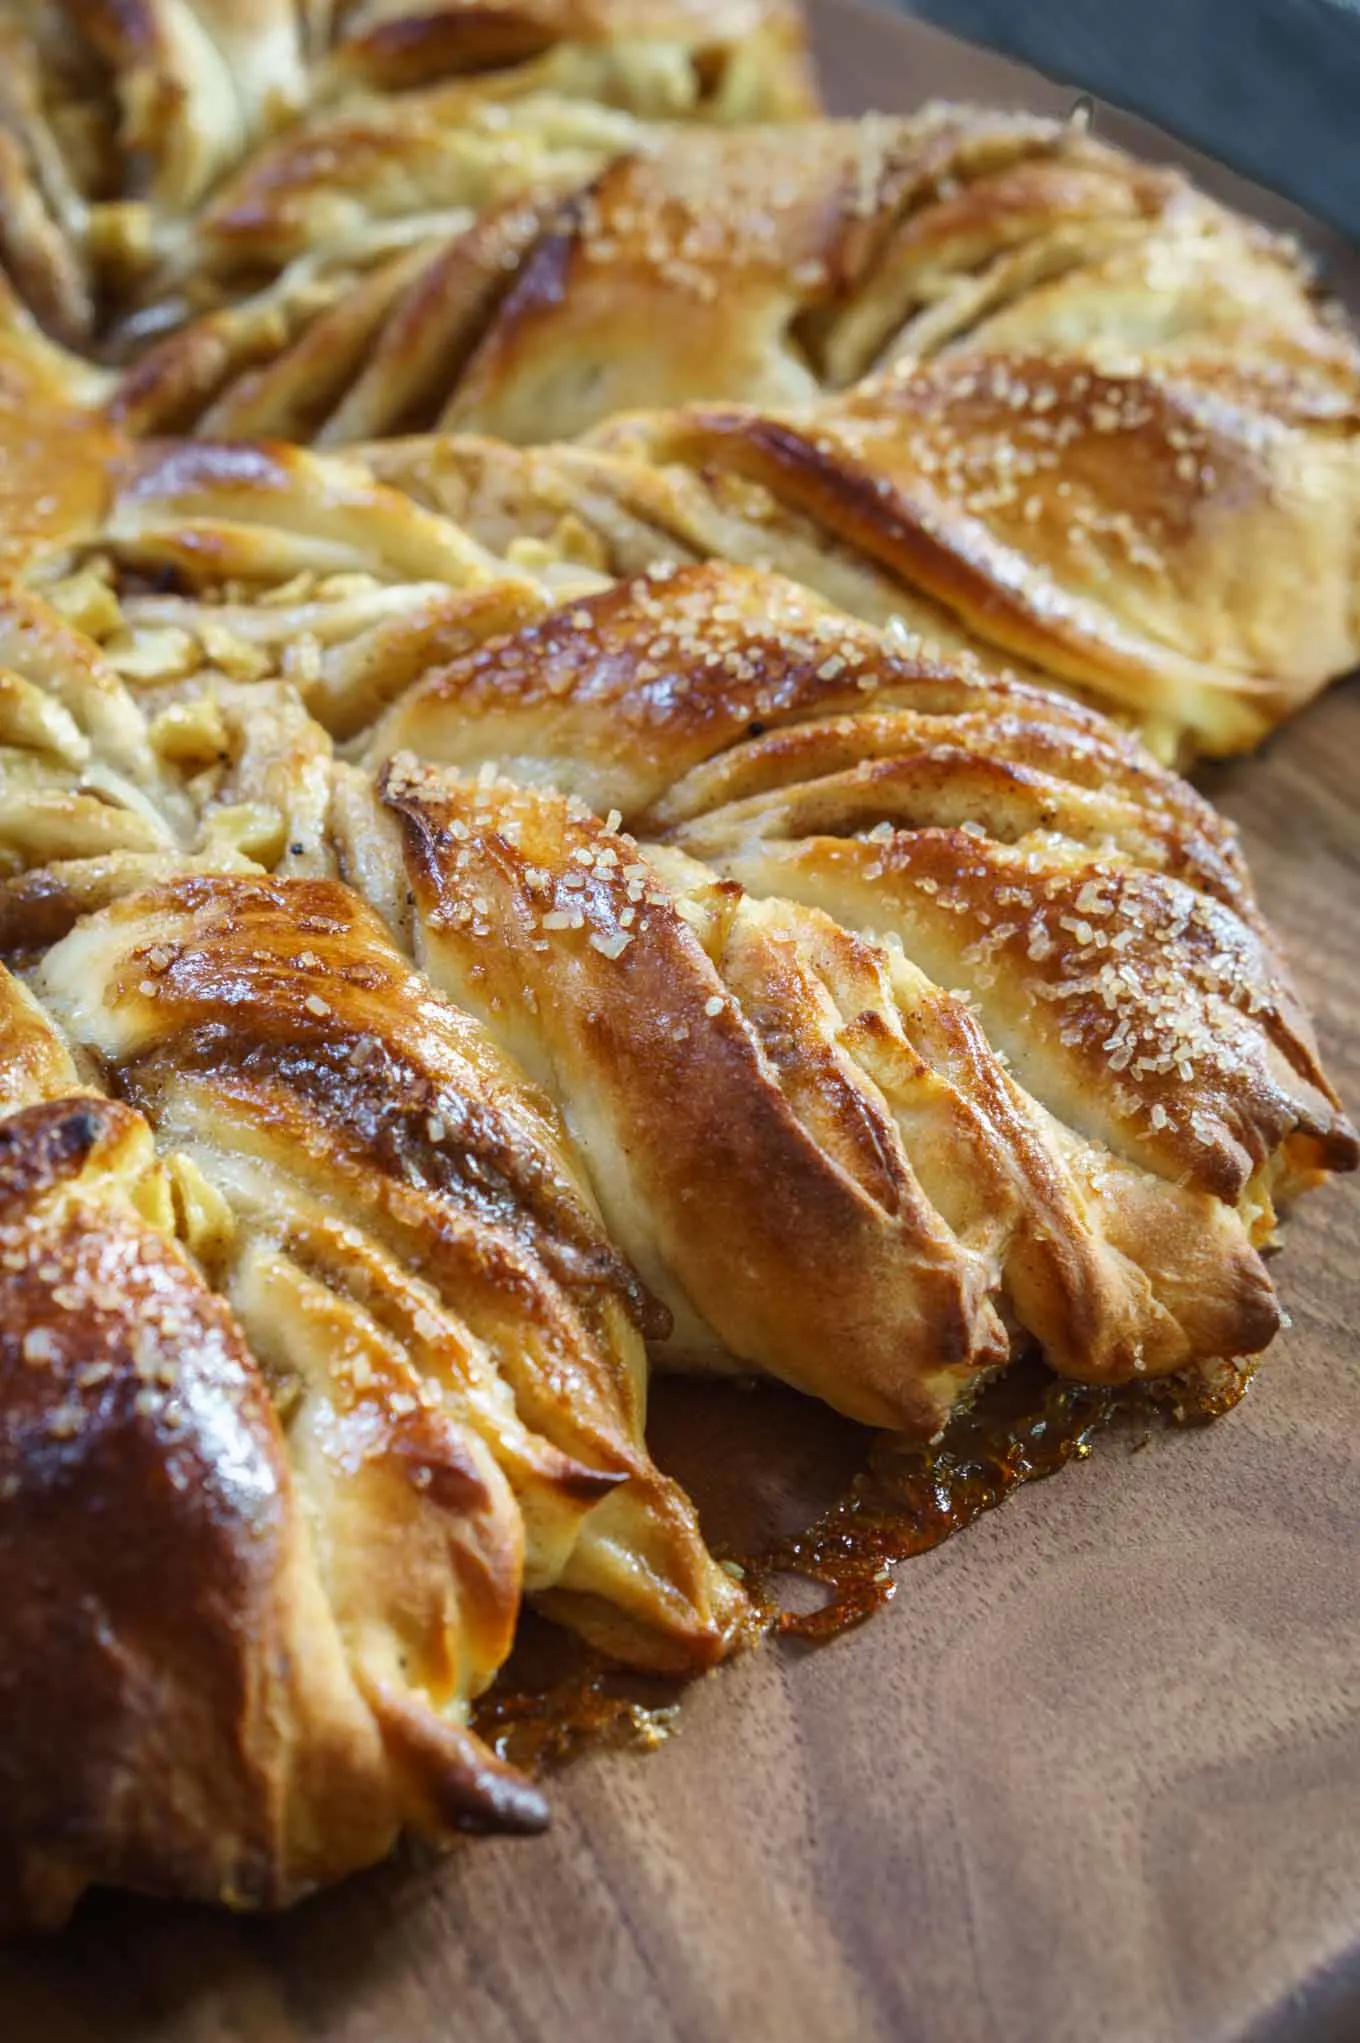
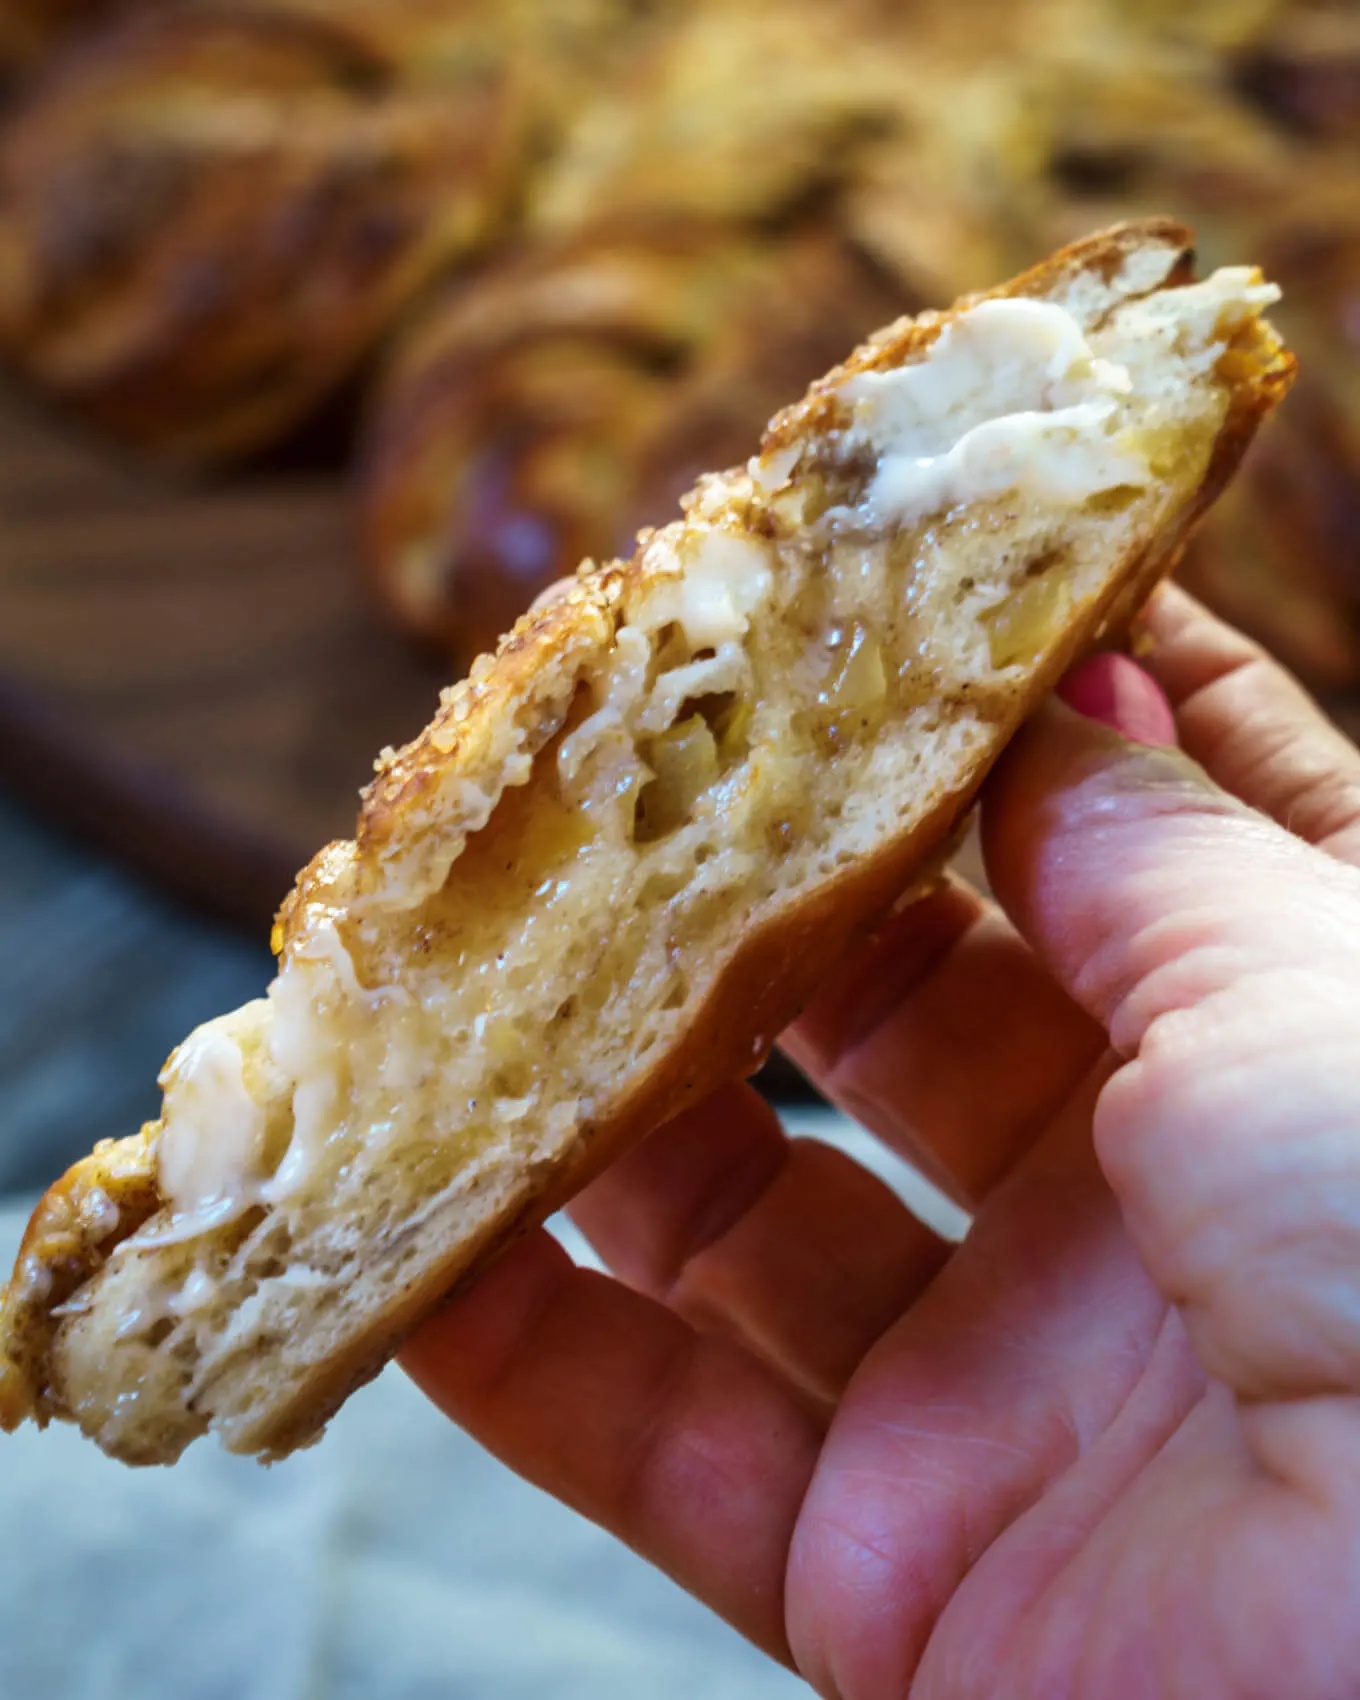
Warm, buttery, and full of cozy spice, this Spiced Apple Star Bread is as delicious as it is stunning! Soft, pillowy layers of dough are filled with a sweet apple-cinnamon mixture and twisted into a beautiful starburst shape. Perfect for special occasions, holiday gatherings, or whenever you want to wow your family with a treat that tastes like fall wrapped in every bite.
When the apple harvest starts, my taste buds turn to bake anything with this delicious fruit. Apple pies, crisps, muffins, filling, cakes, breads, or even stuffed into pork chops. I just can’t get enough!

This Cinnamon Star Bread is soft and tender and tastes like a cinnamon roll loaded with fresh apple. This star-shaped bread is perfect for a holiday morning but easy enough to make when you’re craving a delicious pastry.
We originally made this bread when I was participating in a monthly bread challenge. The challenge was to create bread using fall fruits or vegetables. Sweet or savory bread was all game. Our Spiced Apple Star Bread just screams fall!
Quite some time ago we saw Cinnamon Star Bread on the King Arthur website. It was one of those recipes that I just couldn’t get out of my mind. I wanted to make it but it really looked labor-intensive.
One of the reasons we joined the Bread Bakers group was to learn and challenge myself when it comes to baking bread. This event was the perfect time to give it a try.
Star Bread Fillings
To put a spin on the Cinnamon Star Bread, we stuffed our bread with apples. Here are some more ideas.
- Add raisins to the apples
- Substitute the apples with pears
- Substitute the fruit with chocolate chips
How to make Spiced Apple Star Bread


- We used an electric stand mixer for this recipe. Add the dough ingredients to the bowl, and with the mixer running, slowly add the water until the dough is soft and smooth, not wet and sticky.
- Cover the dough and let it rise for one hour.
- Using a bench scraper, cut the risen dough into 4 pieces. I rolled them into balls and covered them for 15 minutes while I prepared the filling.
- Roll each ball into a 10-inch circle.
- I turn a baking sheet upside down and cover it with parchment paper. Put the first dough circle on the parchment paper.
- Brush the dough with melted butter and sprinkle it with brown sugar and 1/3 of the diced apples.
- Place the second dough circle on top of the first one and stretch it to match up the edges of the first circle.
- Repeat the filling and third dough circle. Place the 4th circle over the previous 3 but don’t top it with filling.
- Place a 2-1/2 to 3-inch biscuit cutter in the center of the top dough circle.
- Don’t cut through the dough. Just place it there.
- You can also use a glass. You just need a circle you can work around.
- Using the bench scraper or sharp knife, make 4 cuts through all 4 layers evenly spaced through all four layers. Repeat until you have 16 cuts to the center.
- Each 2 strips make one star tip. Pick up two strips and twist them twice away from each other. Continue until all 16 strips have been twisted.
- Pinch the pairs of strips together to create a point.
- Remove the cutter. Cover with a clean towel and let star rise 45 minutes. While star rises, preheat the oven
- Remove towel and brush with beaten egg. Sprinkle with Turbinado or demerara sugar.
- Bake
That many steps? Not really, I just really broke them down so it would be easy for you to shape your bread.
Want to save this recipe?
I'd like to receive more tips and recipes from Hostess At Heart!
Tips for the perfect Star Bread
- Dice the apples in small pieces to make twisting the bread easier without losing the filling.
- We recommend using fresh apples. Canned or jar apple slices will have too much moisture making the bread soggy and/or lose its shape.
- Don’t overfill the dough. You will just lose the extra filling when you twist it or it will be difficult to shape.
- Don’t overproof the second rise. By doing so, you will lose the shape.
- We added turbinado (sugar in the raw) to the top of our bread because we love the crunch you get when you bite into it. You could skip the sugar and just apply a dusting of powdered sugar or a simple glaze.
I’m hoping all of these details will encourage you to try it and I hope you’ll let me know if you have any questions.
If you enjoy interesting bread recipes as much as we do, you may enjoy our Blueberry Twisted Bread Rolls, our Kifli Walnut Rolls, or this delicious Brioche Cinnamon Roll recipe.
We LOVE baking bread! You can find all of our bread recipes here!
The bread gods were definitely with me. There isn’t anything difficult about making this bread and I’ll be making it several times throughout the year.
It’s not any more difficult than making cinnamon rolls, and makes an amazing gift!
I hope you enjoyed this delicious recipe as much as we do. Drop me a comment below, and don’t forget to give it a star rating. ⭐⭐⭐⭐⭐. Your comments and ratings help others decide if this recipe is for them too.

Spiced Apple Star Bread Recipe
Ingredients
Dough
- 2 cups Unbleached all-Purpose flour plus more for dusting
- 1 cup of warm water may not use all
- ¼ cup unsalted butter softened to room temperature
- 2 tsp instant yeast
- 2 tbsp white granulated sugar
- 1 tsp salt
- ¼ cup dry milk
- ¼ cup potato flour or instant mashed potato flakes
Filling
- ¼ cup dark brown sugar
- 1 tsp ground cinnamon
- ¼ tsp nutmeg
- ¼ tsp ground allspice
- 2 tbsp butter melted
- 1 apple cored, peeled, and finely diced
- 1 egg slightly beaten
- Turbinado or demerara sugar
Instructions
- In the bowl of an electric mixer combine all dough ingredients EXCEPT water. Mix on low until blended. Drizzle in warm water with mixer running until dough is soft and smooth. Put the dough in a greased bowl and turn once to coat both sides. Cover with plastic wrap and allow bread to rise for 1 hour or until dough doubles in size.
- Once the bread has risen, divide into four even-sized pieces and roll into balls. Cover with plastic wrap and allow to rest for 15 minutes.
- In a small bowl combine brown sugar and spices. Mix to combine. Melt butter in a separate container.
- Dust a working surface lightly with flour. Roll out each piece of dough into a 10-inch circle.
- Place the first circle on a baking sheet covered with parchment paper. Brush with melted butter, sprinkle with brown sugar mixture and top with diced apples.
- Place the next circle over the first filled circle. Stretch to match up edges. Repeat brushing with butter, sprinkle with brown sugar and then apples. Repeat with the 3rd circle and top with the fourth but don’t fill or brush the top of the fourth circle.
- Place a 2-1/2″ to 3″ biscuit or cookie in the center of the circle. Don’t cut through the dough center just set it there. Using a sharp knife or dough scraper make 4 cuts through all 4 layers evenly spaced through all four layers. Repeat until you have 16 cuts to the center.
- Pick up two strips and twist them twice away from each other. Continue until all 16 strips have been twisted.
- Pinch the pairs of strips together to create a point.
- Remove the cutter. Cover with a clean towel and let the star rise for 45 minutes. While the star rises, preheat the oven to 400 °F.
- Remove towel and brush with beaten egg. Sprinkle with Turbinado or demerara sugar. Bake for 10-15 minutes until golden brown.
- Cool on the pan for 10 minutes before serving.
- Store covered at room temperature.
Notes
Nutrition
Nutritional Disclaimer
This recipe was calculated using the exact brands and measurements I used to make this recipe. If you are following a strict diet please note changing anything will cause the nutritional info to change. My calculations are intended as a guide only.
Did you enjoy this recipe? Don’t forget to pin it for later and follow me on Pinterest for more delicious recipes like this one!

This recipe was made on behalf of a challenge group that’s no longer active but I learned so much and am grateful to have participated. Pavani at Cook’s Hideout was our host for this post. Check out what the Bread Bakers have come up with Fall Fruits & Vegetables.
- Apple & Olive Oil Boulé from Food Above Gold
- Apple Cider Muffins from A Baker’s House
- Baked Cauliflower Breadsticks from Sneha’s Recipe
- Broccoli Burger Buns from Herbivore Cucina
- Brown Sugar Pumpkin Apple Bread from A Day in the Life on the Farm
- Chilli and Cheddar Potato Rolls from Mayuri’s Jikoni
- Easy Apple Banana Bread from Food Lust People Love
- Kartofel Khleb – Russian Potato Bread from Ruchik Randhap
- Potato Bread Rolls from Gayathri’s Cook Spot
- Pumpkin Challah from Passion Kneaded
- Sauerkraut-Nut Bread from Palatable Pastime
- Savoury Potato Rose Rolls from Sara’s Tasty Buds
- Spiced Apple Star Bread from Hostess At Heart


I make this every year for Christmas. Thank you.
It’s definitely a show stopper and so delicious. Thanks, Megan!
My neighbor suggested getting together and having a practice at making your star bread, and they turned out great. I have one question though. After you have cut the strips and twisted them around we both had trouble getting the tips of the star to stay stuck together. We tried tucking the ends under but they opened up again during the bake. Any suggestions on how to get them to stick better?
What a fun activity Grace, and thank you for such an excellent question. I believe that the flour in the dough is preventing the tips from sticking together. I’d suggest wetting you fingers and pressing the tips together. Thank you so much for trying one of my favorite recipes!
Had some difficulty with my layers staying pinched together. Is it possible I got my fillings too close to the edges? I was going to let my husband see it before tasting, but I couldn’t wait!
I think that maybe too much flour may be the culprit. Try brushing it off or even dampening the ends with your egg wash before pinching it together. Regardless, I’m glad you enjoyed it!
Unbelievable! Finally got the courage to try this recipe. My friends thought I was a master baker! It was so beautiful! The step by step instructions were just what this girl needed to make it! THANK YOU! ps… it tasted even better than it looked!
Thank you, Michele!