Homemade Italian Bread Recipe (Easy & Quick to Make)
This post may contain affiliate links. Please read our Disclosure Policy.
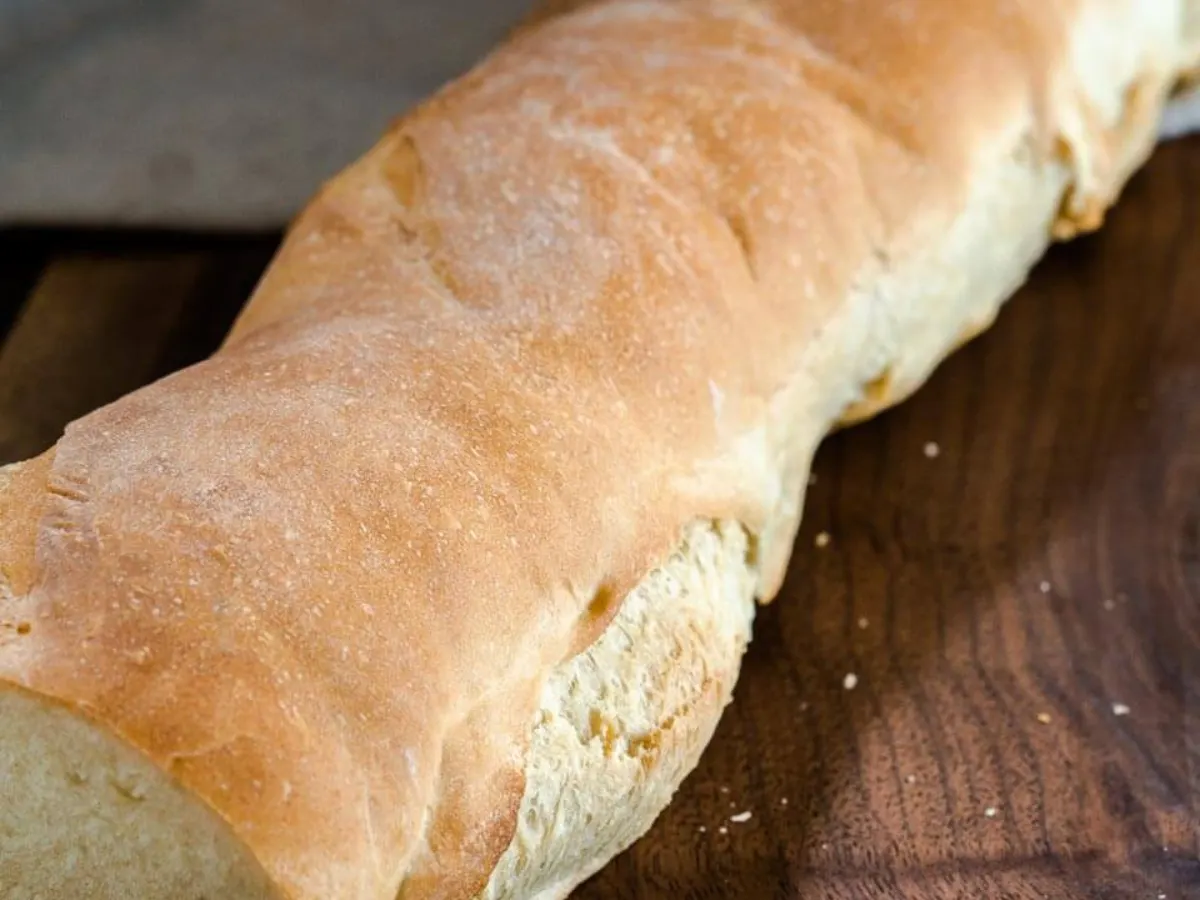
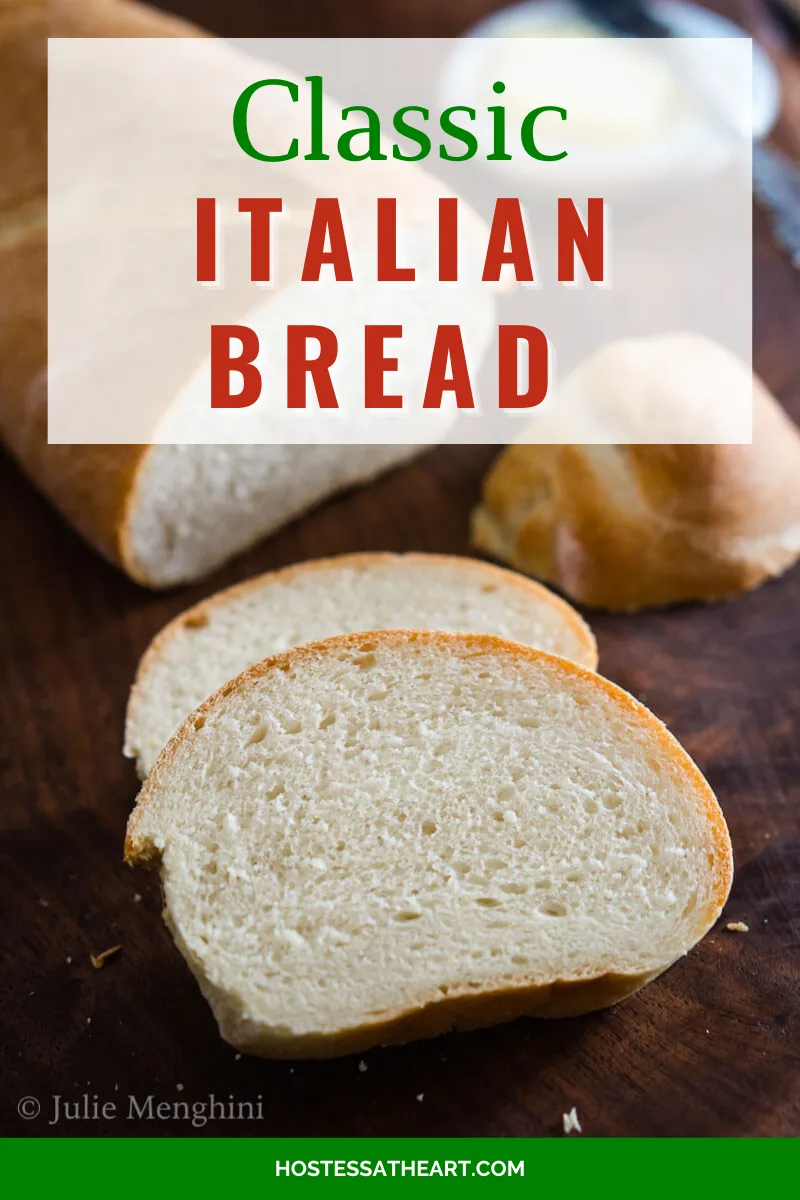
Homemade Italian Bread recipe has a soft and tender crumb and a delicious chewy crust in just 2 hours. Make classic Italian bread in your own home. Try it today and enjoy the flavor of Italy!
THIS POST HAS BEEN UPGRADED FROM 4/11/17 TO IMPROVE READER EXPERIENCE.
Learn how to make delicious Italian bread from home with this easy and quick recipe! All you need is 5 ingredients plus water to make this mouth-watering homemade Italian bread!
Get the best flavor and texture with simple, easy-to-follow instructions and video.
I first made this Homemade Italian Bread recipe as a part of a bread challenge group that I participated in.
The theme was “Bread from Italy“. This excited me because my hubby’s papa is 100% Italian and John is half (Irish is the rest of the mix). Since I’m related by marriage to this wonderful country, homemade Italian bread should be simple right?
I’m not sure what part of Italy this Classic Italian Bread recipe comes from. If I were to guess I would say Puglia or the southern part of Italy.
John’s family is from the north so maybe that’s my excuse for flunking this Italian bread recipe the first 3 times I made it. Slow-learner me!
Hostess At Heart participates in affiliate programs. As an Amazon Associate, I earn a commission from qualifying purchases. Please refer to my disclosure page for more information.
To see my failed attempts scroll beyond the recipe card.
Helpful Items you may need:
- Baking stone – I own a large one and it works well for longer loaves like this one. You can use it on the grill too but I just keep it in the bottom of my oven because it’s heavy!
- Unbleached Parchment Paper – It’s important to know that there is an oven temperature rating on parchment paper. If you exceed it your parchment paper can catch fire in your oven. This one is rated at 450°F, high enough for my bread recipes.
If you have a cooler kitchen, you can turn on your oven for at the lowest temperature for just a couple of minutes and then turn it off. Cover the dough with plastic wrap and let it proof.
Italian Bread Ingredients
- Bread Flour. Makes bread with a lighter crumb
- Sugar. Just a small amount helps the yeast become active.
- Olive oil. Provides a small amount of flavor as well as a fat that makes bread tender.
- Salt. I use Fine Sea Salt because I like the way that it dissolves and mixes in with my other ingredients. You can use Kosher salt or even table salt.
- Yeast. Active dry yeast.
- Water. Any water that you can drink can be used to make bread. However, I choose to use filtered water.
How to make Homemade Italian Bread
On the third go-around, I followed the directions to the letter. A novel idea don’t you think?
 Blooming yeast
-
Add Flour, Salt & Oil
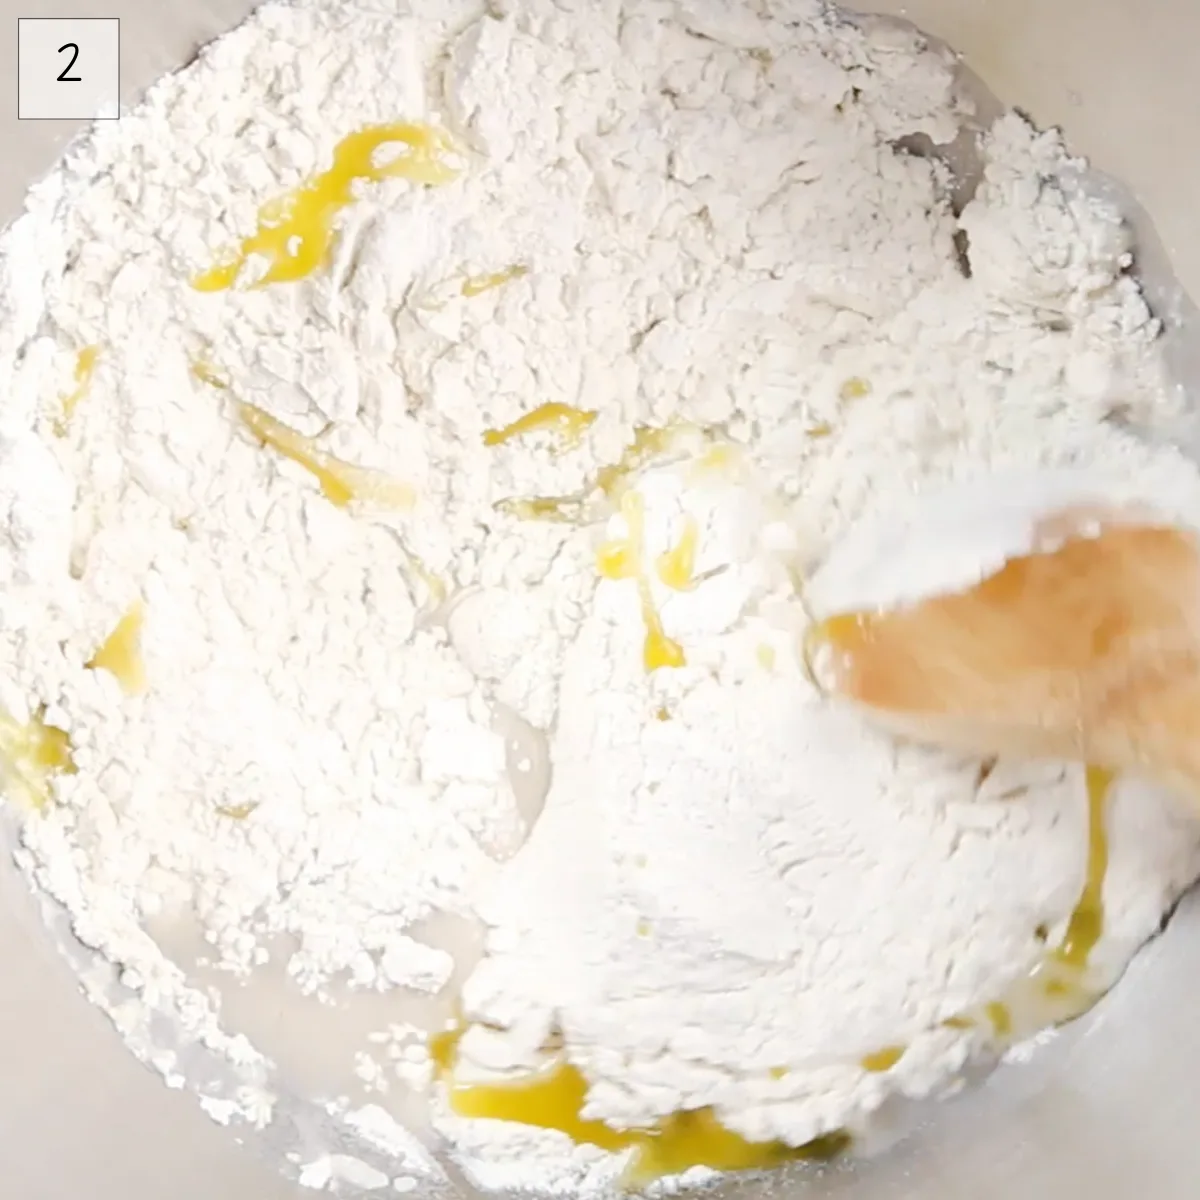
- In a large bowl activate the yeast for 5 or 10 minutes with the water and sugar.
- Add the remaining flour, salt, and olive oil. Using a wooden spoon stir it together.
-
Knead until smooth
-
Dough in an oiled bowl
-
After first proof
- Knead the dough for ten minutes.
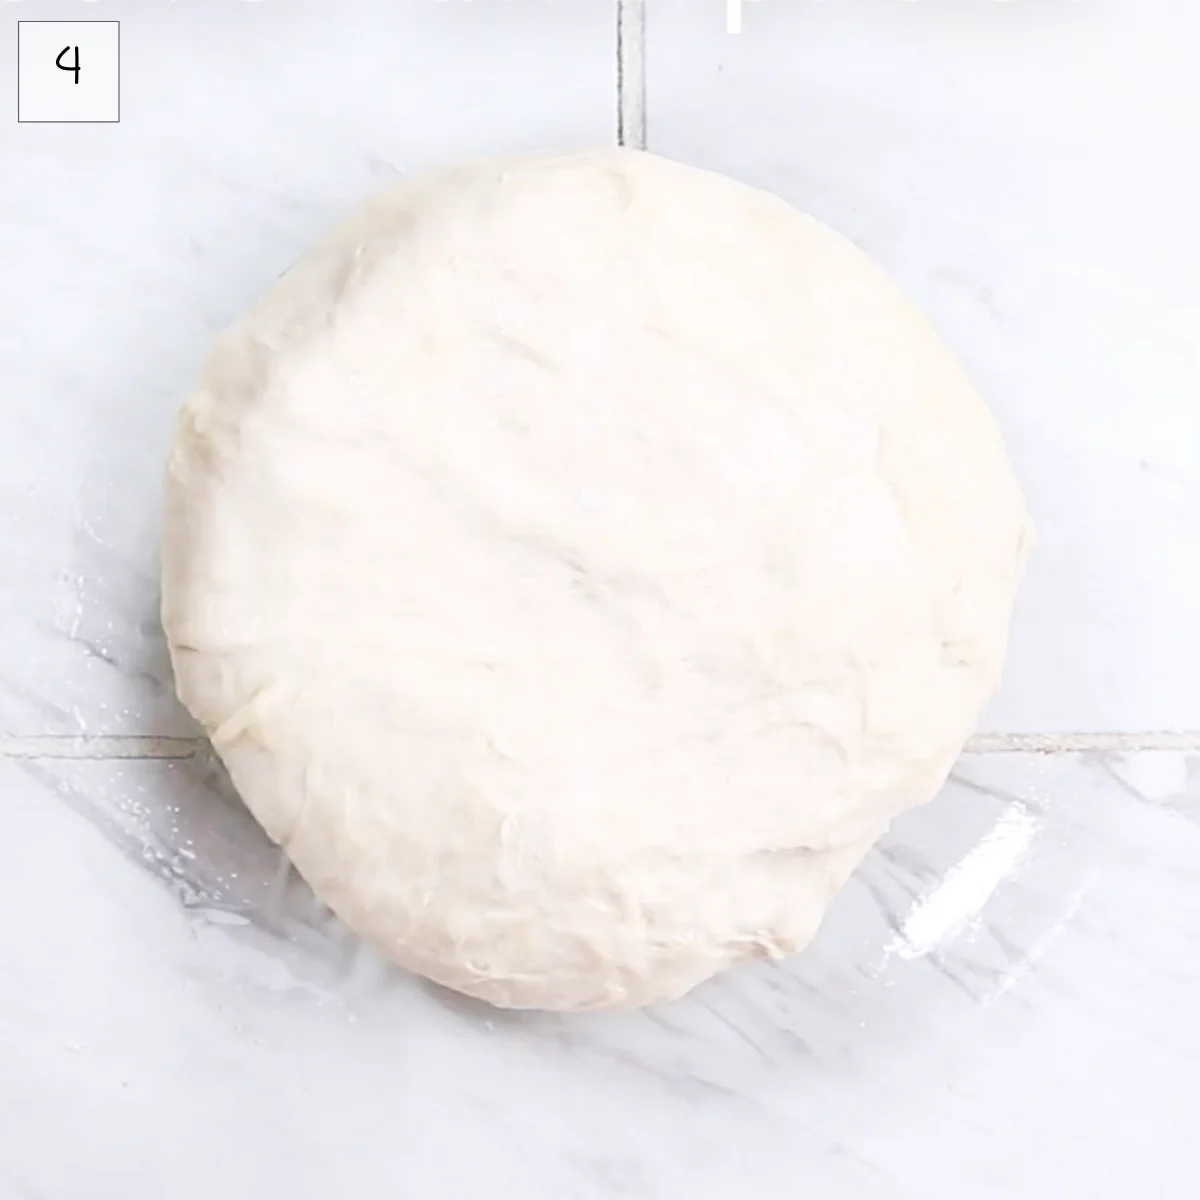
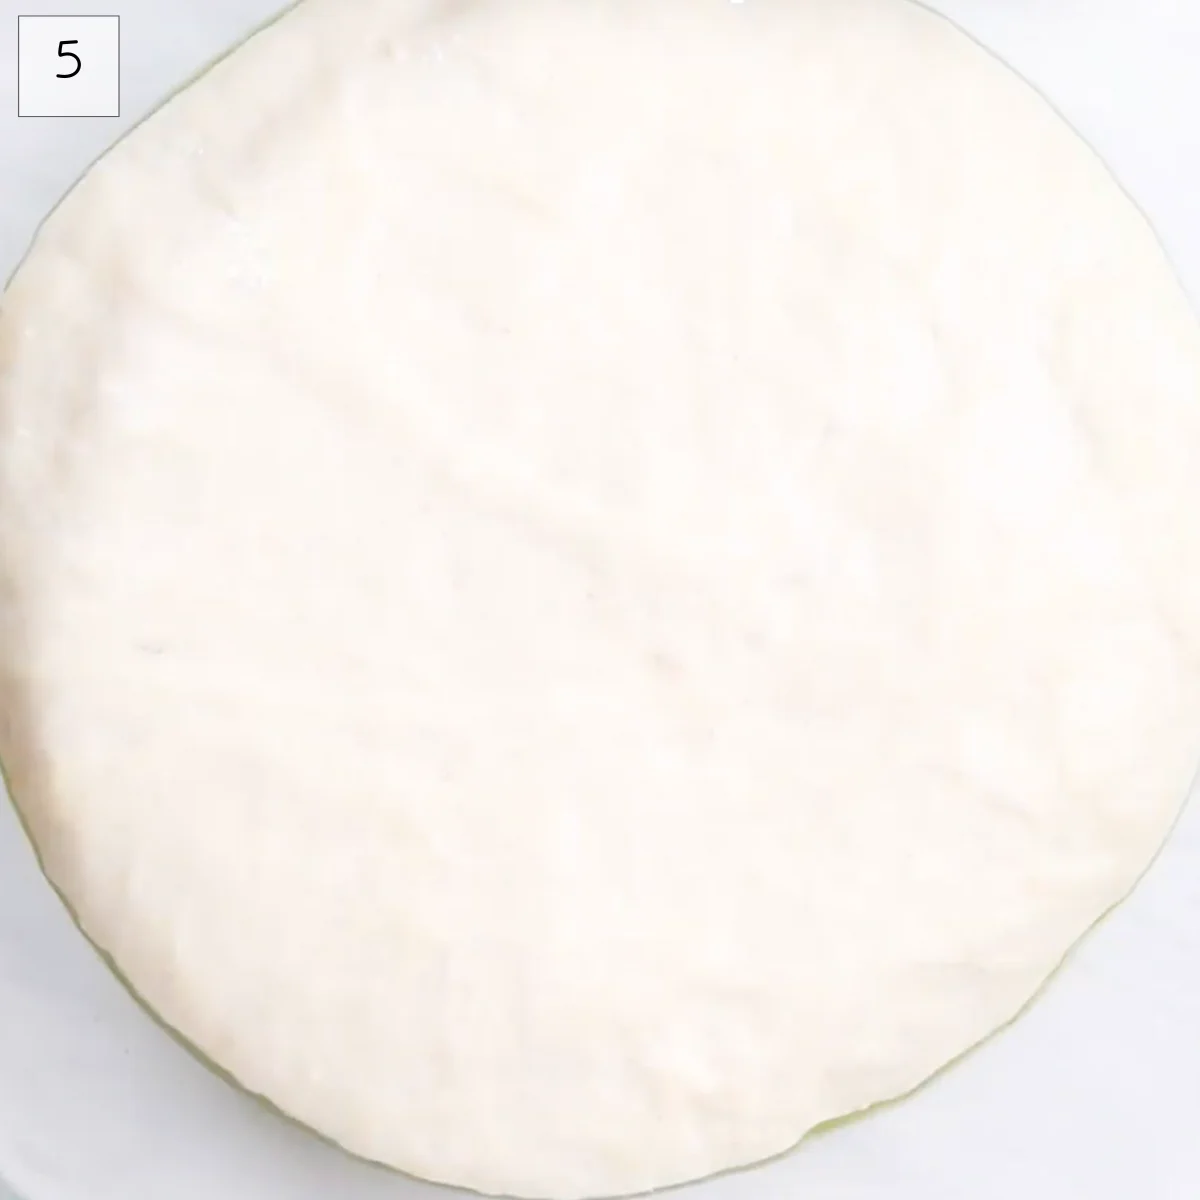
- Roll the dough into a ball and place it in an oiled bowl and cover it with plastic wrap.
- Proof for 1 hour.
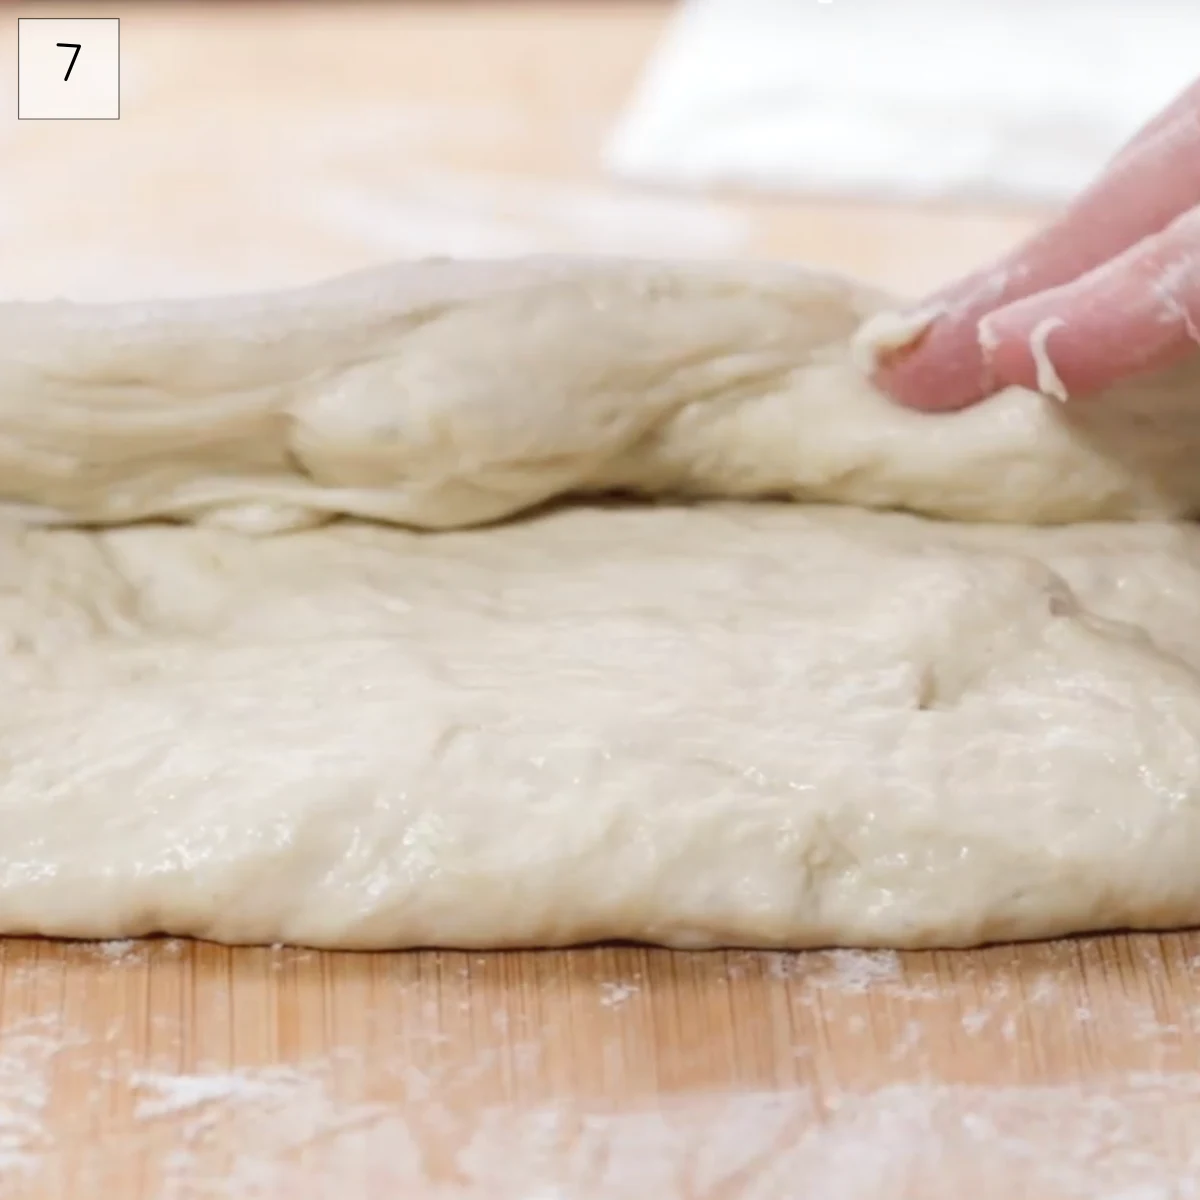
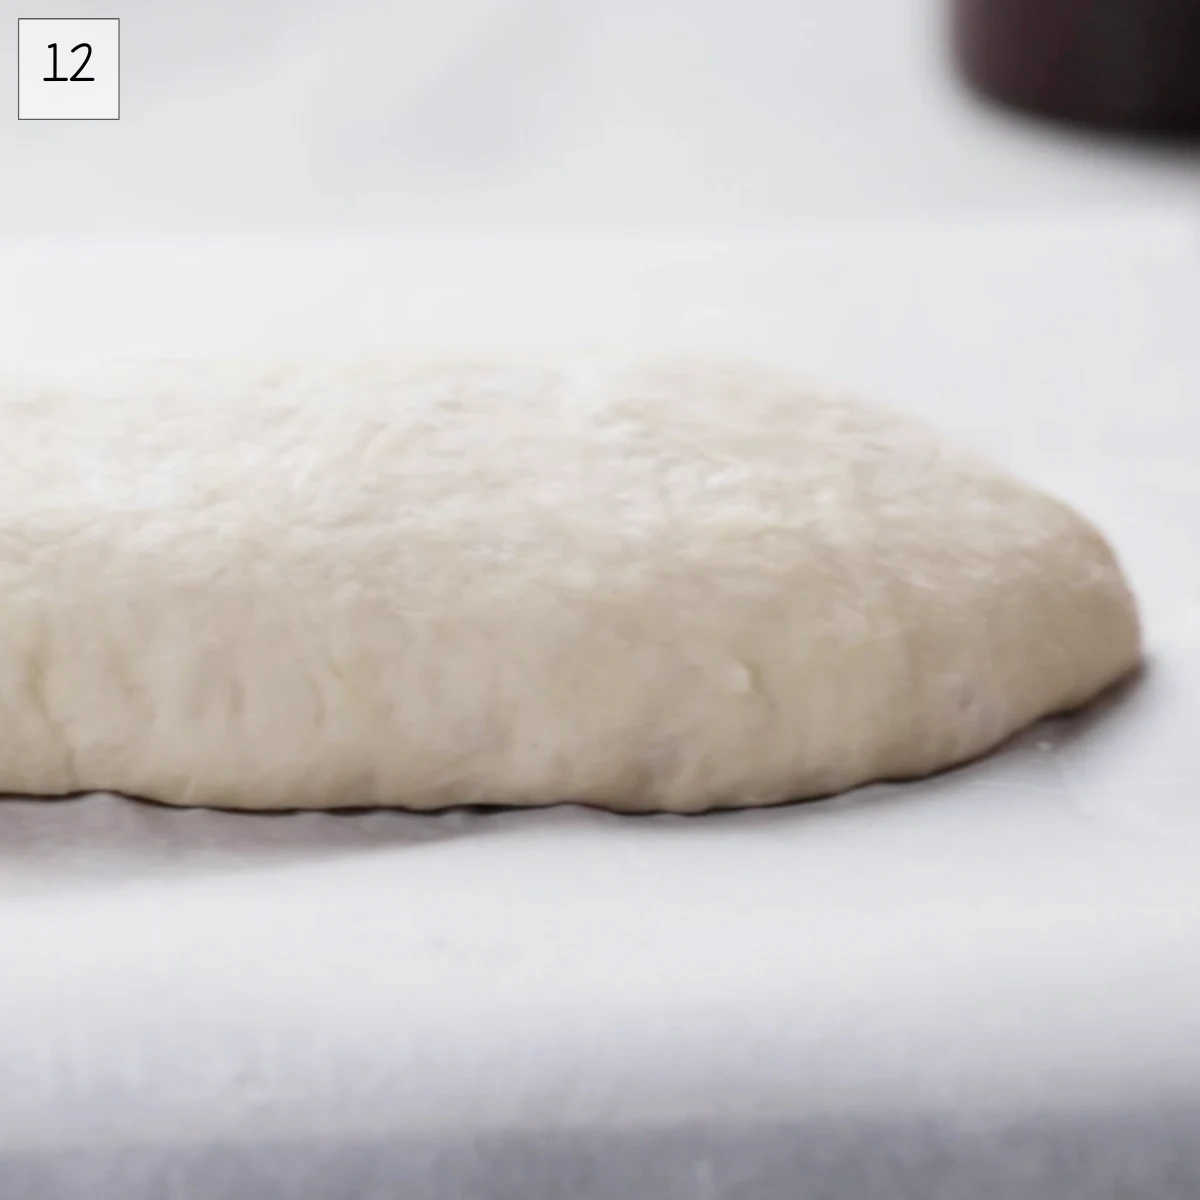
- After one hour gently deflate the dough by just pushing your fingertips into it to form a rectangle and keeping some bubbles in the dough.
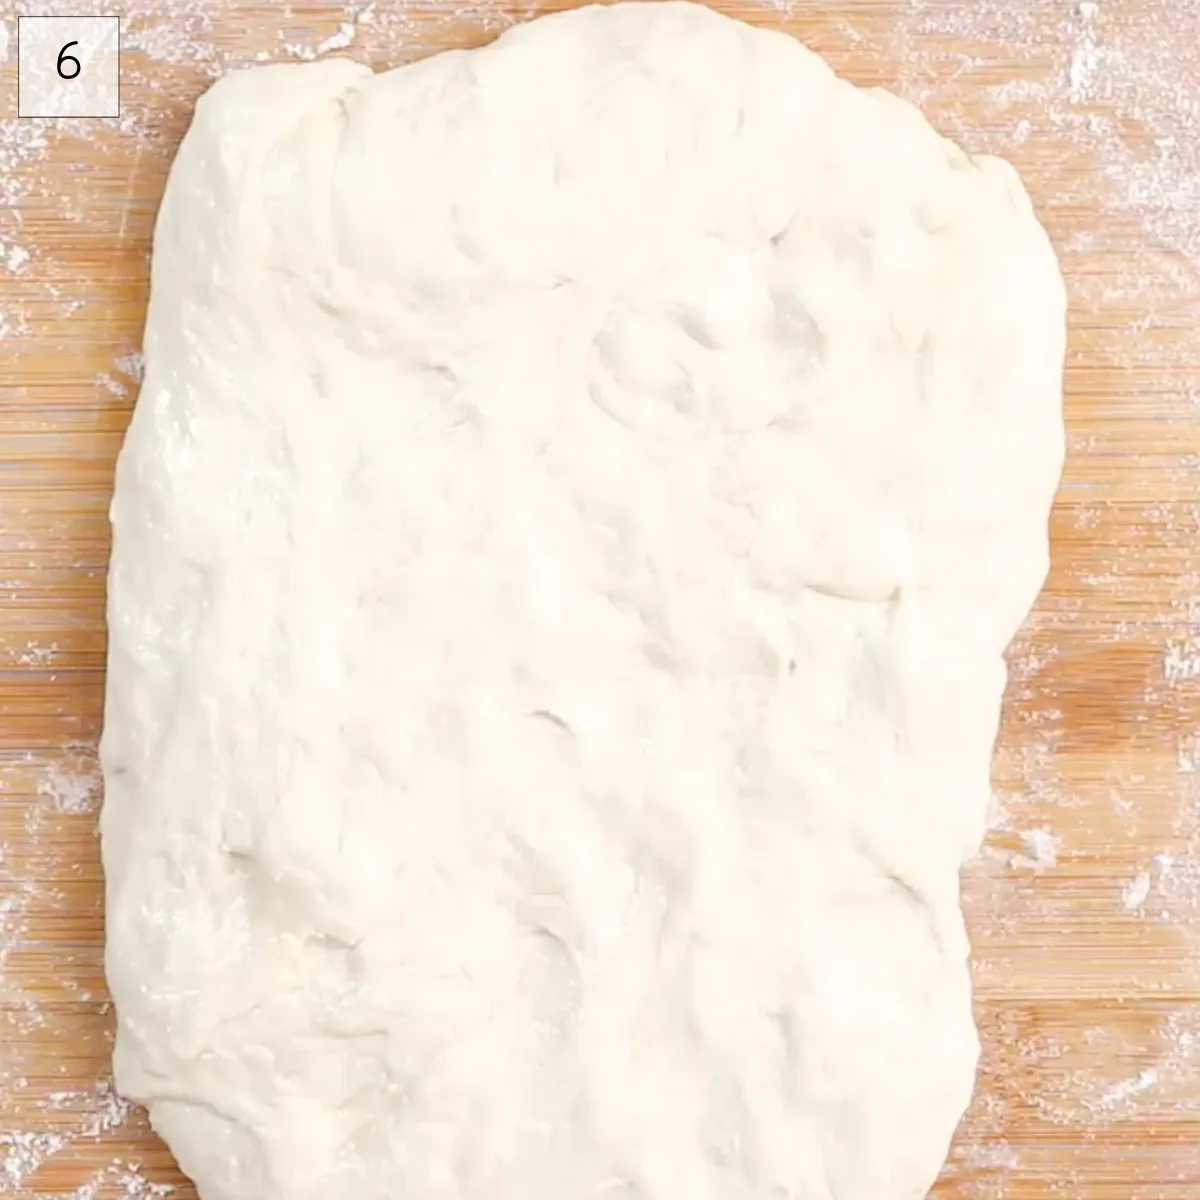
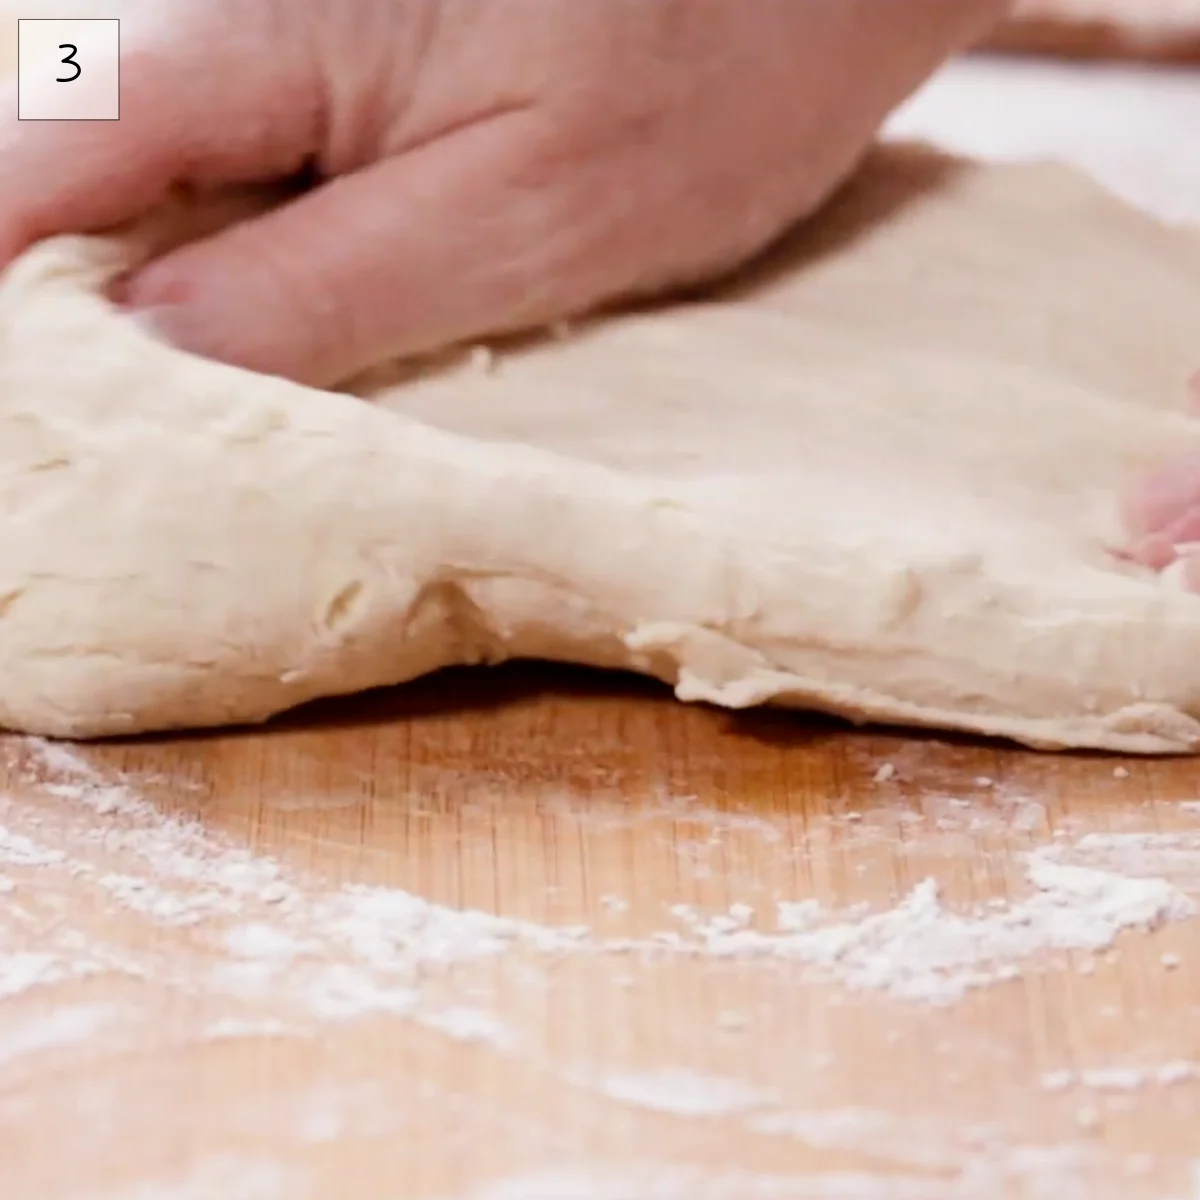
Fold the dough using the bâtard method (torpedo shape) or a baguette method as follows
- Take the right verticle edge of the dough and fold it to the center.
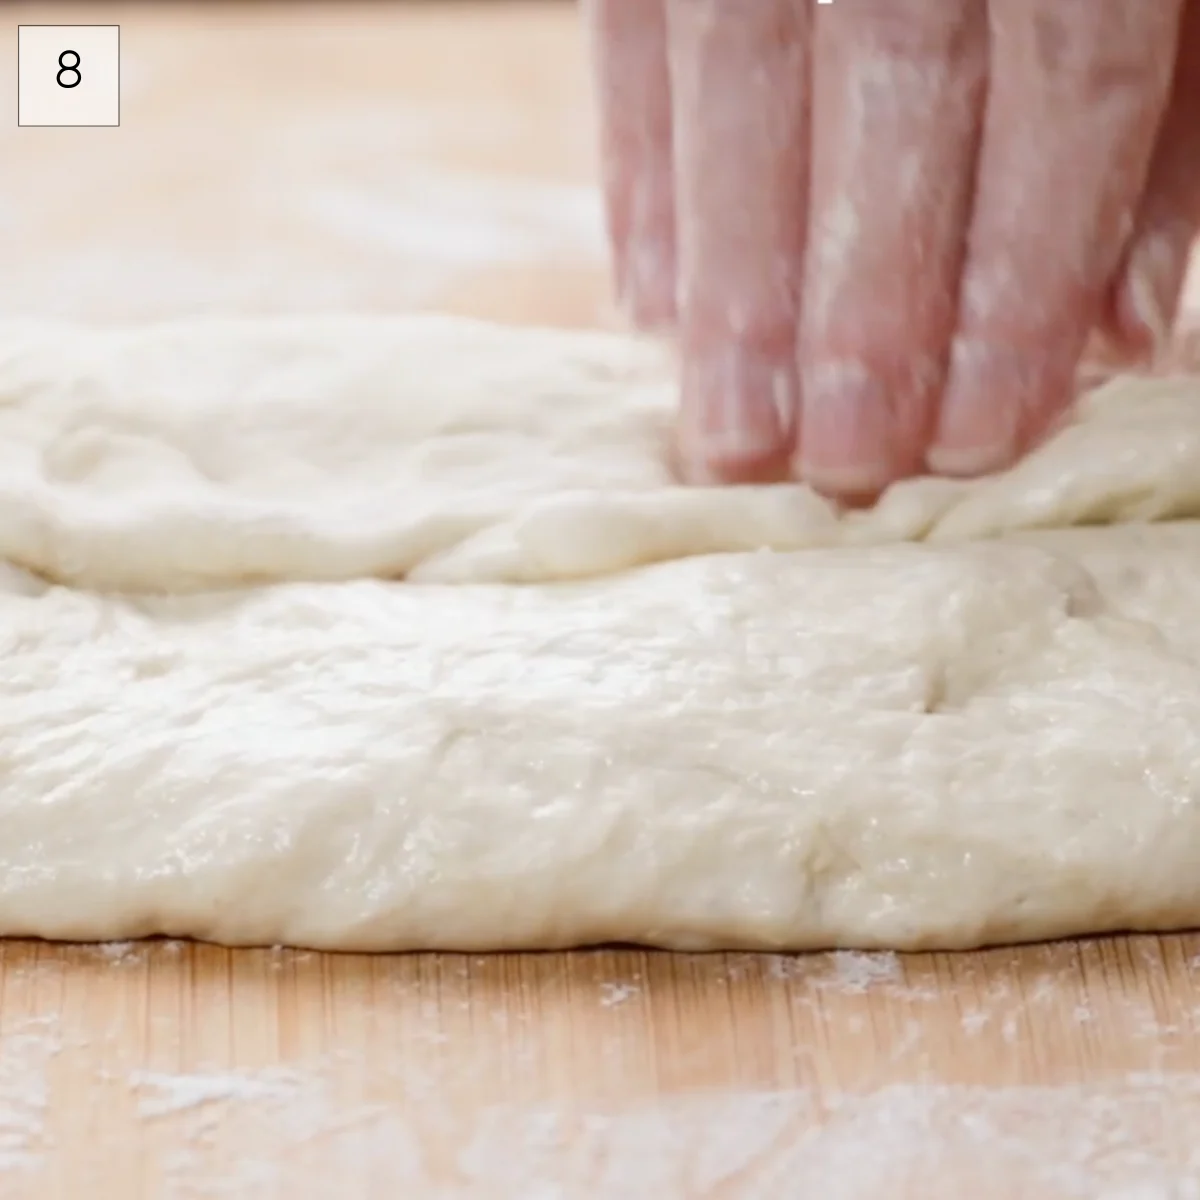
- Take the left verticle edge of the dough and fold it to the center meeting the right edge.
- Press your fingers over the center seam smoothing it out and creating an indentation down the center.
- Using a bench knife, turn the dough onto itself.
-
1st fold to center
-
2nd fold to center
-
Press seam to indent
-
Fold dough from center to left edge
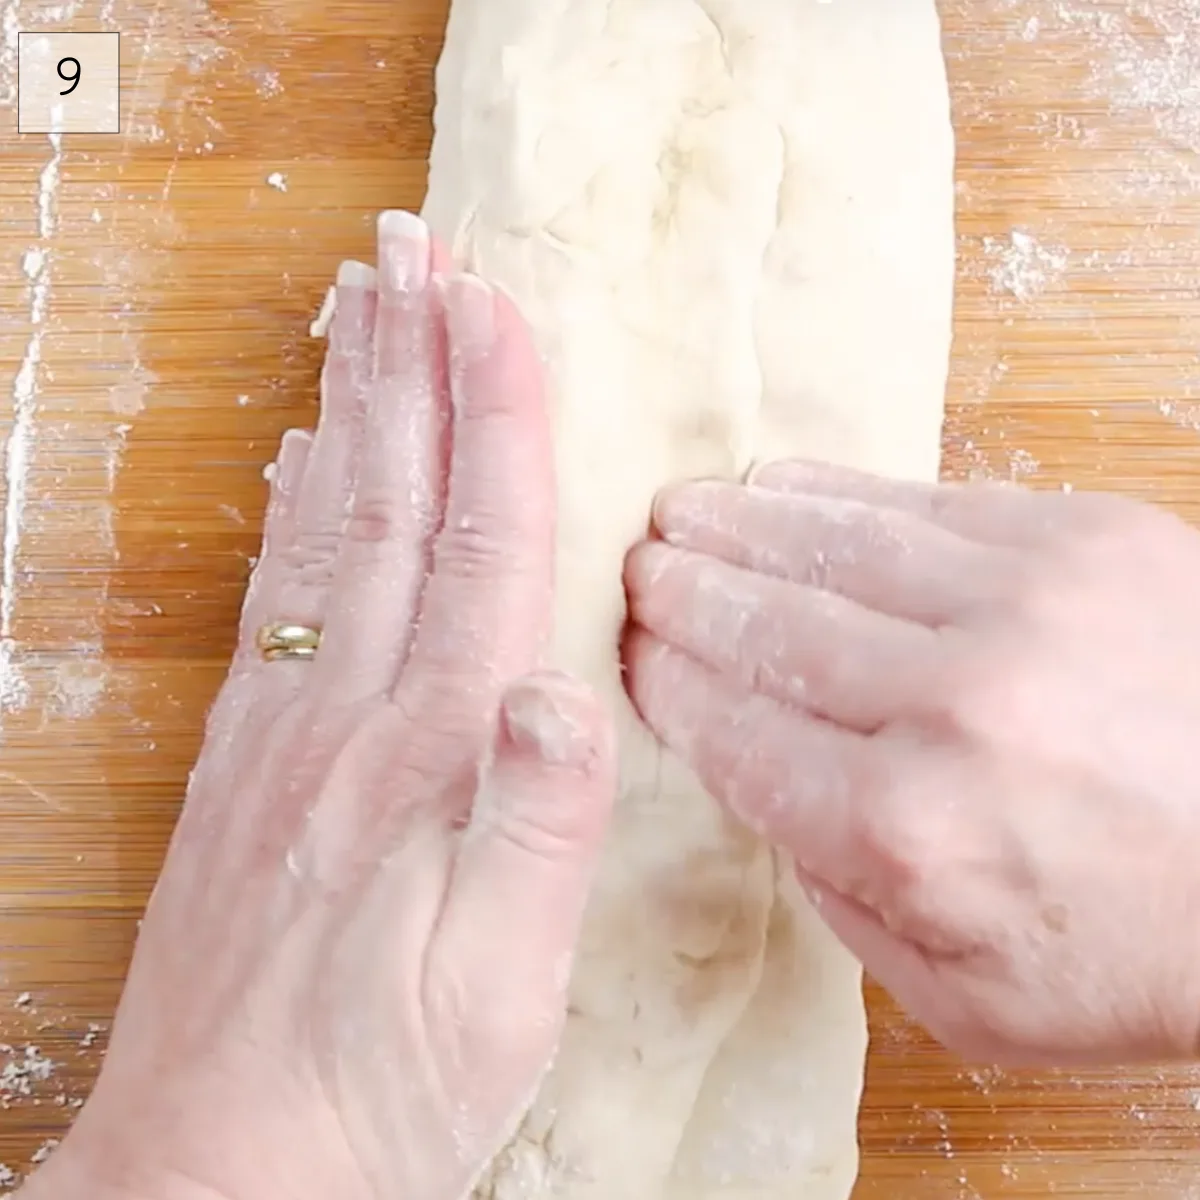
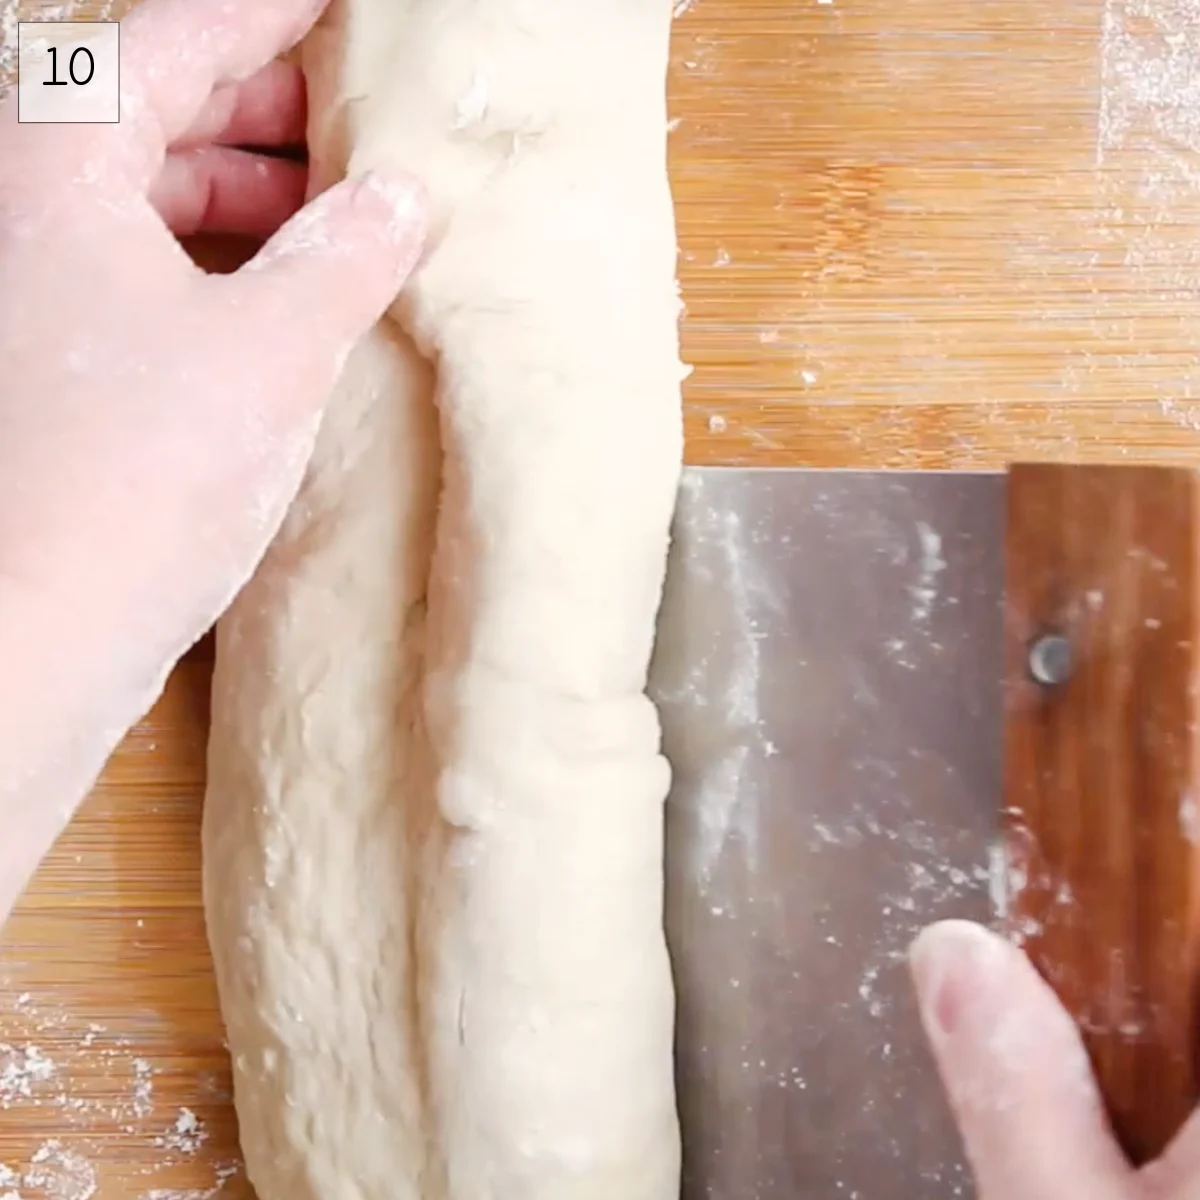
- Pinch the new side seam together.

- Place it on a cutting board covered with parchment paper and proof for 20 minutes
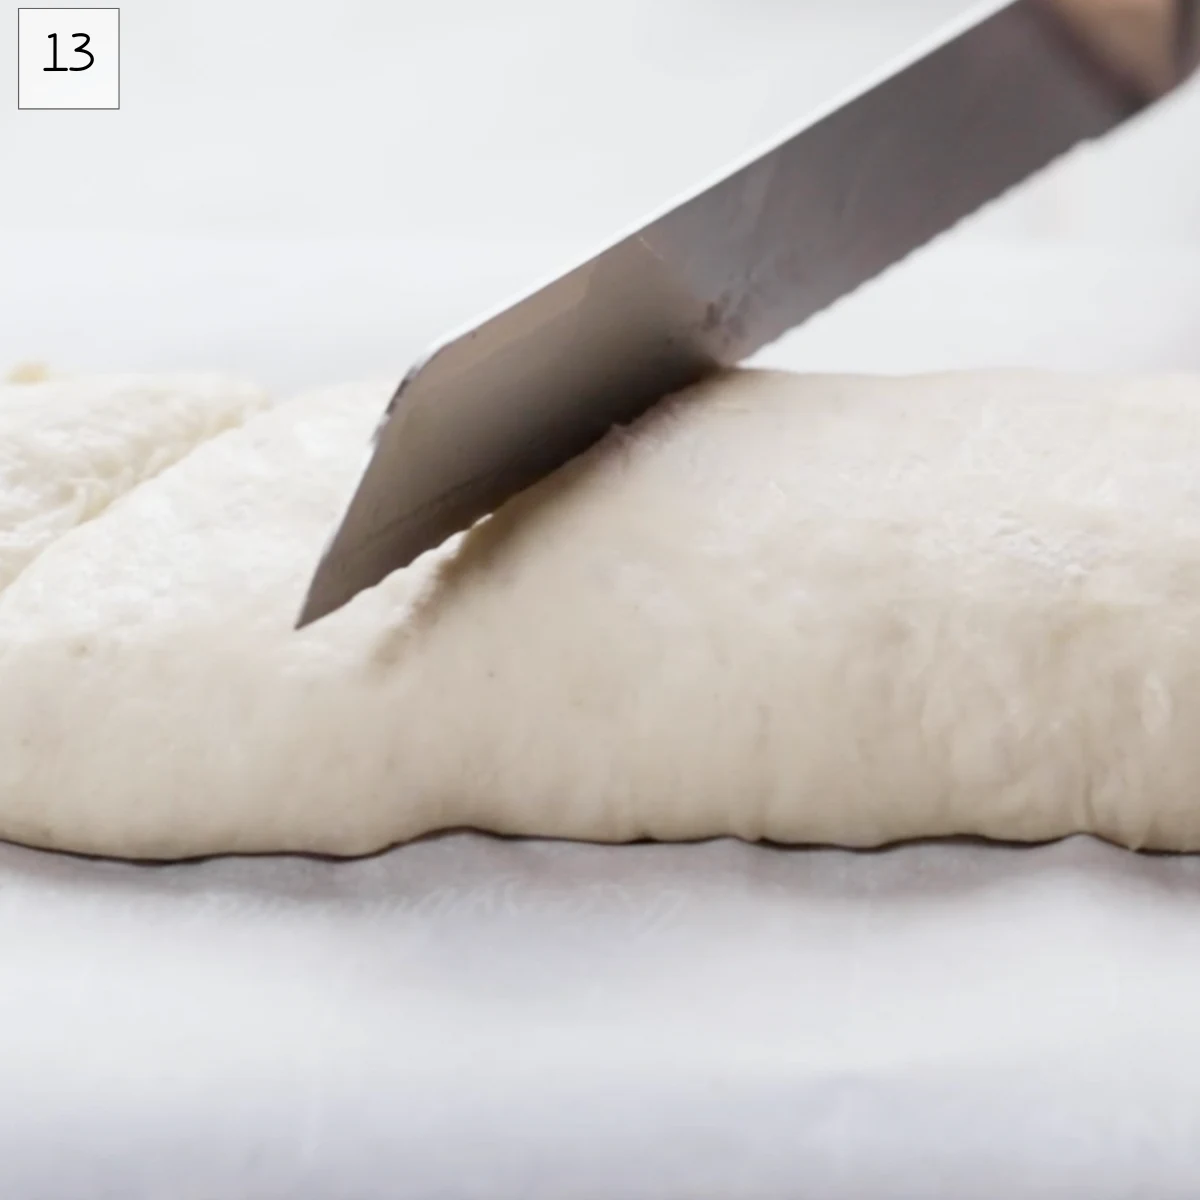
- Score the bread
-
20 minute proof
-
Score the bread
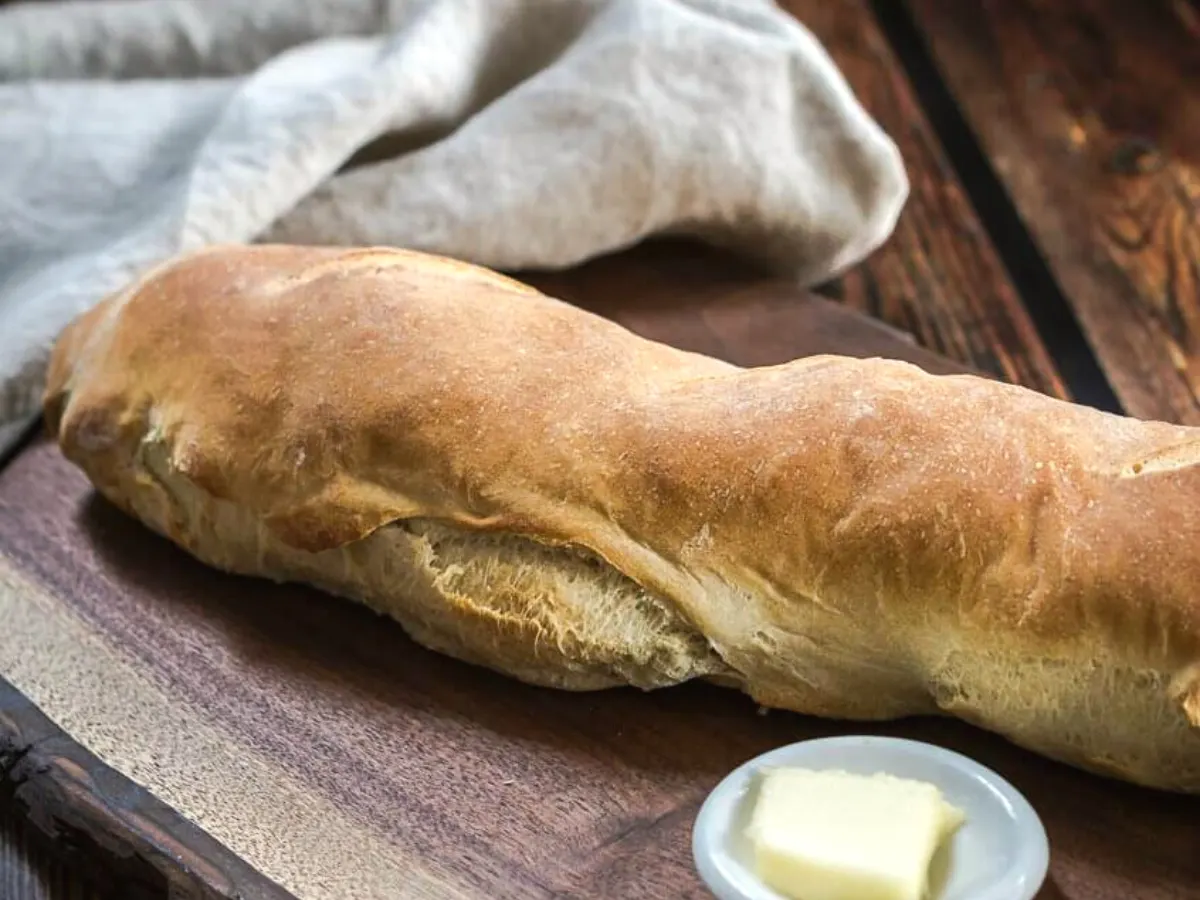
- Slide the bread onto a baking stone by the parchment paper. If you don’t have a stone you can use a baking sheet turned upside down.
- For a Crusty Italian bread recipe mist the walls of the hot oven with a spray bottle filled with filtered water to create steam.
- *NOTE cover the glass of your oven door with a dish towel first. Water dripping on the glass can cause it to shatter.
What makes Italian Bread different?
- The difference between French Bread and Italian bread is that Italian Bread Recipes can contain milk, olive oil, and sometimes sugar that other countries such as France do not.
- Classic Italian Bread is often baked in a stone oven rather than an electric oven.
In my humble opinion, homemade bread is so much better than store-bought. It’s better to freeze part of a loaf than to let it go to waste.
If you can’t use this bread in one to two days, freeze it in an airtight bag and then wrap with foil. You can also revive bread going stale.
How to Heat or Revive Homemade Italian Bread
If you’re reviving bread that’s gone a little stale or thawing frozen Italian Bread, the following tips work.
- To revive bread that’s been frozen, let it thaw uncovered at room temperature out of the bag. If the crust isn’t moist from thawing, mist it with water.
- For stale bread mist it and continue with the following.
- Put the damp bread in a 350°F oven for 10 to 15 minutes. Larger loaves can take a little longer and smaller Italian Baguettes take a little less.
- Remove the bread from the oven and let it cool on a wire rack for 5 minutes.

Want to save this recipe?
I'd like to receive more tips and recipes from Hostess At Heart!
What you can you do with Italian bread
Homemade Bread Croutons or bread crumbs are amazing. Here are a few more amazing ideas!
Dipping sauces
Desserts
Pumpkin Pie Bread Pudding and Bread Pudding Souffle recipes are a great way to use bread that’s beyond its prime.
Can I substitute All-Purpose flour for the Bread flour?
You sure can! Bread flour has a higher protein content than all-purpose flour so the dough is a little tighter with smaller holes in the crumb.
Either flour works well in this recipe. This site is helpful if you want to read up on flour and what different substitutions can make to your bread recipe.
We LOVE baking bread! You can find all of our bread recipes here!
Active Dry Yeast versus Instant Yeast
The difference is actually just the size of the granule. Active Dry Yeast has a larger granule that must be dissolved in water before using it. This is also known as proofing the yeast.
Instant Yeast, also referred to as Rapid Rise has a smaller granule and can be mixed right into your other ingredients and doesn’t need to be proofed first.
Both dry yeasts are capable of two separate rises and can be used interchangeably. The two separate rises are required with the Active Dry Yeast whereas the second rise can be skipped with the Instant Yeast.
Other additives are added to the Instant (Rapid Rise) yeast to make the dough rise faster.
I hope you enjoyed this delicious recipe as much as we do. Drop me a comment below, and don’t forget to give it a star rating. ⭐⭐⭐⭐⭐. Your comments and ratings help others decide if this recipe is for them too.

Homemade Italian Bread Recipe
Equipment
Ingredients
- 2¼ tsp yeast *active dry yeast
- 1 tsp granulated sugar
- 1 cup warm water like bath water
- 2¼ cups bread flour divided
- 1 tsp salt
- 2 tbsp olive oil
Instructions
- Combine *active dry yeast, sugar, and water. Allow it to sit for approximately 5 minutes or until bubbly. If you are using instant years, there's no reason to let it sit and get bubbly.
- Add 2 cups of flour, salt, and olive oil to the yeast mixture and stir until combined with a wooden spoon.
- Lightly flour a working surface and knead bread together until soft and silky. Approximately 10 minutes. Form a ball with the dough and put it into an oiled bowl, turning the dough once so it’s oiled on both sides. Cover with plastic wrap and let it rise for 1 hour.
- Preheat oven to 400 °F. If using a baking stone, put it in the oven while preheating.
- After 1 hour, turn the dough out onto a floured working surface. Gently deflate with your fingertips and form a rectangle. Form the dough into a batard or torpedo shape and put it on a baking sheet lined with parchment paper or a silicone mat. Alternatively, place it on parchment paper on a hard surface like the back of the baking sheet, pizza peel, or bread board. Set it aside to rise for 20 minutes, lightly covered.
- Score the bread 1/4″ deep with a lame or sharp knife and place the bread in the oven. Optionally spray the oven walls with filtered water to create steam.
- Bake for 20 minutes. Remove from the oven and allow to cool completely on a cooling rack before slicing.
Notes
Nutrition
Nutritional Disclaimer
This recipe was calculated using the exact brands and measurements I used to make this recipe. If you are following a strict diet please note changing anything will cause the nutritional info to change. My calculations are intended as a guide only.
Here are a couple more recipes that use dry yeast I think you’ll like!
If at first you don’t succeed follow the directions.
For my first attempt, I manhandled it and thought that was the reason it “deflated” before I had it in the oven. The second time it deflated again as soon as I scored it.
When I started researching what I could be doing wrong, I found that I was either over-proofing my bread or proofing it at too warm a temperature. I would say, I was doing both!
My biggest problem in making this “Simple” Italian bread is over-thinking it. The recipe stated to proof it for one hour for the first rise and 20 minutes for the second.
I proofed it like I do other yeast bread recipes which is 60 to 90 minutes for the first rise and 60 minutes for the second.
I read that the air temperature for proofing bread doesn’t need to be any warmer than 70°F. If you have a warmer kitchen you can just leave it out on the counter covered.
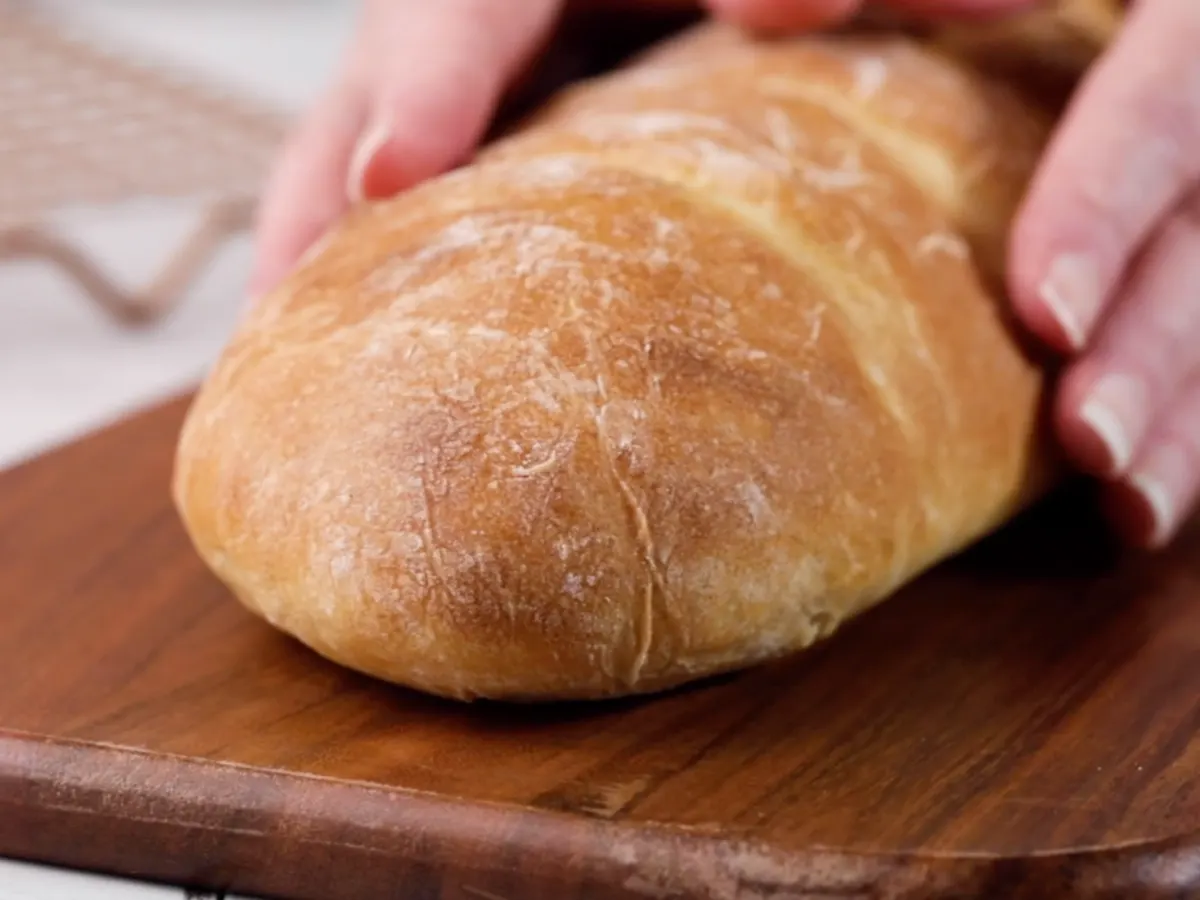
After the third attempt, this Italian bread recipe came out beautifully. You can see how the scores “bloomed” which didn’t happen on the earlier attempts.
Note to self, simple can be delicious! John loved the flops, but he really loved the successful attempt!

Even though my attempts may make you think that this is difficult bread to make. It’s not. It’s an easy Italian Bread recipe that I hope you will try yourself.
I just got in my own way which is generally the case. If at first you don’t succeed follow the directions.
How about diving into bread that requires a starter? You can get started by Making Your Own Starter. The first bread that I would recommend is our Overnight Sourdough.
If you’re already into using wild yeast bread, you’ll love our Multi-Grain Wheat Bread, No-Knead Sourdough Bread, and our Spelt Sourdough bread.
Did you enjoy this recipe? Don’t forget to pin it for later and follow me on Pinterest for more delicious recipes like this one!


Omg this recipe is perfect. I usually like quick and easy dinners. Not much of a baker but I’ve been trying different recipes and this is my best so far! So light fluffy and delicious. Thank you for sharing your recipe.
Thank you, Margherita! My journey sounds exactly like yours, branching out and trying different things. I have so much fun coming up with new ideas.
Thanks for this recipe. So simple and delicious. Making it for the second time today and hoping it’s just as good. I typically bake bread on the bottom of a sheet pan and use cornmeal to keep it from sticking. Works great every time. Thanks again!
Thank you, Ilene! I love hearing from my bread baking friends and your tip for baking it on the bottom of a sheet pan will be helpful too. This recipe is a favorite of ours too.
The dough was way too sticky, I made it twice. One as per instructions and one with an additional cup of flour. The one I added to was much better. It wasn’t as sticky, I was actually able to knead it. But neither loaves had flavor. Something was missing for sure.
There are so many reasons that you had different results, Melissa. Did you use bread flour? The first time I made it I over proofed it and got the results you did. I hope you had a chance to read about my experience. The olive oil and salt add delicious flavor to this bread.
I have a fan-forced oven so would I put it on 200 Celsius and what level in the oven would I put it at the bottom of oven, the top or in the middle?
Thank you for the recipe.
I cook everything on “convection” and on the middle rack.
Followed directions and had a very wet dough, even after adding more flour the baked bread had no flavor and was dense as a brick. I have made many loaves of bread and like to try new recipes but this one is terrible.
Hey, thanks for sharing. This isn’t a typical result. Not sure where your bread went wrong. If you’d like to expound on your comment, maybe I could help.
Julie, what a great flavor! I think bath water should be about 104F and so I used that temperature H20. The dough came out VERY wet and stayed that way after 10 minutes of kneading (dough hook). Before the 1st hour was up the dough was bubbling looking very much like my starter about 3 hrs after feeding. I turned it out at about 50 minutes and it was still quite sticky. I shaped the bread, let it rise the instructed 20 min, scored it, and popped it onto the stone. Let this serve as a reminder to other rookie bakers like me. If your are going to use a stone, make sure that you have it in the oven, heating for at least an hour! The bottom of my loaf was not completely done. and I did not get a good oven spring.
Thanks for the recipe. Taste is great!
Dave N.
Hi David! Thank you for sharing your experience. I usually don’t go as warm as 104F more like 98-99F. You refer to your starter. Did you convert this dry yeast to sourdough starter? Your tip on the stone is spot on, and another tip is to make sure it’s not so long that it’s difficult to transfer to your stone too. I appreciate your tips, Dave. You’re helping all of us.
Julie, thanks for your reply. I realized this morning that I had miss-calculated the weight of flour looking at the “ missing” 1/4 cup of flour, and had a shortage of flour in the recipe. Tried it again today with the correct amount of flour and used my dough hook for 10 minutes. The resultant loaf was still flat. I’ll try tomorrow with a 1/8 cup addition of flour and hand knead for 10 min. I’ll let you know how it goes.
Hi Dave. Are you using a dry yeast? Also, give it a hand knead for 10 minutes and see if that will make a difference? I found in my first 2 attempts that I was working it too much.
Third time IS a charm. The extra 1/4 c flour added during hand kneading did the trick. Thanks
Woo hoo Dave! I’m so glad that it worked for you.