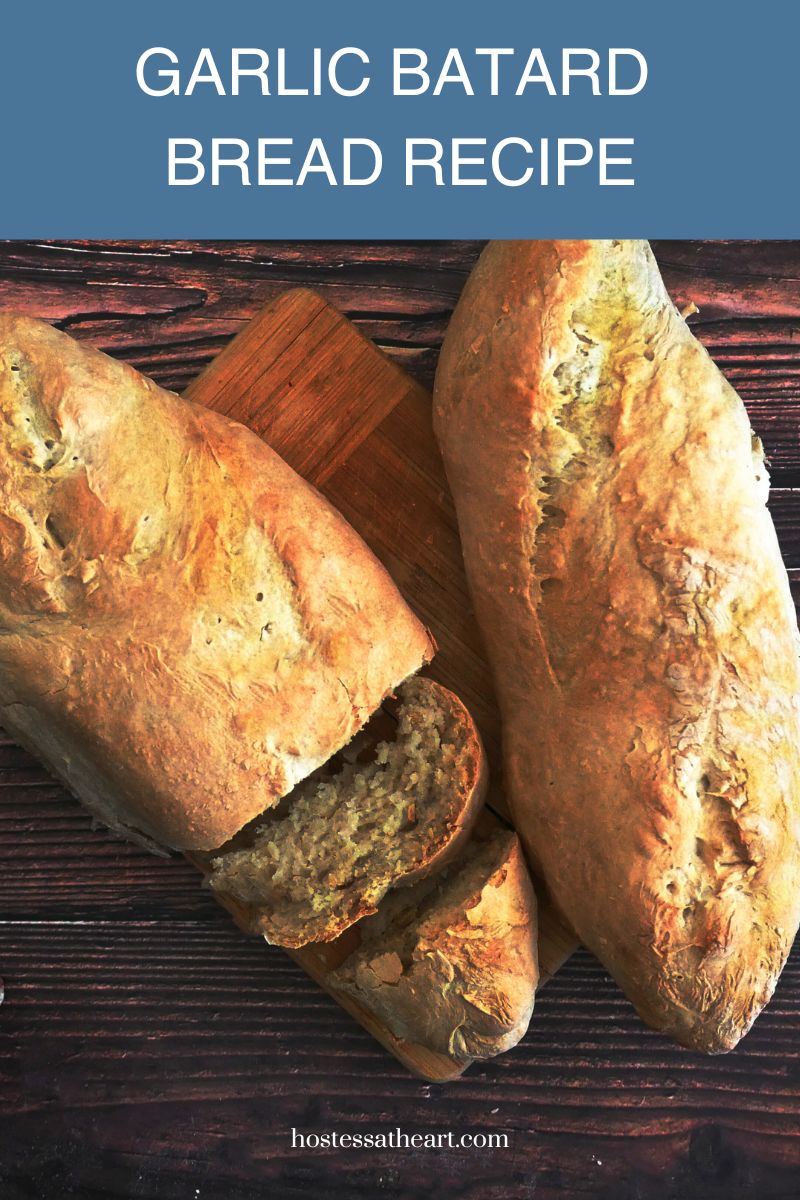
Garlic Batard Bread Recipe (Easy French Loaf)
This post may contain affiliate links. Please read our Disclosure Policy.
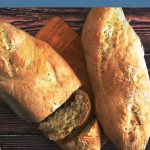
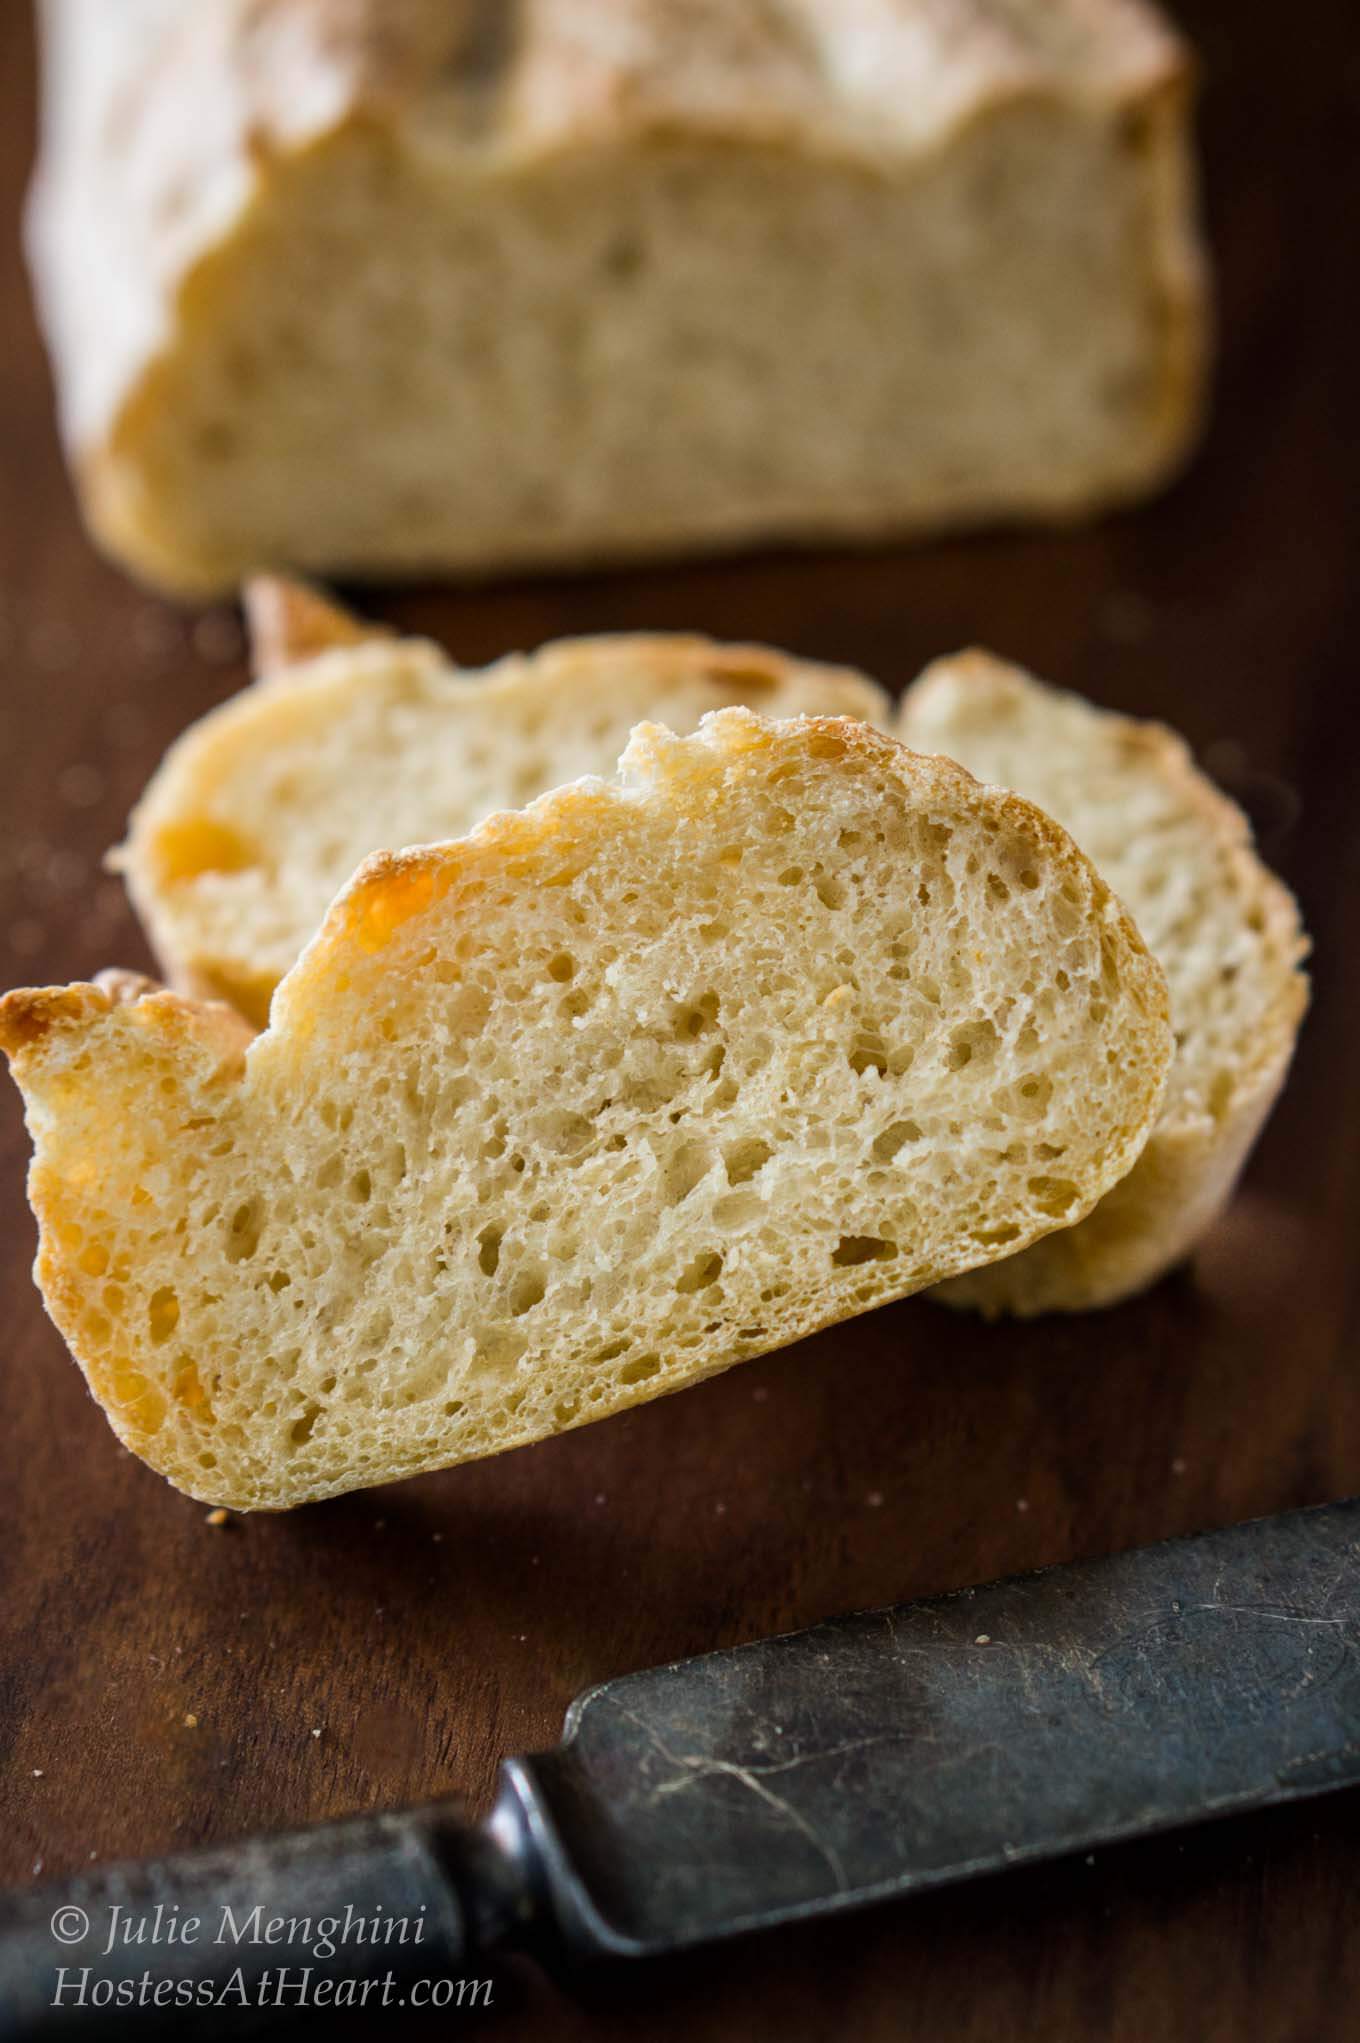
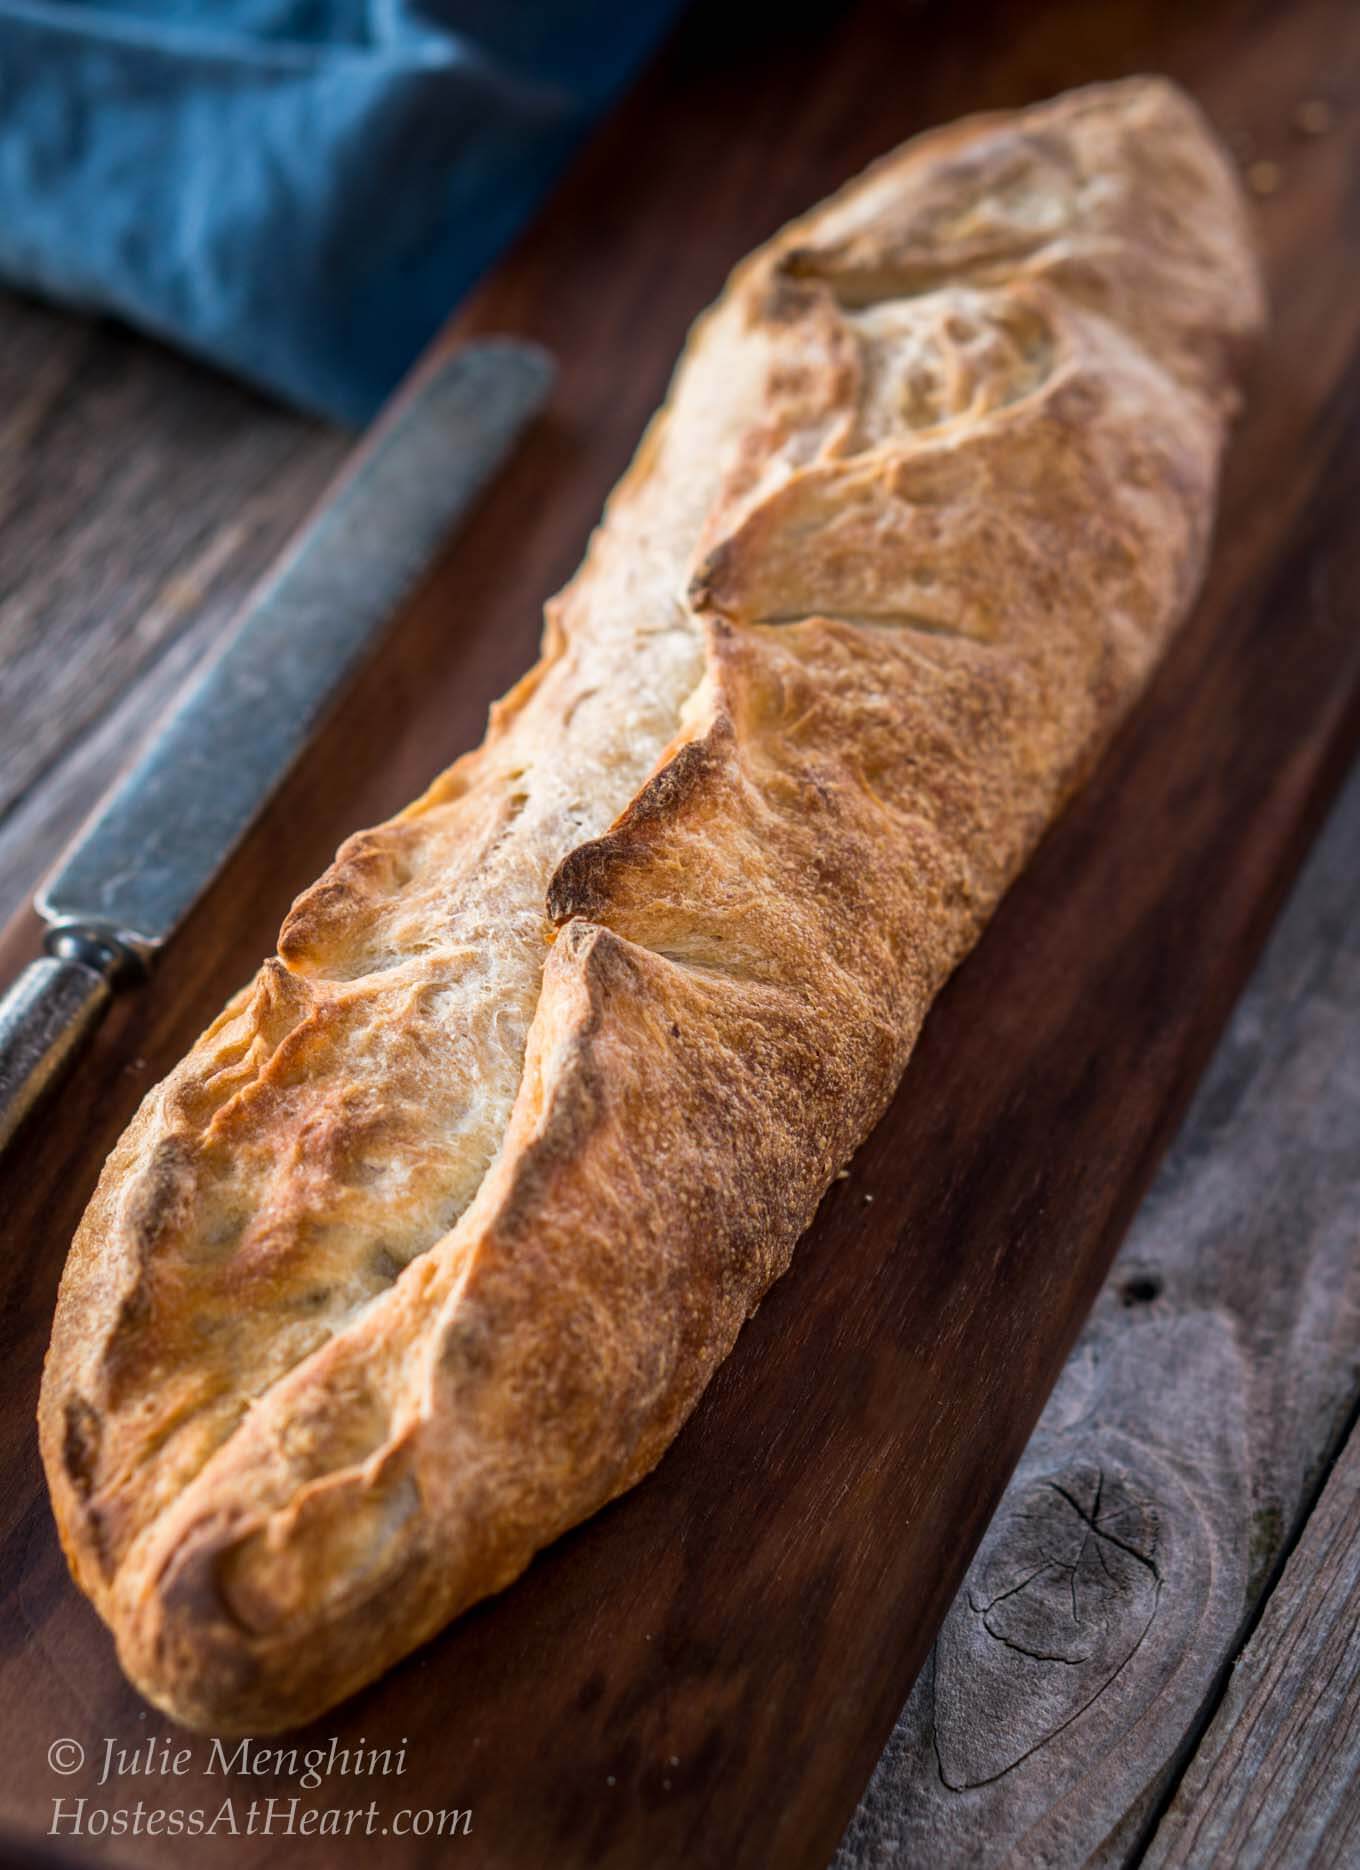
Our Garlic Batard Bread recipe makes an artisanal bread that looks like it came from a bakery but is just as easy to make at home. This French-style loaf of bread has a crunchy crust and a tender center with a smooth garlic flavor.
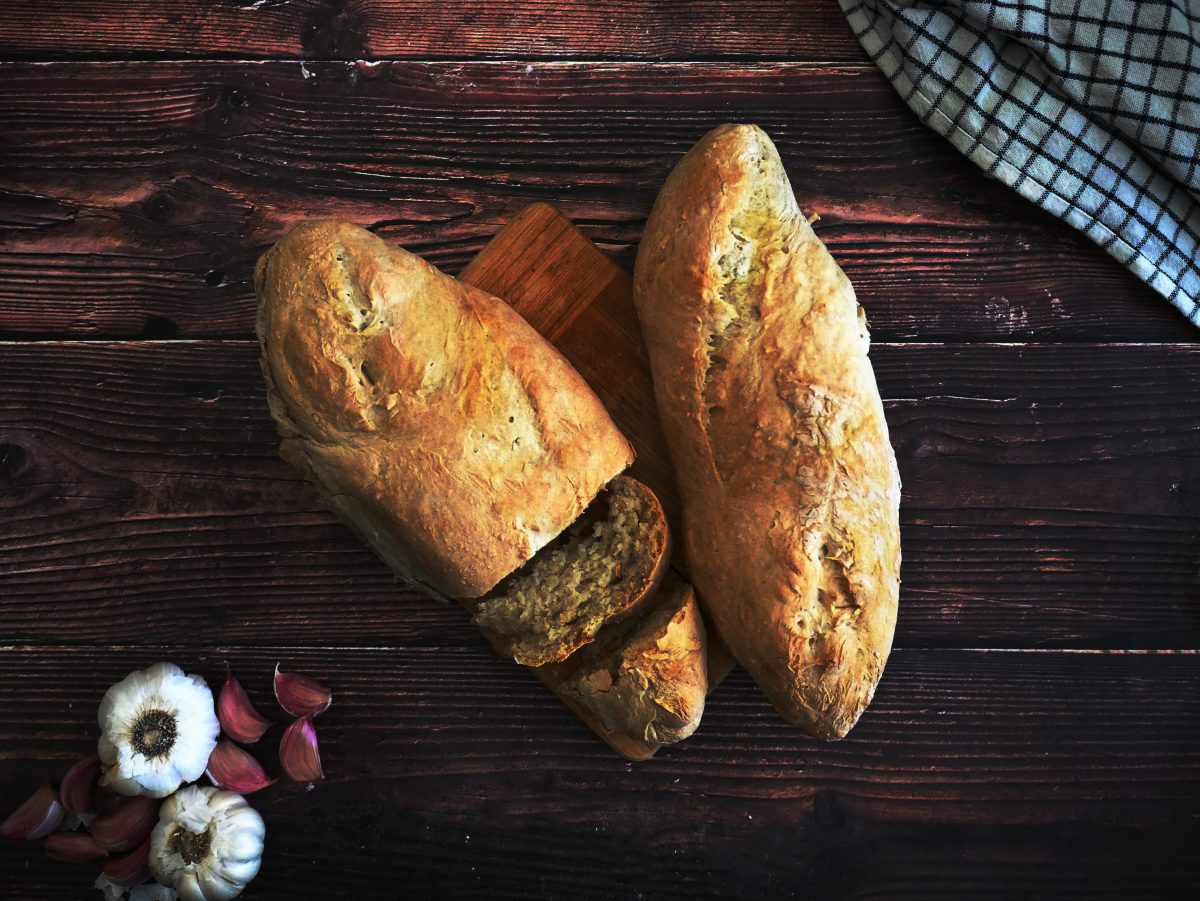
Our Easy French Batard Bread is a light crispy artisan bread that can take on the heartiest bowl or soup or elevate your charcuterie board. The mild garlic flavor makes it a delicious match for a plate of pasta. Let us show you how easy it is to create your own batard loaf.
Note: You need to start this bread the day before you want to eat it so it’s helpful to read through all of the instructions before you start. If you would rather bake French bread today, take a look at our French Bread Baguette recipe. It’s easy enough for the beginner.
What is Batard Bread?
Originally, French bakers shaped their bread into a baguette or boule (round) shape. In the 19th century, a baker came up with a loaf shape. It was referred to as a Bâtard, pronounced Ba taar and means “Bastard”.
Is a Batard a Baguette?
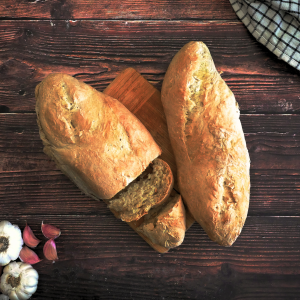
While both are French Breads, A batard is like a baguette but has a rounder middle and tapered ends like a torpedo.
Hostess At Heart participates in affiliate programs. As an Amazon Associate, I earn a commission from qualifying purchases. Please refer to my disclosure page for more information.
Batard Bread Ingredients
Bread Flour. I used European-Style Artisan Bread Flour Bread flour has a higher protein content than all-purpose flour which creates an airy chewy texture to batard bread. You can substitute 1:1 with all-purpose flour. The texture may change but it will still be good.
Instant yeast. Check the expiration date and that the yeast is labeled as instant or rapid-rise yeast. Expired yeast may not rise properly and unlike active dry yeast, it doesn’t need to be activated in warm liquids.
Water. Filtered water is what we recommend for areas that are highly treated or chlorinated. It’s been said that such treatment can have an effect on the yeast but I haven’t experienced this personally.
Garlic. One fresh bulb.
How to make Batard Bread
Step 1: Make a Poolish
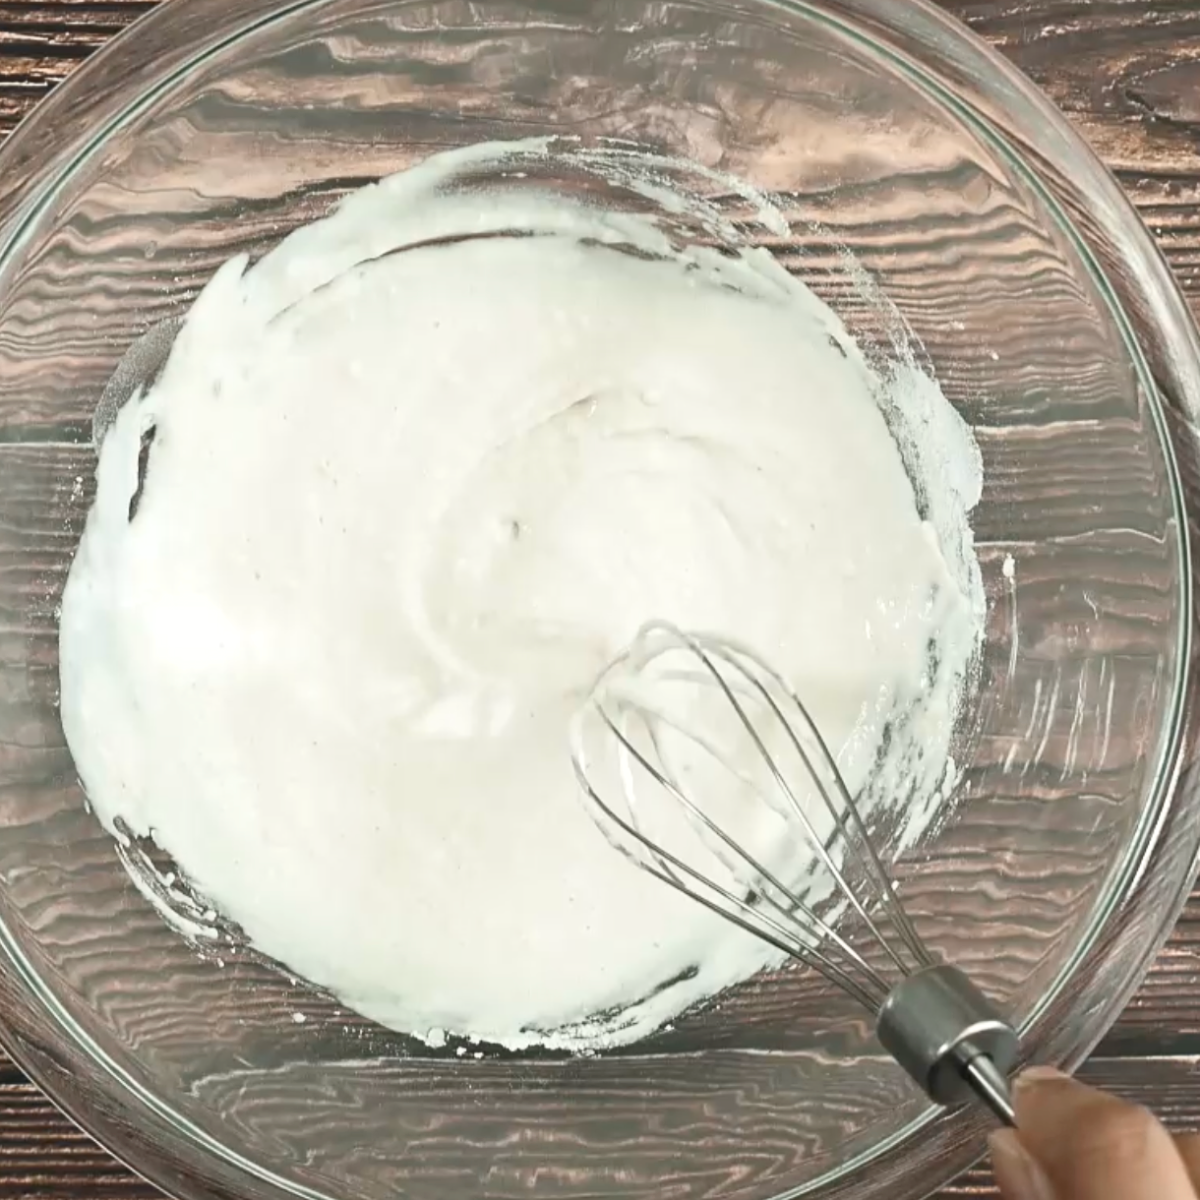
The night before you bake the bread, you will make a poolish by combining flour, water, and a pinch of yeast.
 Add poolish ingredients
- Mix flour, water, and yeast
- Active Poolish
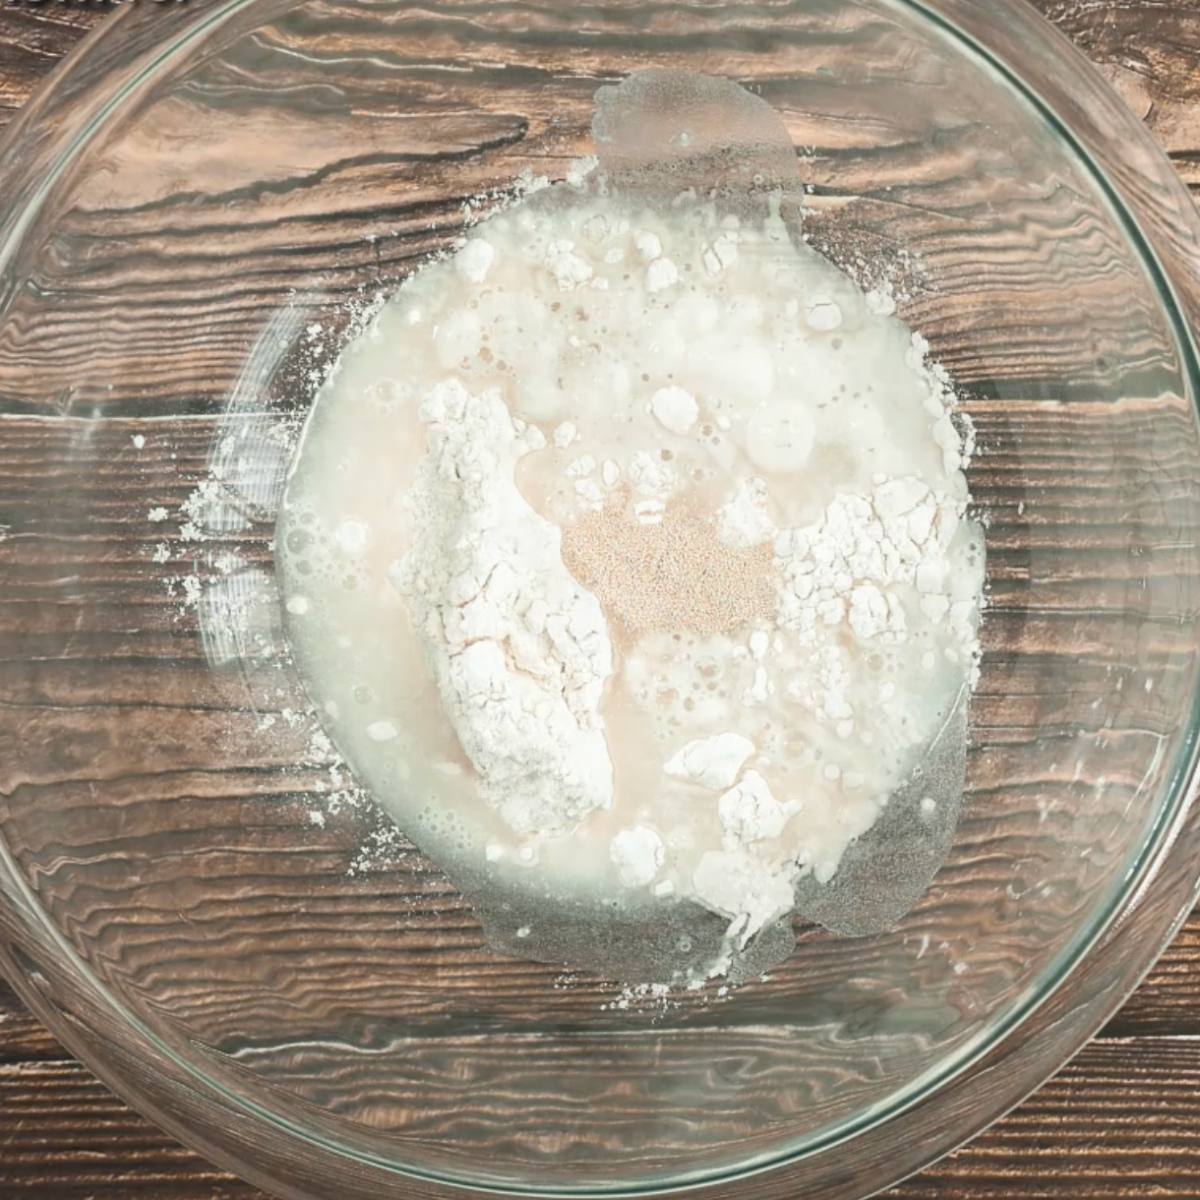
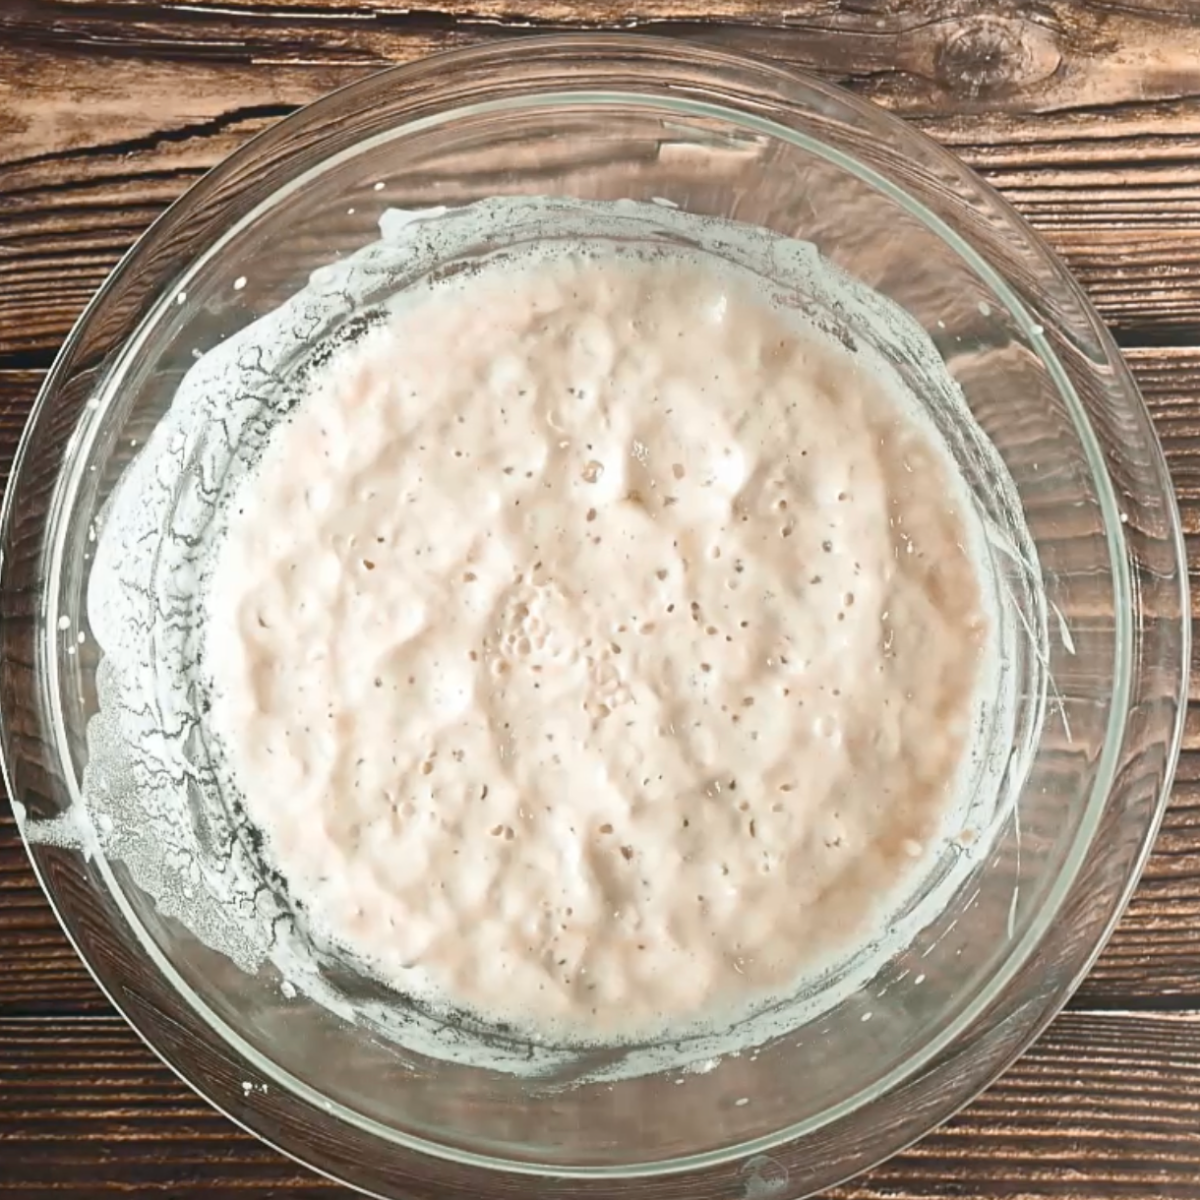
What is a Poolish? A poolish is a “preferment” somewhat like a sourdough starter except that it’s made with commercial yeast, not wild yeast. It’s often used in French bread to improve flavor and texture. Like sourdough, the poolish needs time to ferment at room temperature. We recommend 16 hours. As you can see, our poolish was very active before we proceeded.
Step 2: Roast the Garlic Bulb

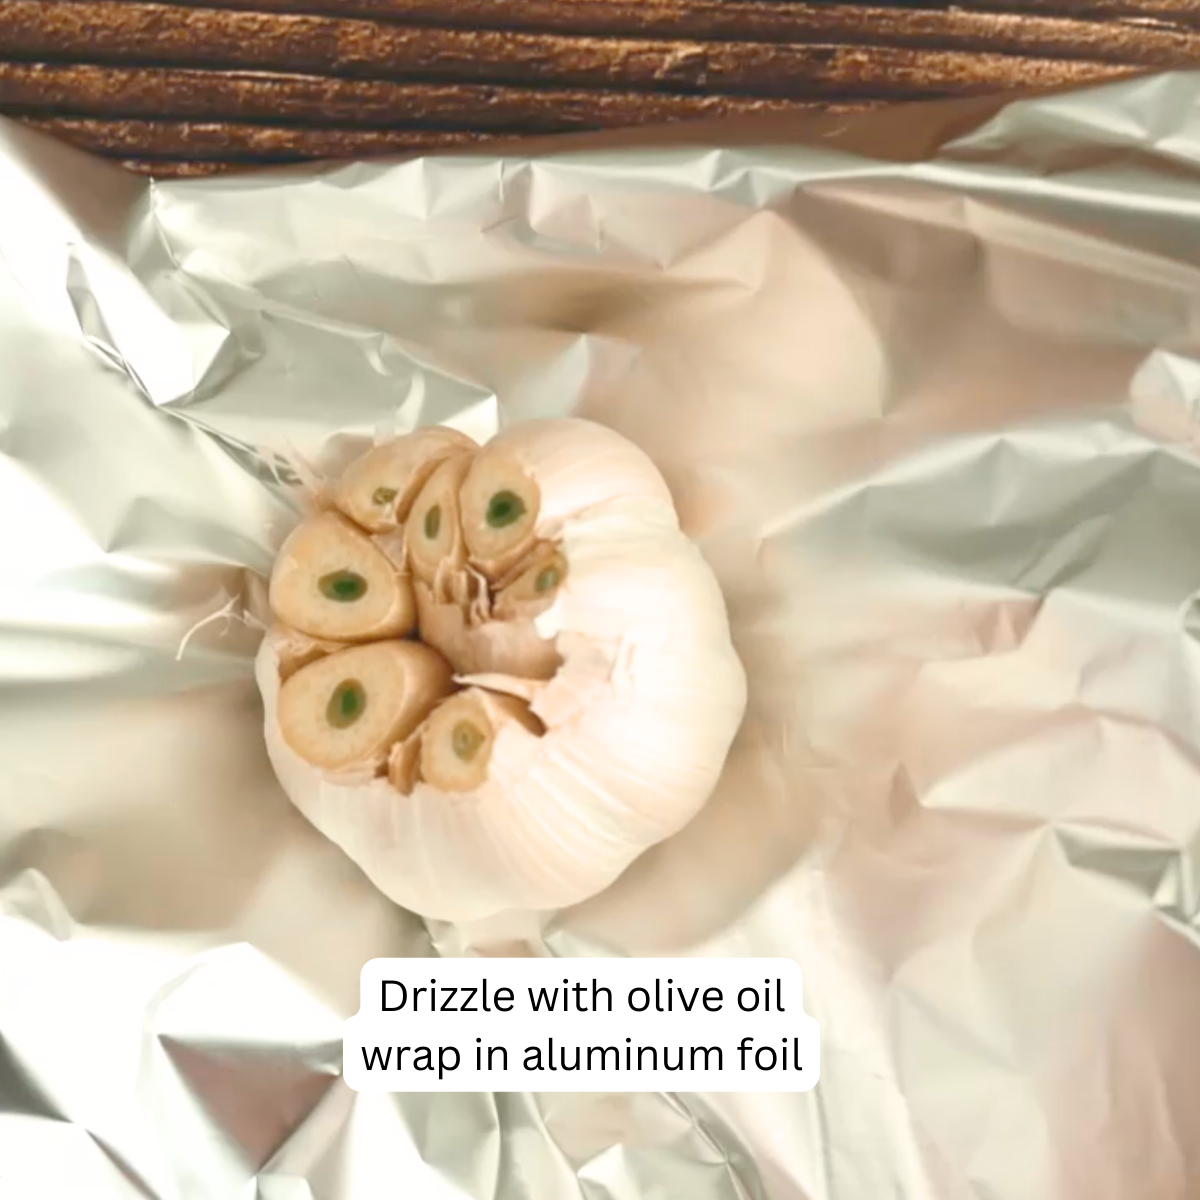
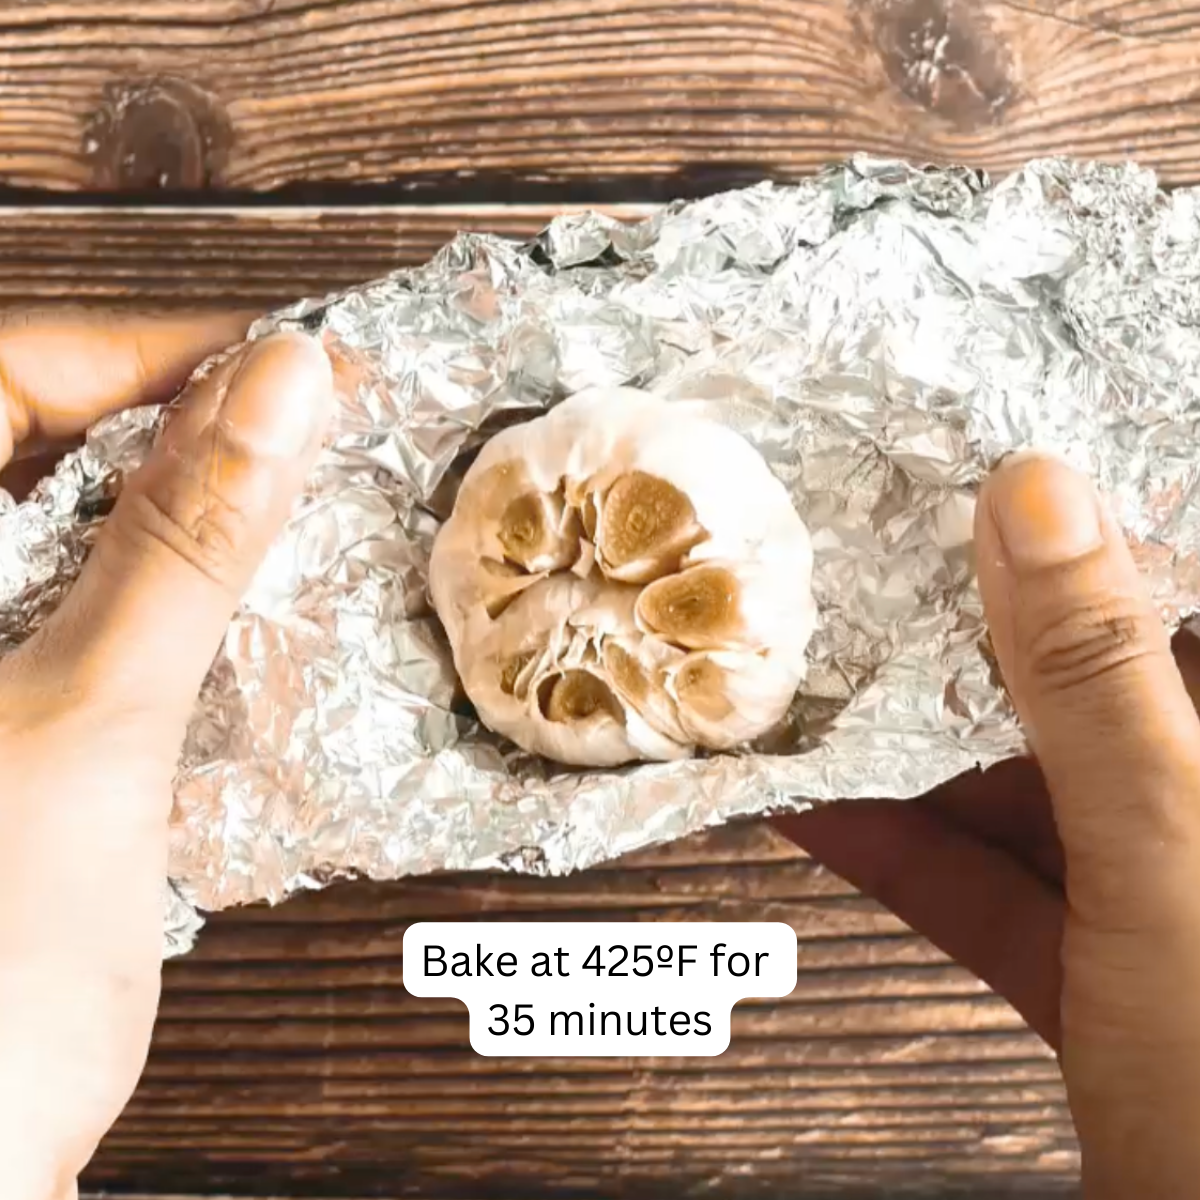

Cut the top off of the garlic and set it in a piece of aluminum foil. Drizzle it with olive oil and wrap it completely in the foil. Set it on a pie plate or baking sheet and bake. Let it cool enough to handle it.
Step 3: Make the bread dough
This isn’t hard but it may look complicated because of the steps. Just take them on one at a time and your Garlic Batard Bread will be a success.
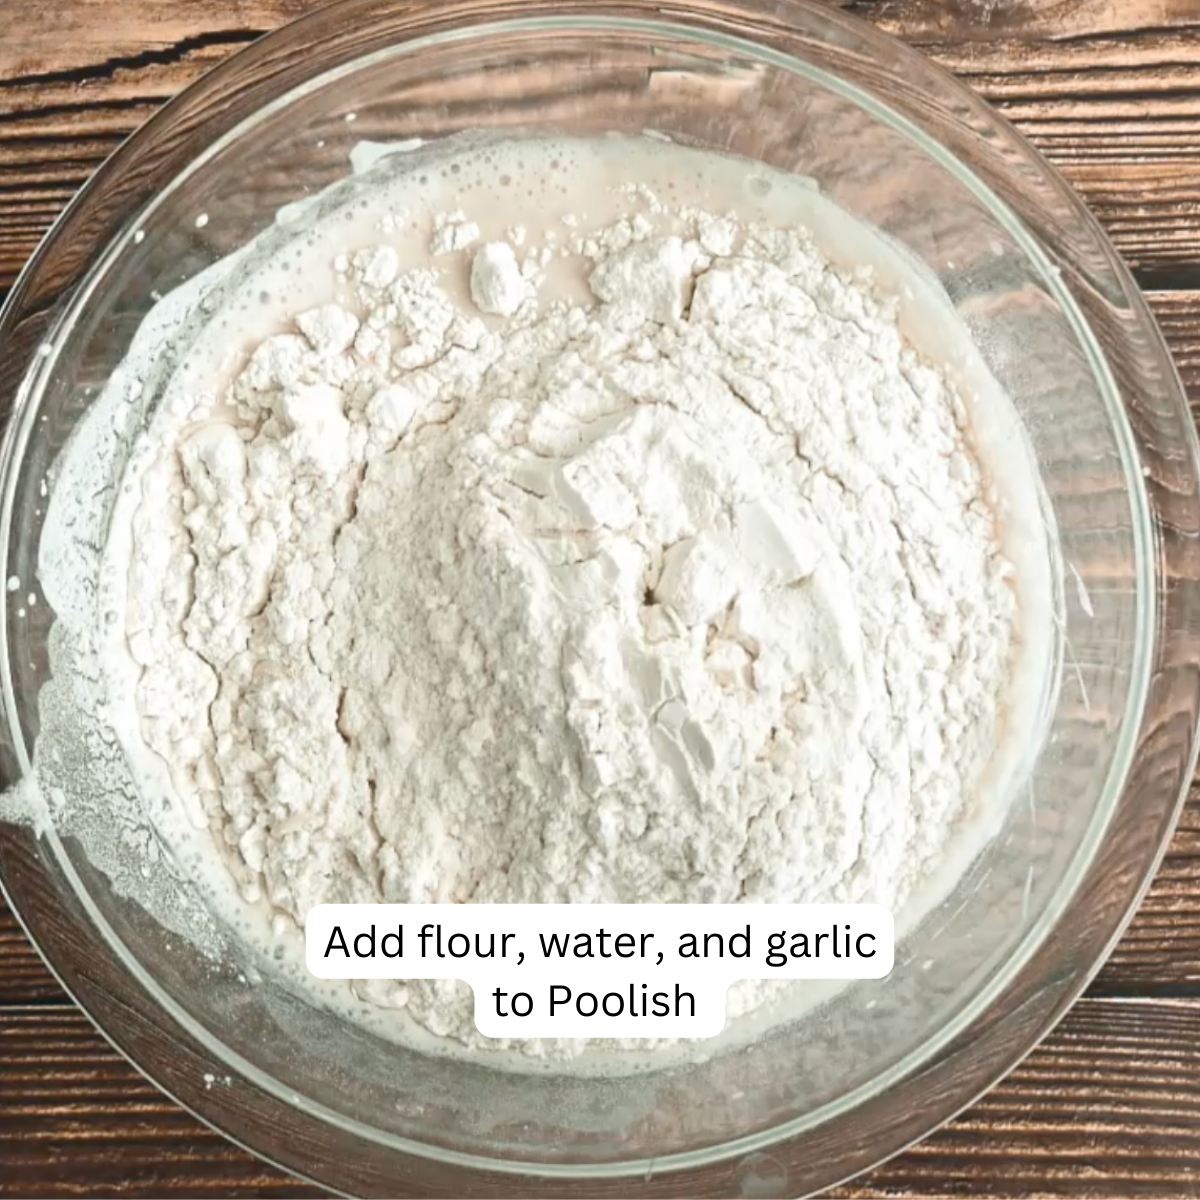
On the day of baking, add the water flour and chopped roasted garlic to the poolish and stir until combined. Rest for 20 minutes.
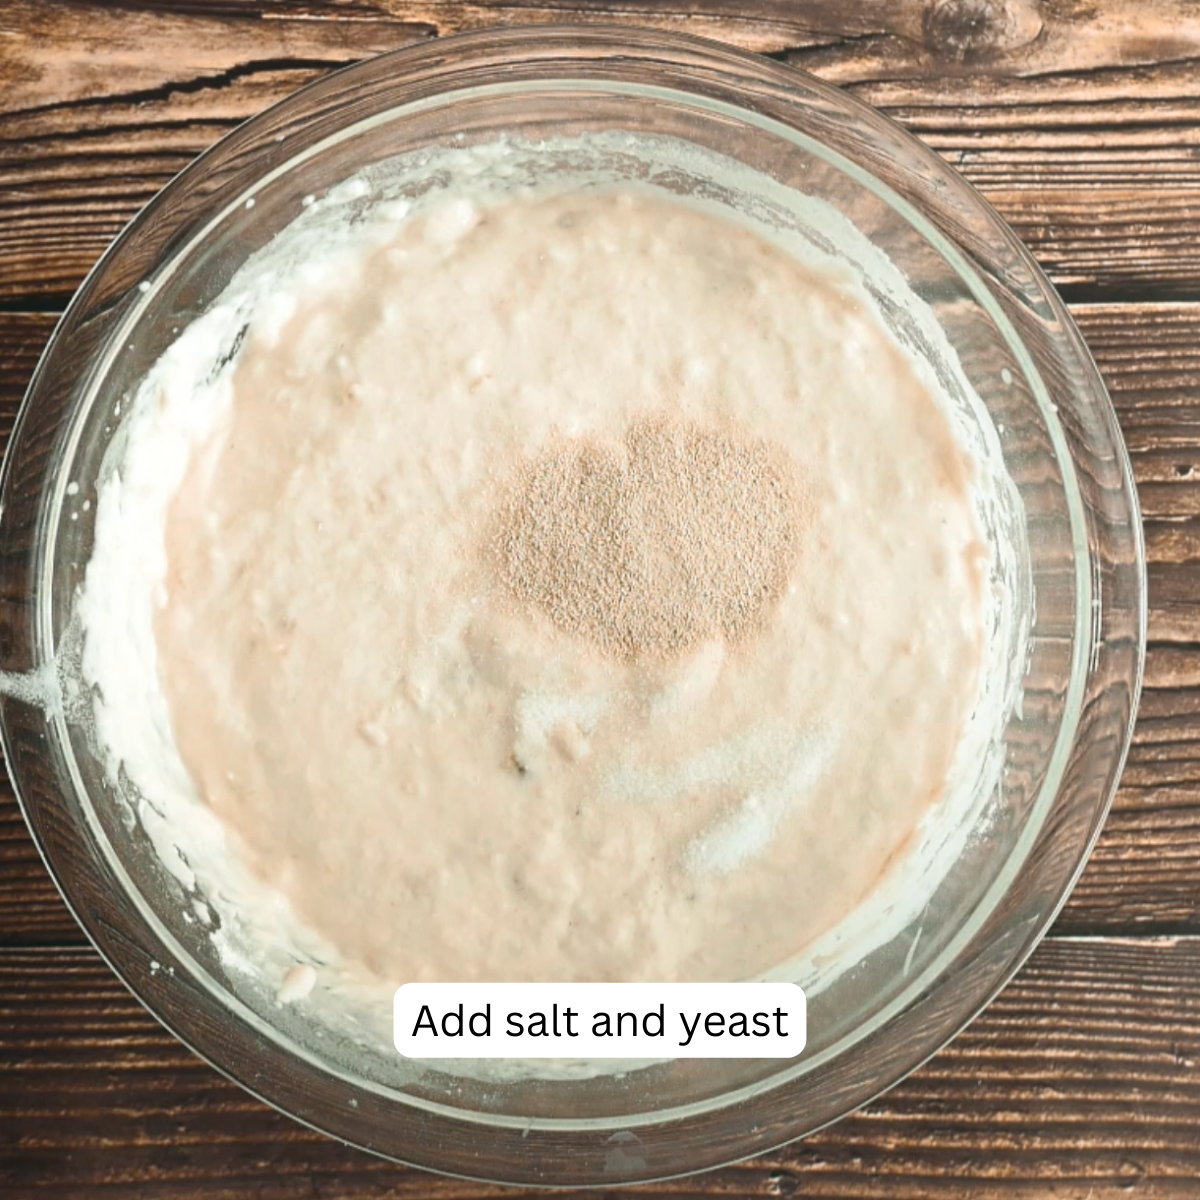
Add the salt and yeast. Knead the dough for 5 to 7 minutes or until smooth.
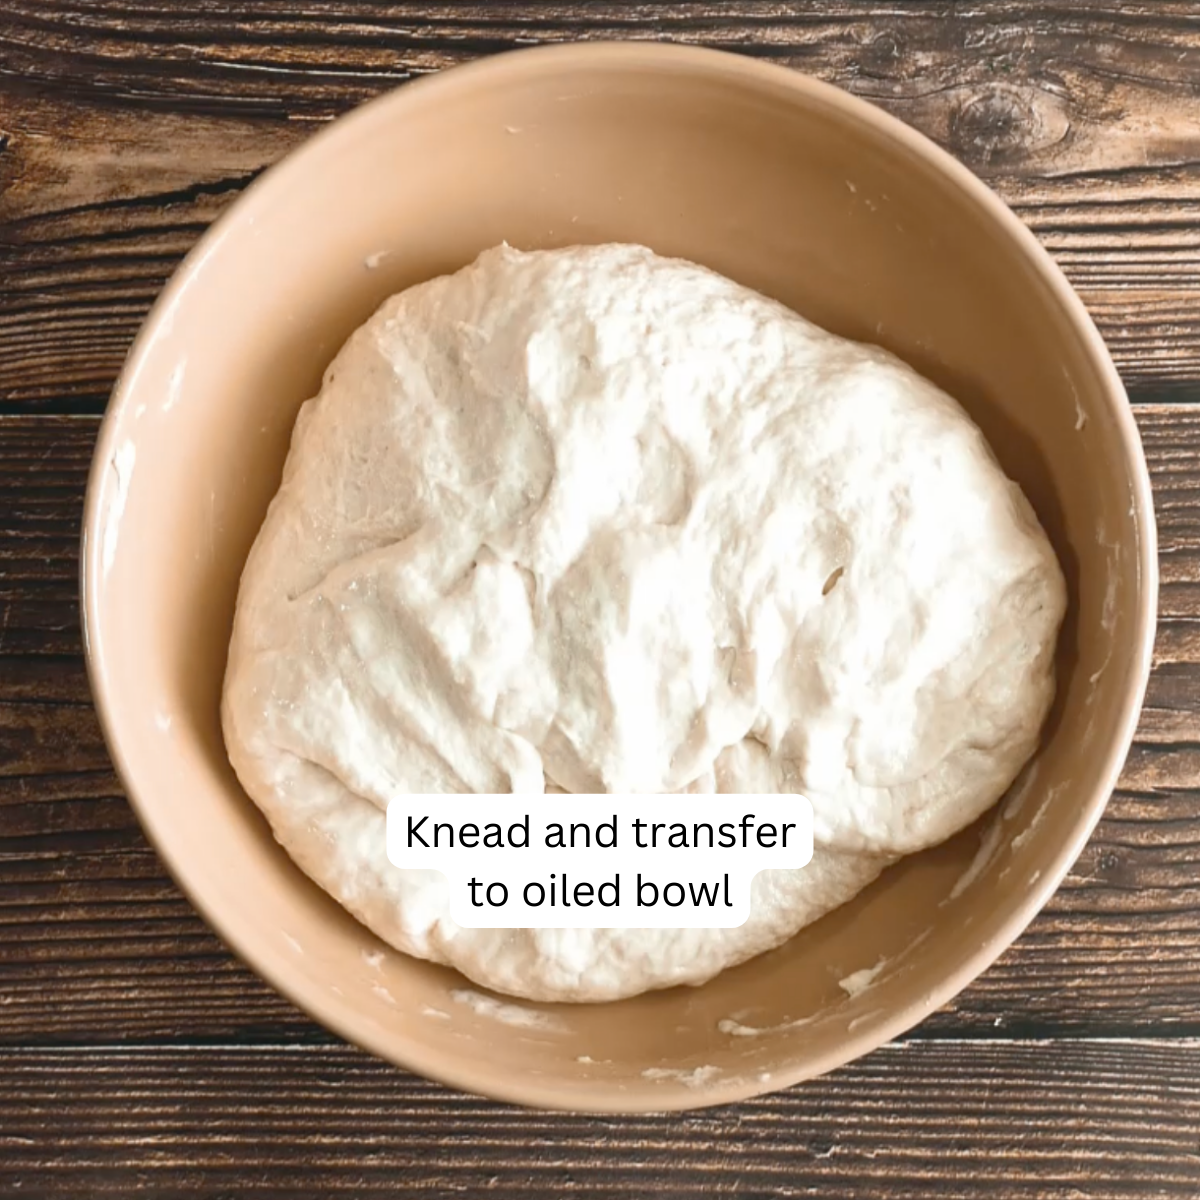
Place the dough into a lightly oiled large bowl and cover it with plastic wrap or a tea towel.
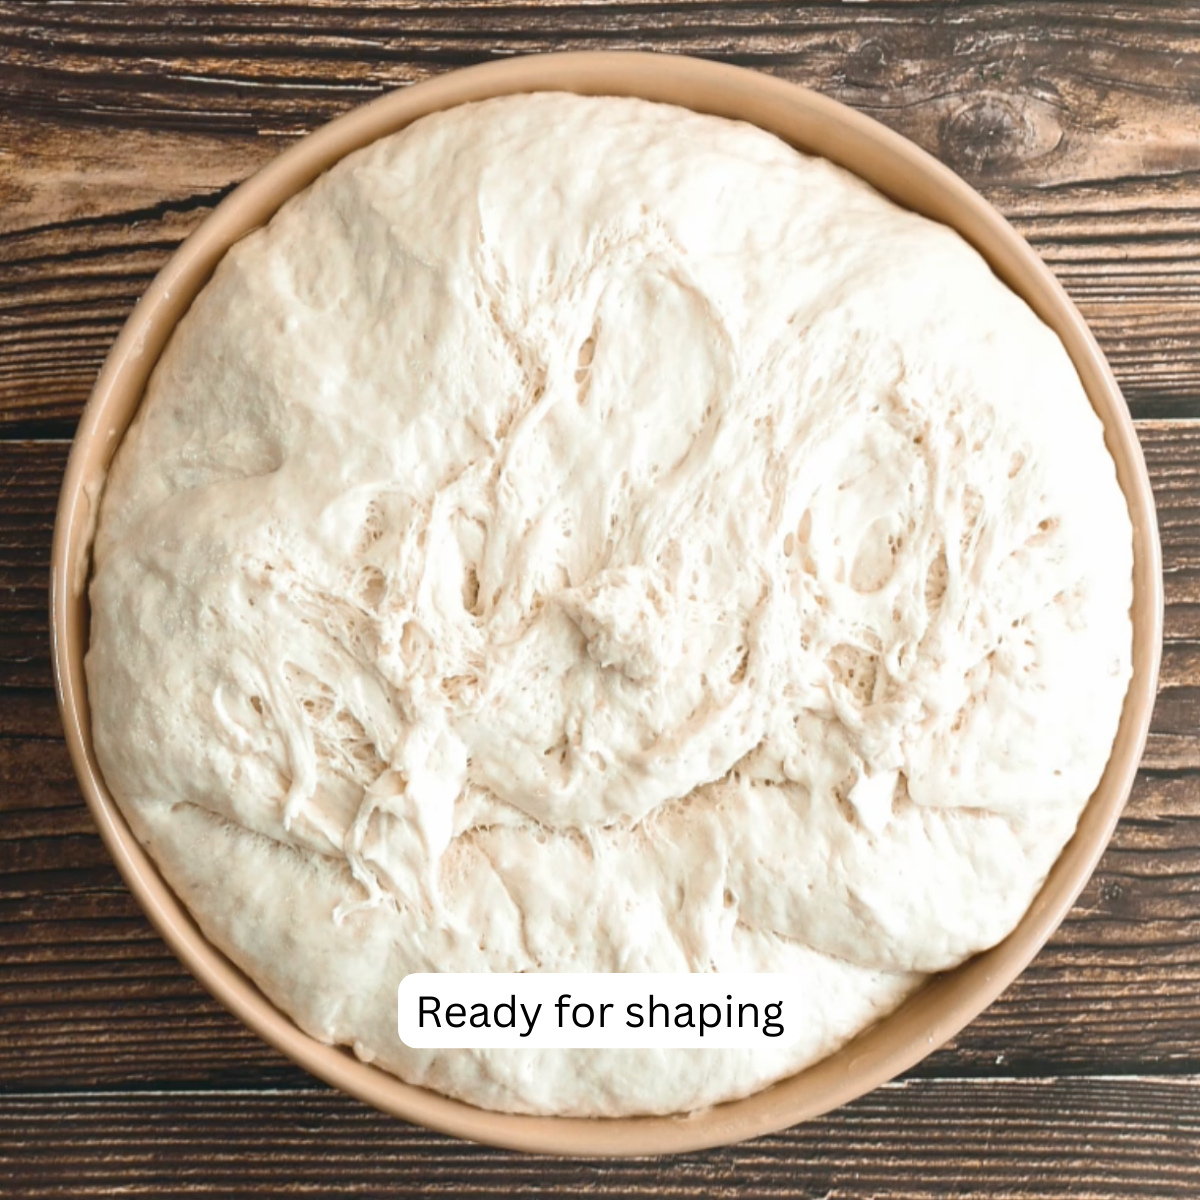
Place the dough in a warm place for 90 minutes. Every 30 minutes fold the four sides of the dough into the middle and turn the dough over each time. This will help strengthen the dough for shaping.
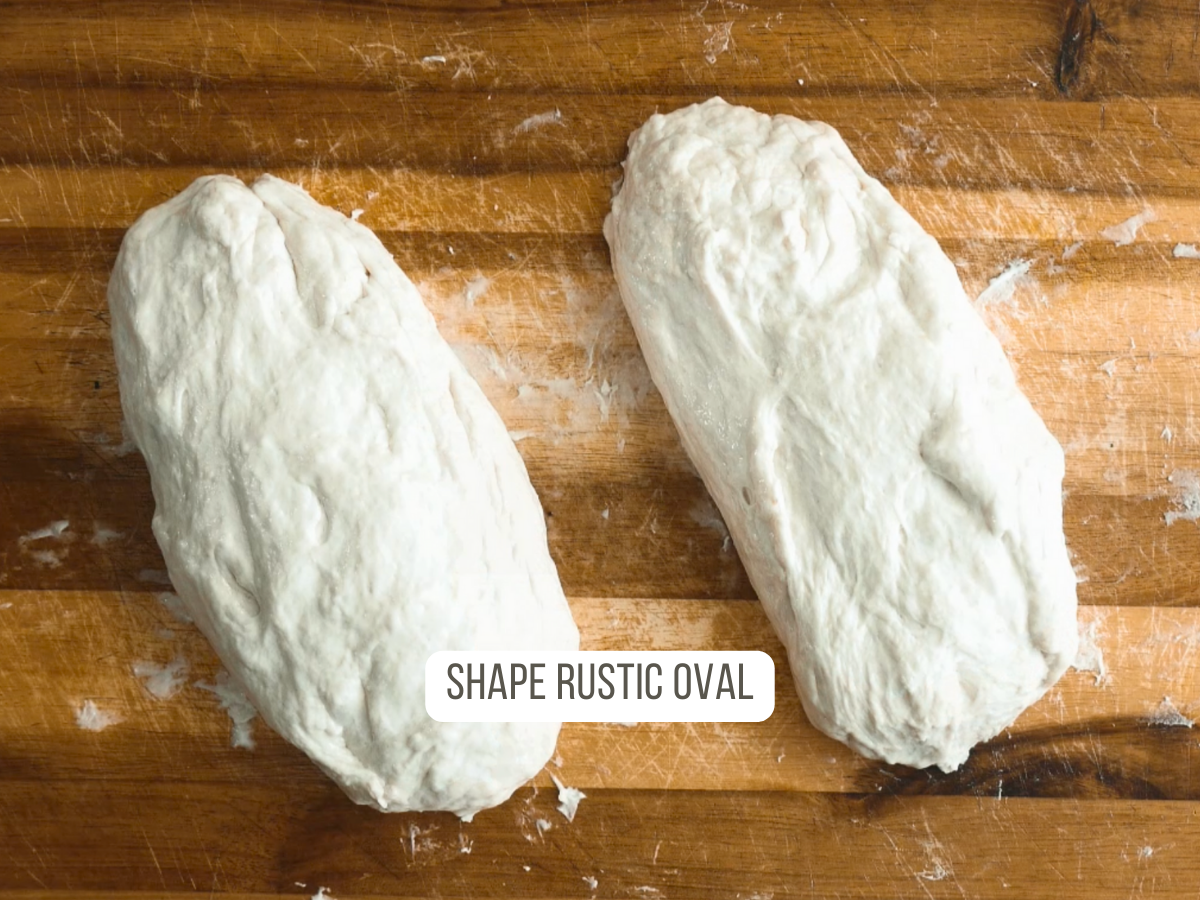
Remove the dough from the bowl and separate it into two roughly shaped oval pieces using a bench scraper or sharp knife. Cover the dough with a clean kitchen towel. Let the dough rest for 15 to 20 minutes.
Step 4: How do you Shape a Batard?
The final shape of the Batard looks somewhat like a baguette with tapered ends or like a torpedo. As you can see in our video, first we shape it in an oblong shape.
Want to save this recipe?
I'd like to receive more tips and recipes from Hostess At Heart!
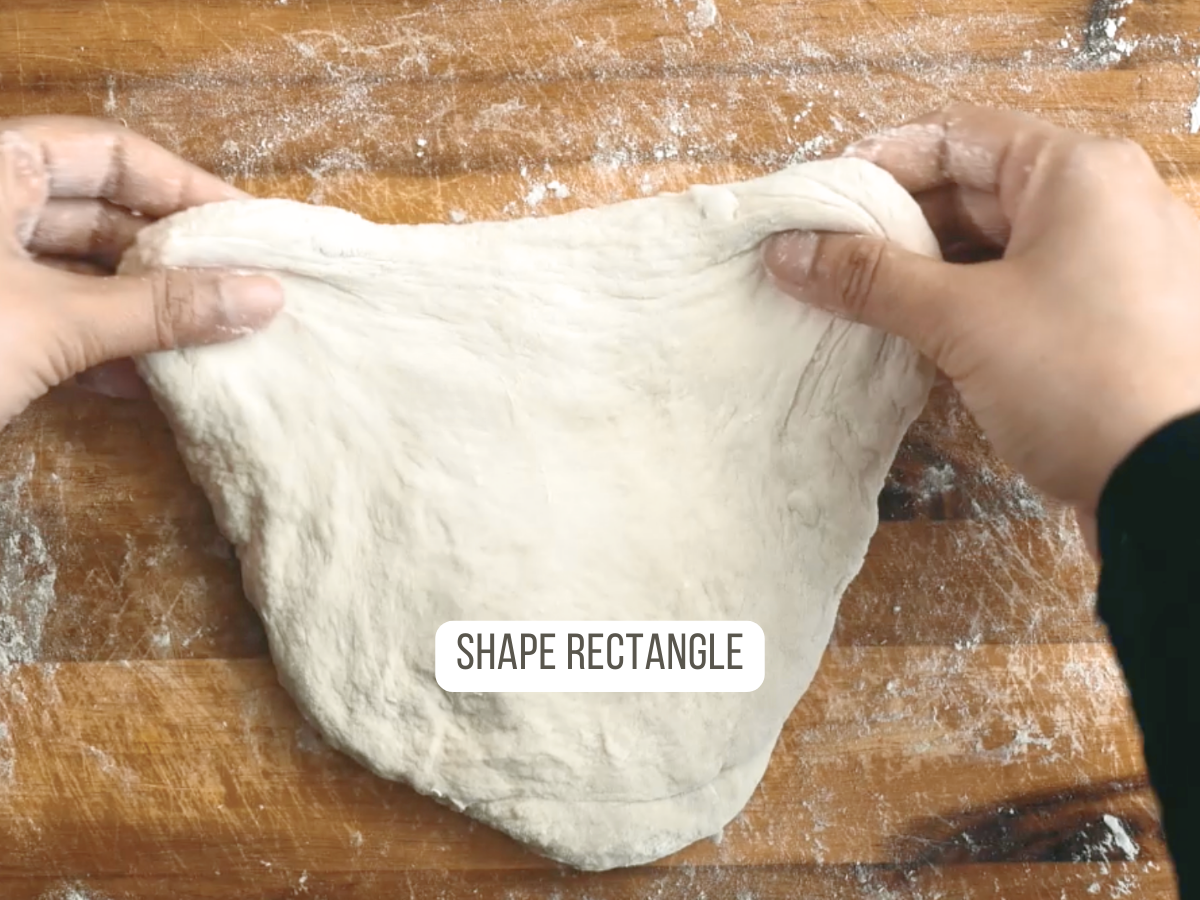
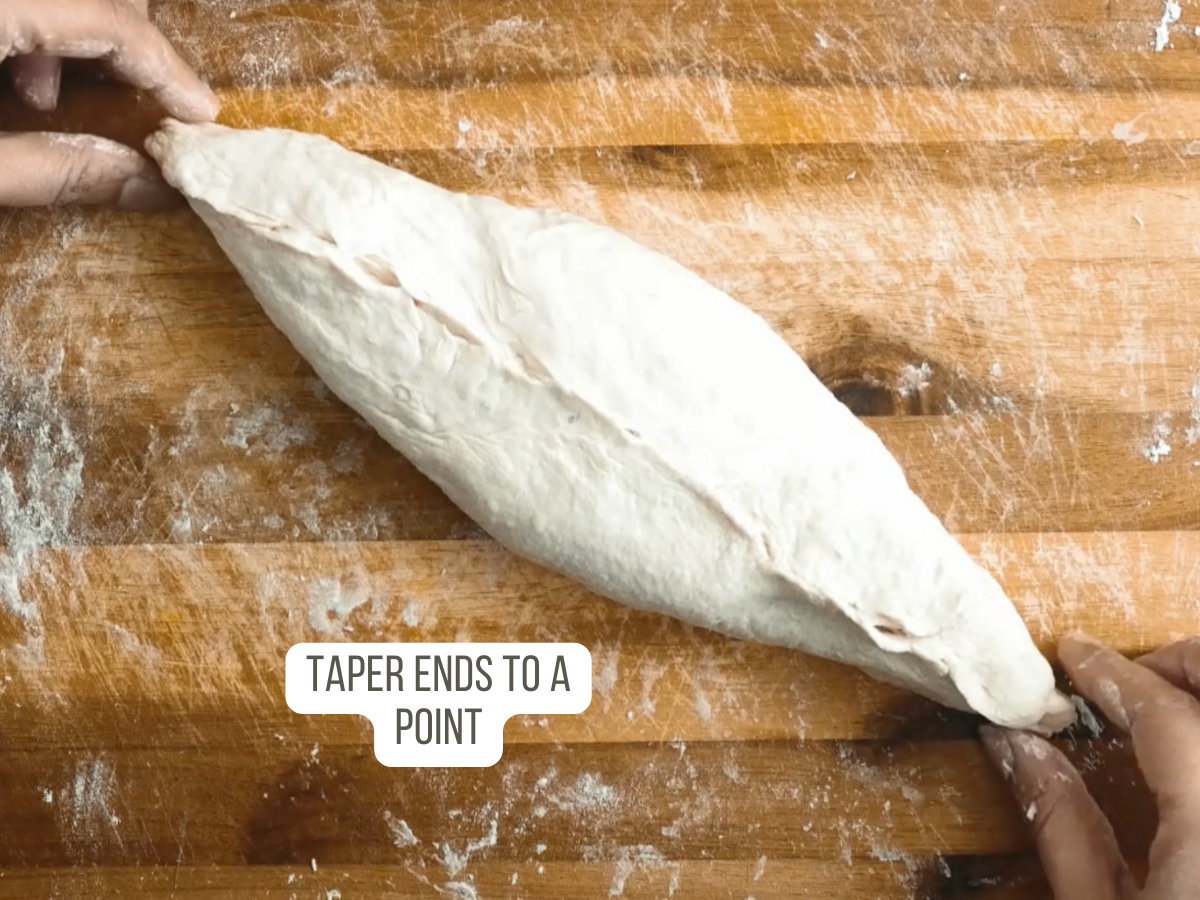
- For the final shaping, we turned our dough out onto a lightly floured surface and shaped it into a rough rectangle.
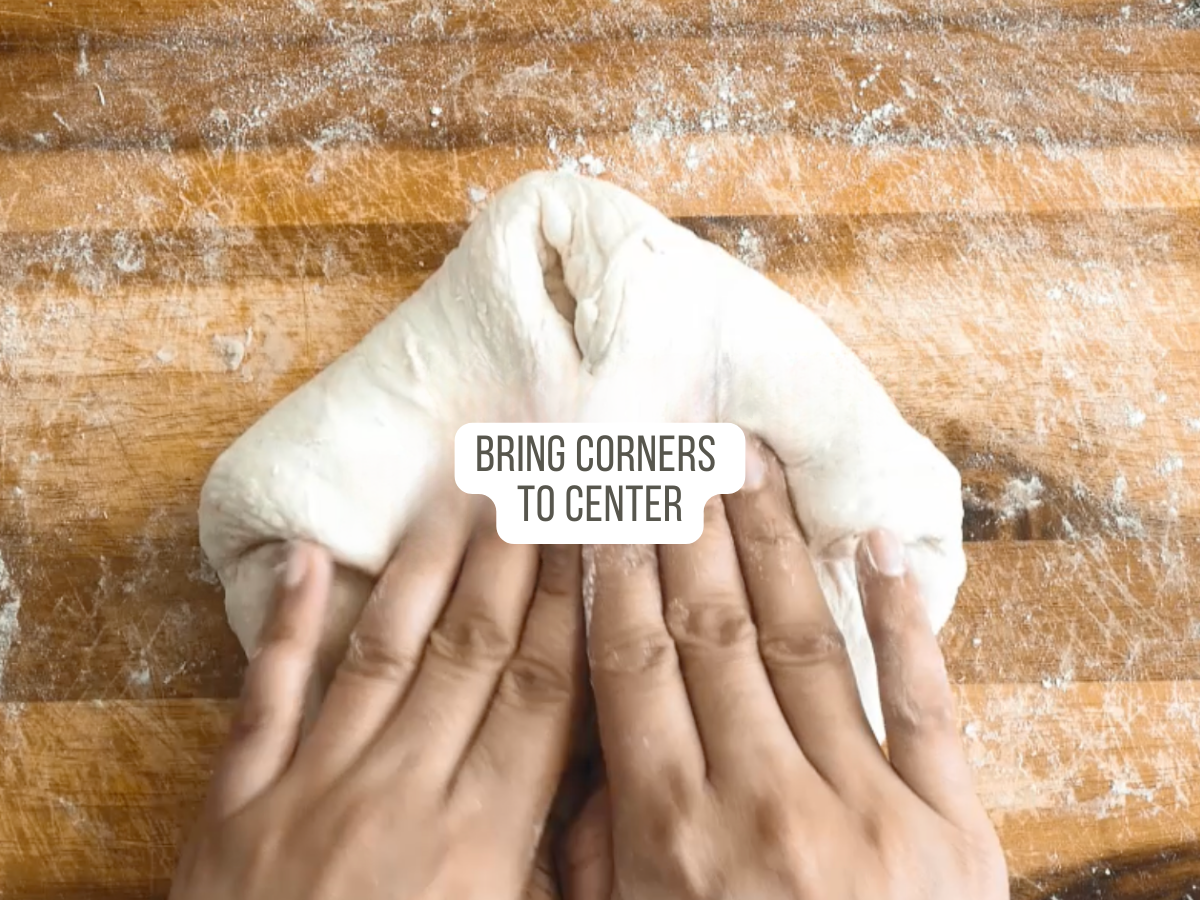
- Taking hold of the upper corners, bring them to the center leaving the top at a point (like you would when making a paper airplane).
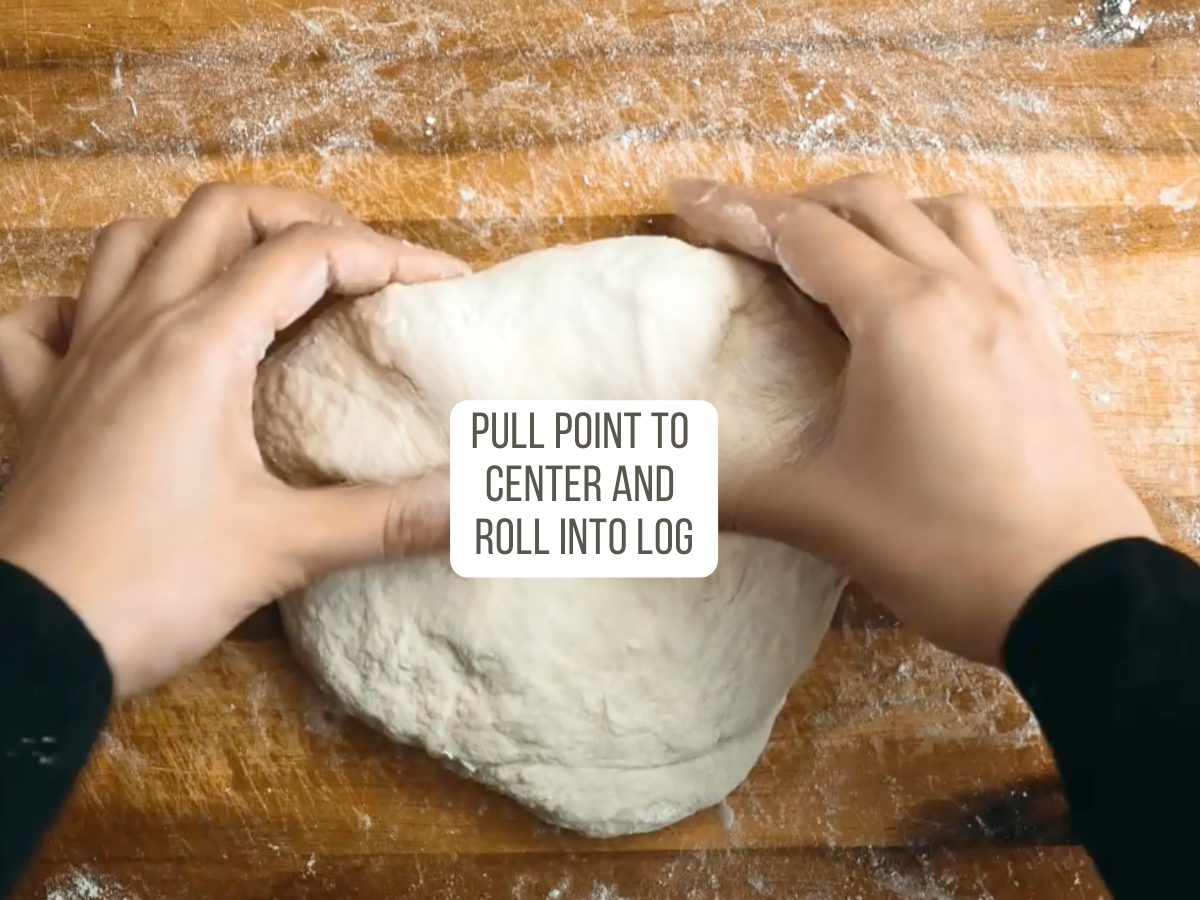
- Fold the point to the center and then roll it into a log creating surface tension and tapering the ends to a point to imitate a torpedo loaf.
Place the shaped dough on a parchment paper-lined baking sheet. Cover the dough for the final proof, approximately 2 hours or not quite double. It’s important to note that the dough not be over-proofed because it will lose its oval shape.
Step 5: Prepare and Bake
- This bread must be baked in a hot oven so I suggest giving it plenty of time to preheat. We also baked our batard on a baking stone instead of the baking sheet and placed it in the oven while the oven was preheating.
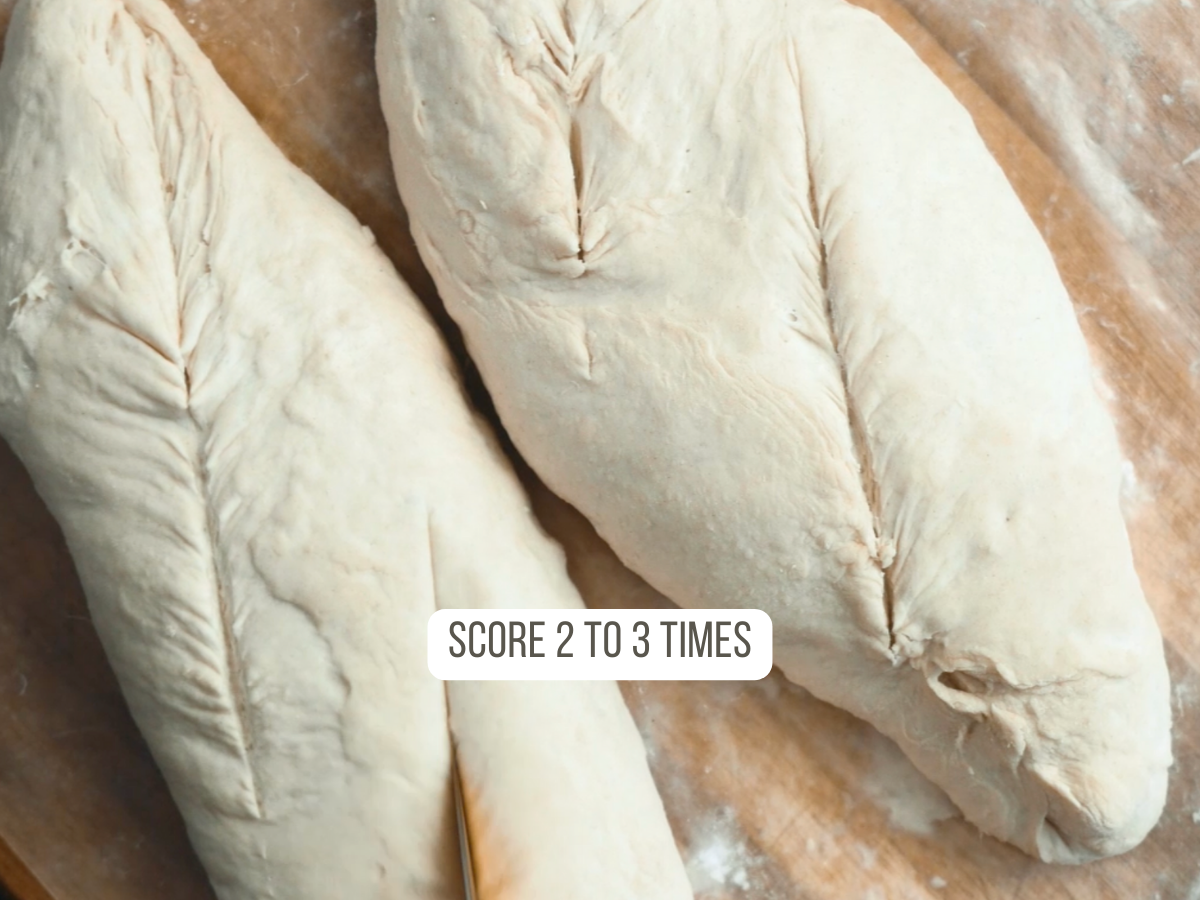
- Score the top of the dough 2 to 4 times diagonally with a sharp knife or razor blade.
- We found it easier to just slide the batard loaves onto the hot baking stone using the parchment paper. Alternatively, you can bake the bread on a baking sheet.
- Spritz the loaves of bread with a mist of warm water which will give you that crispy artisanal crust.
Step 6: Cool
Once your delicious bread is golden brown and reaches a temperature of 190F, turn the oven off, crack the oven door open (I use a wooden spoon), and let the bread cool.
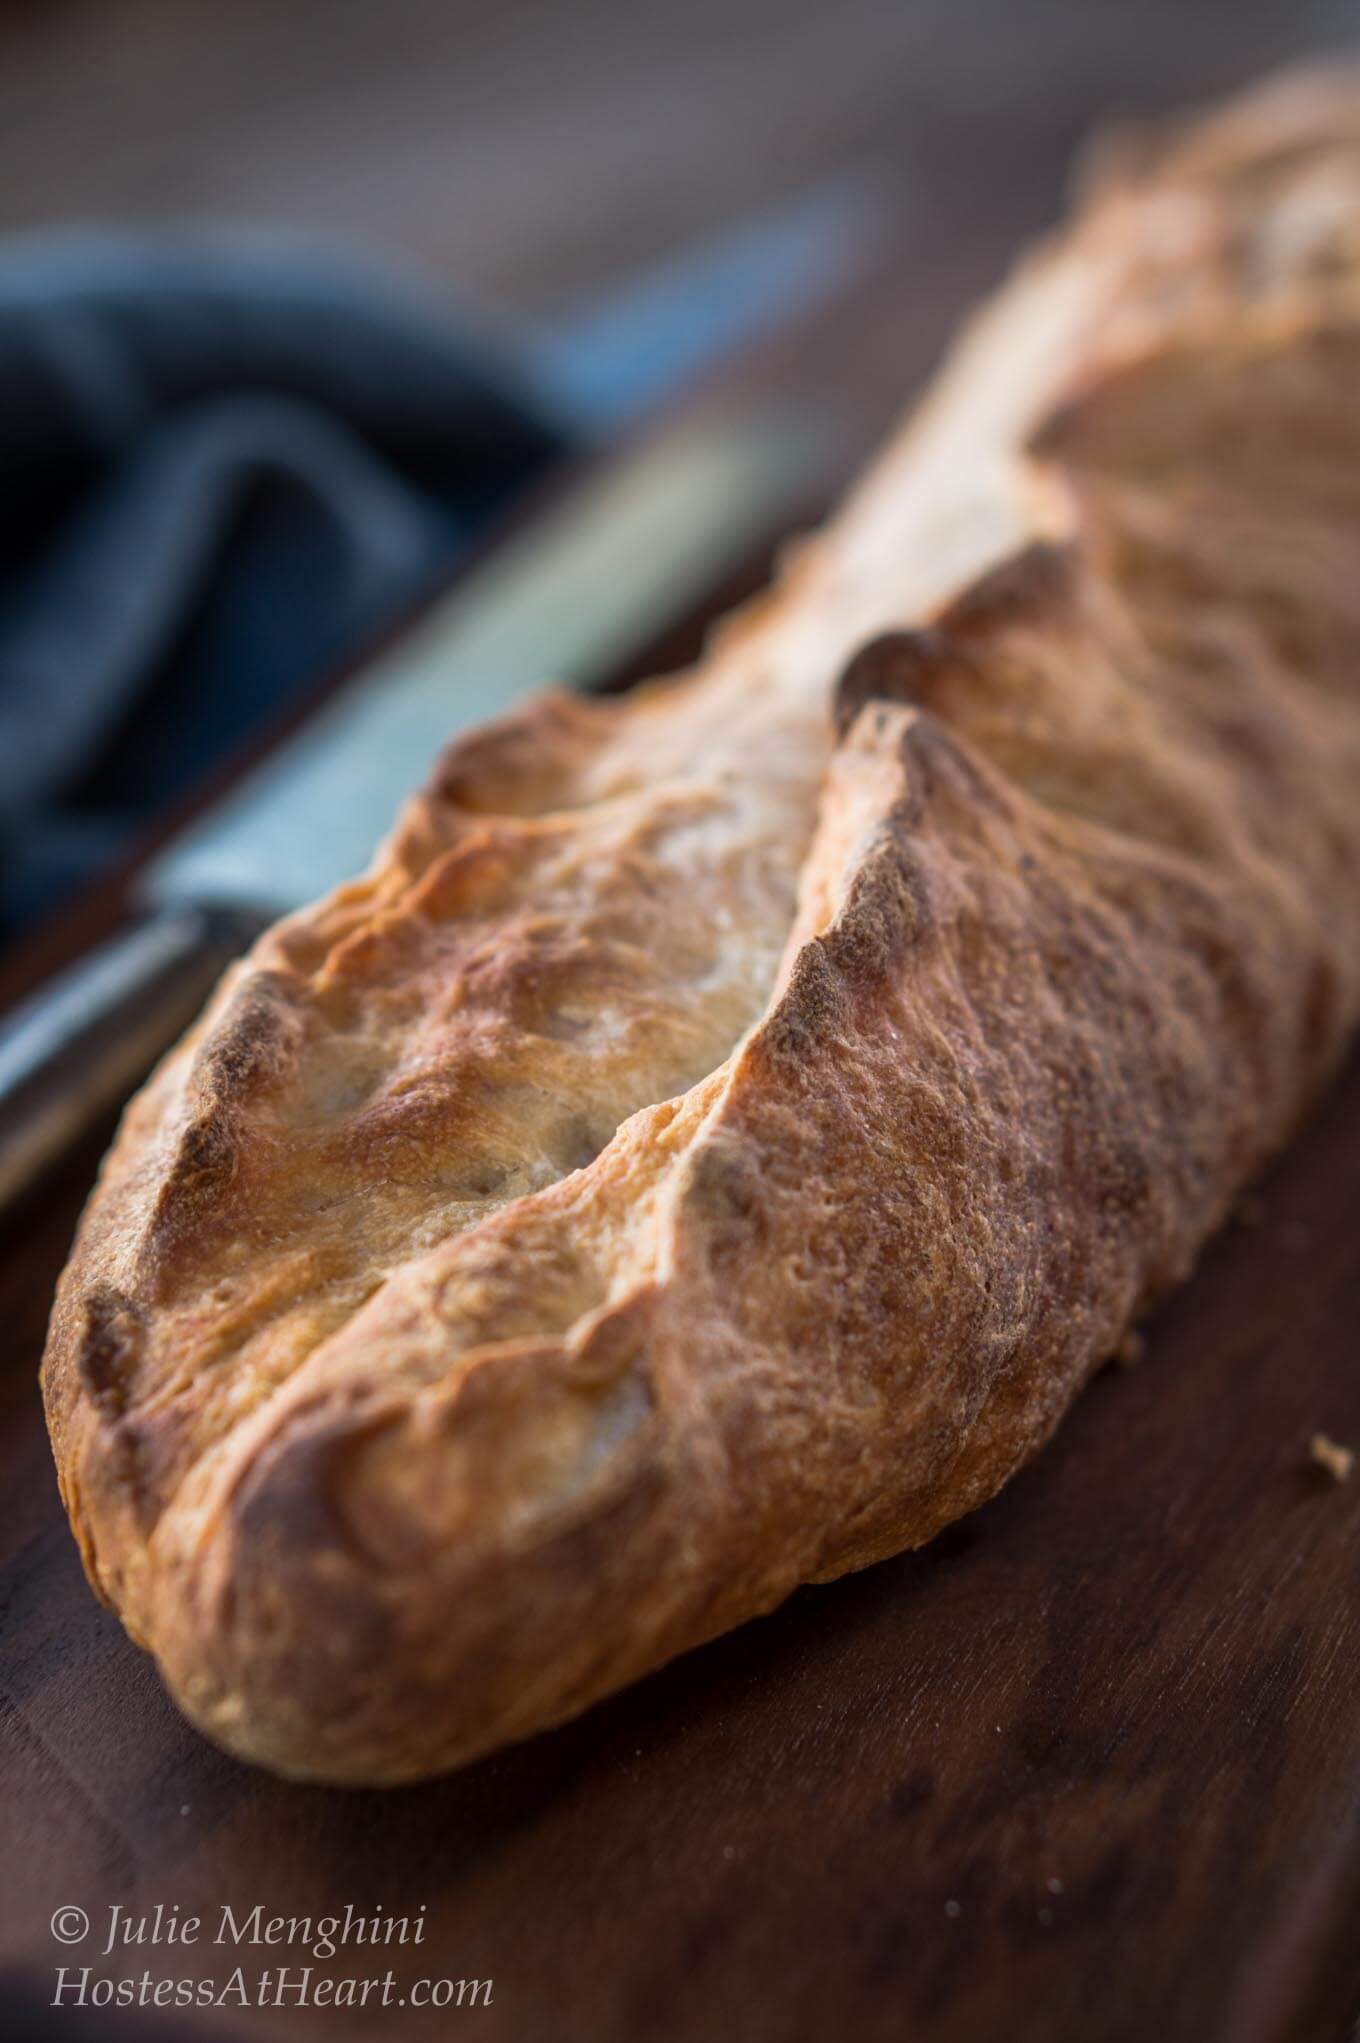
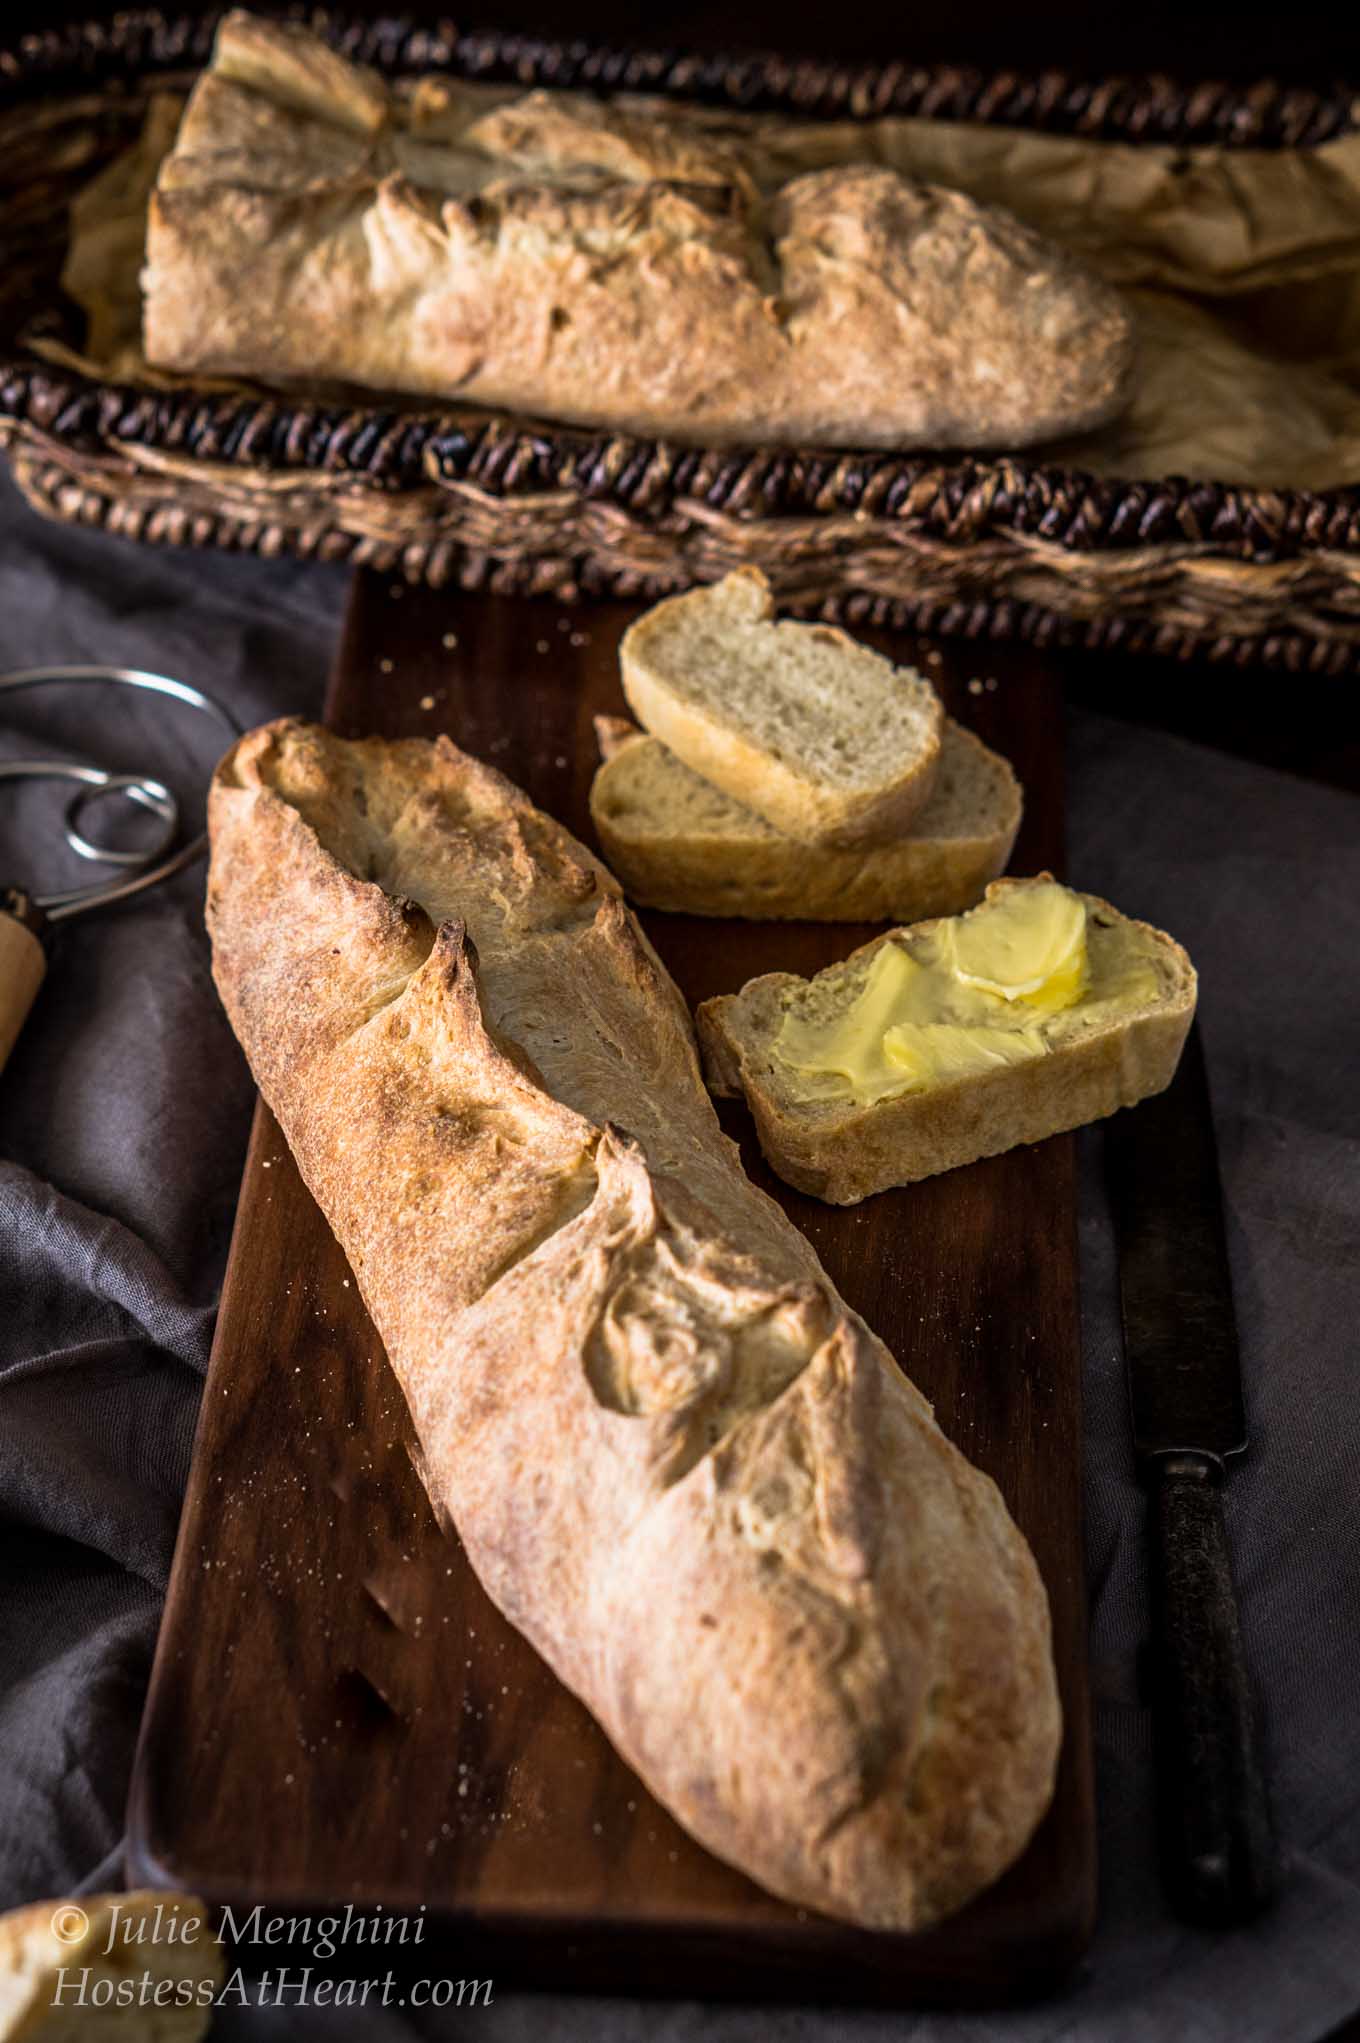
One thing that I’ve never quite gotten is bread with that crunchy crusty exterior. That is until this Garlic Batard. Misting the bread before it’s baked and cooling it the way we did in step 6 gave us exactly the crust we desired.
What is the best way to eat batard bread?
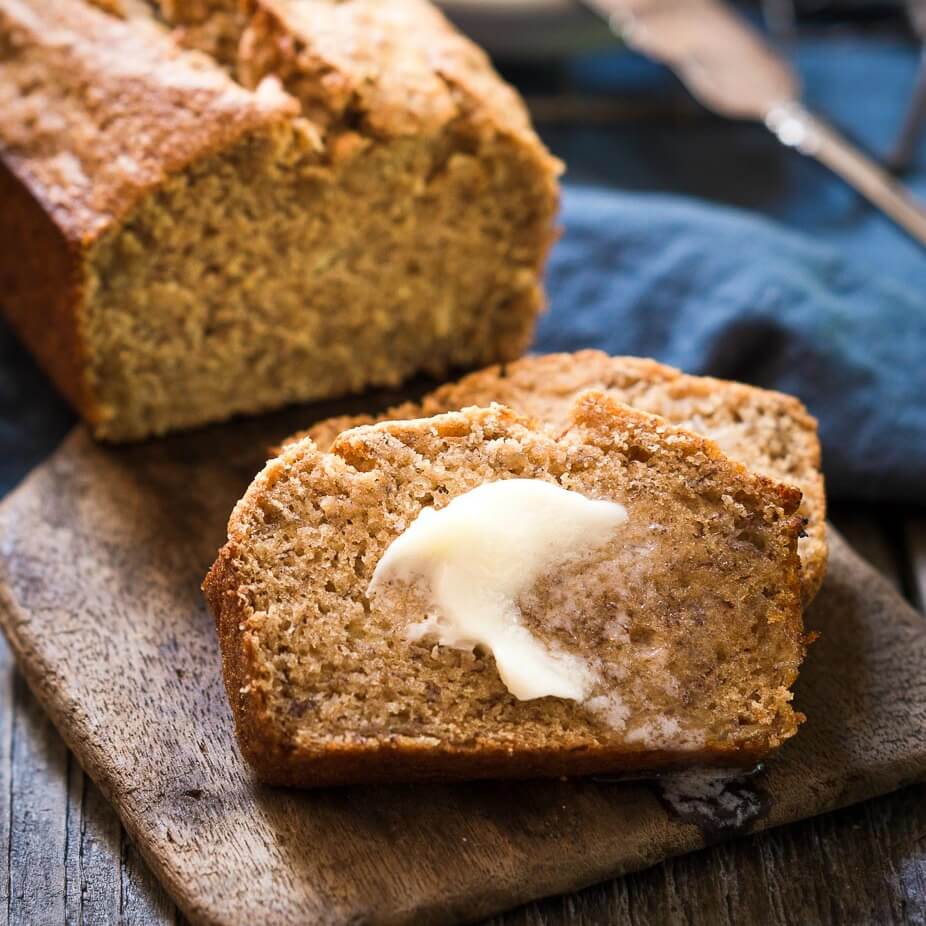
Any way that you eat a traditional baguette is perfect for bread batard. A slather of butter or cream cheese with your favorite bowl of soup or plate of pasta would be our choice. The French generally eat this delicious bread unadorned.
French Batard Bread F.A.Qs
What is the best way to store Garlic Batard Bread?
This bread is best eaten the day you make it. However, Leftovers can be stored at room temperature for up to 3 days.
Can you freeze this homemade bread?
Yes, you can freeze Batard French Bread. This Batard Bread Recipe makes two small loaves. We eat the first one the day we make it and freeze the second loaf. Wrap it in plastic wrap and then aluminum foil for up to 3 months.
How do you reheat homemade Batard bread?
Batard bread can be reheated for 5 to 10 minutes in a preheated 350° F oven.
Hostess Tips
- Roast the garlic and mince it before adding it. That way the flavor is consistent throughout the loaf.
- Bake by temperature. We use an instant-read thermometer and bake our bread to an internal temperature of 190 to 195. Tapping the bread or gauging its doneness by color isn’t consistent.
- We all start somewhere, right? The first time I made French Batard Bread loaves I didn’t create enough surface tension when I shaped the batard dough so my ends lost their points, and I slashed my bread incorrectly, but it’s always easier to get right the second time around right? Regardless, it tastes delicious! So, don’t be afraid to try.
I hope you enjoyed this delicious recipe as much as we do. Drop me a comment below, and don’t forget to give it a star rating. ⭐⭐⭐⭐⭐. Your comments and ratings help others decide if this recipe is for them too.
Garlic Batard Bread Recipe
Ingredients
Poolish – Make the night before.
- ⅓ cup water Cool and filtered
- ½ cup European-Style Artisan Bread Flour Bread flour will also work
- Pinch of instant yeast 1/16th tsp
Dough
- All of the Poolish
- ¾ cup water Cool and filtered
- 2½ cups European-Style Artisan Bread Flour Bread flour can be substituted
- 1 garlic bulb roasted and mashed
- 1 tsp instant yeast
- 1¼ tsp salt fine sea salt is what I use
Instructions
Poolish
- In a medium-sized bowl, combine the poolish ingredients. Mix until combined. Cover and let sit at room temperature for 12 to 16 hours or until large bubbles and holes emerge.
Roasted Garlic
- Slice the top 1/4 off the bulb of garlic and drizzle with olive oil. Wrap completely in aluminum foil. Put into a 425 °F oven for 35 minutes. Allow the garlic to cool to touch. Squeeze from the bottom to remove garlic into a dish. Cover and refrigerate for up to 2 weeks or 3 months in the freezer.
Dough
- Add the water to the poolish and mix to combine. Add the flour and garlic. Mix to combine. The dough will feel tough and look craggy. Cover and let rest for 20 minutes. This allows the gluten to start developing and will make kneading easier. Add yeast and salt. Knead the dough until it's fairly smooth, 5 to 7 minutes. It still will not feel elastic but will be smooth.
- Place the dough into a lightly greased bowl, flipping once to oil both sides. Cover and allow it to rise at room temperature, 1 1/2 hours. To allow the gluten to develop and distribute the yeast's food, turn the dough every 30 minutes during rising time; gently fold all four sides into the middle and turn the dough over each time.
- On a lightly greased work surface, divide the dough in half. Shape each half into a rough log, cover and let them rest for 15 to 20 minutes. This allows the gluten to relax. Shape the logs into 12-inch batards.
- Place them on a baking sheet lined with parchment paper. Cover with lightly greased plastic wrap and allow to rise at room temperature about 2 hours. They should rise about three-quarters of the way to doubled. Don't over-rise or they will lose their shape.
- Set oven rack to middle position. The oven should be preheated to 425 °F, making sure you give it plenty of time to preheat. This bread needs to go into a hot oven. I also preheated a baking stone instead of baking my bread on the baking sheet and slid it onto the stone using the parchment paper.
- Hold a sharp knife or razor at a 10 to 20-degree angle and make 3 to 4 slashes vertically down the length of the bread, each running about 1/3 the length of the bread. Spray the loaves with warm water.
- Bake for 30 to 35 minutes until the bread registers 190 °F. Turn the oven off and crack the door open about 4 to 6 inches, and allow the bread to cool in the oven. This will help the crunchy crust to develop.
- Bread should be eaten the same day it is baked. These loaves will go stale. Day old bread can be reheated for 5 to 10 minutes in a preheated 350 °F oven.
Notes
Nutrition
Nutritional Disclaimer
This recipe was calculated using the exact brands and measurements I used to make this recipe. If you are following a strict diet please note changing anything will cause the nutritional info to change. My calculations are intended as a guide only.
Most Popular Bread recipes
- Overnight Sourdough Bread
- Italian Bread Recipe
- Medianoche Bread
- Cherry Bread
- Organic Whole Wheat Bread Recipe
- Brown Bread Rolls
This garlic batard recipe was previously shared on 4/12/16. We’ve updated it with process shots to help our readers but no changes were made to the recipe.
We participated in a bread-baking challenge group. The theme was “garlic” and hosted by Karen with Karen’s Kitchen Stories. I’d seen the European-Style Hearth Bread recipe on the King Arthur website and knew I could adapt it by infusing it with roasted garlic and shaping it into a batard would be amazing. I wasn’t wrong and hope you’ll give it a try.
Did you enjoy this recipe? Don’t forget to pin it for later and follow me on Pinterest for more delicious recipes like this one!
Take a look at these Bread Baker recipes!
- Black Garlic Parmesan Sourdough Bread from Magnolia Days
- Buttery Garlic Cheddar Rolls from Kylee Cooks
- Buttery Garlic Knots from Sara’s Tasty Buds
- Caramelized Garlic Chèvre Stuffed Bread from Food Lust People Love
- Cheddar, Garlic and Jalapeno Beer Bread from A Palatable Pastime
- Cheddar Garlic Dinner Rolls from Hezzi-D’s Books and Cooks
- Cream Cheese Stuffed Garlic Rolls from Herbivore Cucina
- Domino’s Style Garlic Bread from Gayathri’s Cook Spot
- Easy-Peasy Garlic-ky Mini Rolls from G’Gina’s Kitchenette
- Garlic Batard from Hostess at Heart
- Garlic, Herbs and Cheese Bread from La Cocina de Aisha
- Garlic Naan with Green Chiles from Karen’s Kitchen Stories
- Garlic Pull Apart Rolls from A Day in the Life on the Farm
- Garlic Sunflower Bread from Passion Kneaded
- Gluten Free & Vegan Garlic Breadsticks from What Smells So Good?
- {Gluten Free} Seeded Black Garlic Flat Bread from Culinary Adventures with Camilla
- Green Garlic Parathas – Flat Bread from Sneha’s Recipes
- Herbed Garlic Butter Garland Bread from Ruchik Randhap
- Multi Grain Garlic Naan from Mayuri’s Jikoni
- Pissaladière from The Bread She Bakes
- Roasted Garlic Focaccia from Sizzling Tastebuds
- Whole Wheat Garlic Ciabatta Bread from Cooking Club
#BreadBakers is a group of bread-loving bakers who get together once a month to bake bread with a common ingredient or theme. Follow our Pinterest board right here. Links are also updated each month on this home page.
We take turns hosting each month and choosing the theme/ingredient.
If you are a food blogger and would like to join us, just send Stacy an email with your blog URL to foodlustpeoplelove@gmail.com.
You know how much I love baking bread right? I loved making this one and here are a couple of other recipes I really enjoyed making with the Bread Bakers group.


I have been working on making sourdough bread with my own starter for the last few months. I am loving the ease of this recipe. and the crumb on this loaf looks incredible!!
It really is easy Angela! I loved seeing your recent bread. It was just gorgeous!
Hey friend I wanted to swing back by and say I made this yesterday and it’s DELICIOUS! The whole house smelled amazing – FIVE STARS!!!
Thank you, Deb! I’m sure they try and bottle that smell! I’d buy it.
This loaf is so amazing! That crust is everything I want!
Thank you! I’m all about the crust too!
This is probably the prettiest loaf of bread l’ve seen…even better than our local bakery. Perfect addition to an Italian meal, especially with that garlic!
Thank you, Sandra!
My goodness… you always make me crave bread! I can almost smell the loaf in my oven as I read about it!
Thank you Michele!
You have truly mastered the art of beautiful bread making, Julie!! This, like all of your other’s is just show stopping!! I love that crusty outside. GORGEOUS photography as always!!
Thank you my friend!
My mouth is absolutely watering!! Homemade bread is the BEST!!! This looks sensational!
Thank you! We love this one with pasta.
I LOVE homemade bread and I”m sure the roasted garlic makes this bread over the top good!
We love homemade bread and garlic…we love it way to much!
This bread sounds amazing! Perfect with some soup, or just a smear of butter! I love the shape that you were able to get too. I need a basket like yours.
One of New Year Resolutions is to make more bread! I am going to add this to the list!
We love homemade bread and I love baking it too!
It’s now almost 11 and I have a hankering for bread and butter, yikes! This batard looks so awesome, can I order to ship? Thanks so much for cohosting!
Thank you Angie! We need a big ole bread and wine fest with plenty of butter! I always love co-hosting and wish I had more time to do it more often. I’ll get back to you soon and schedule another one.
That looks wonderful, just how the bakery’s make them.
Thank you Laura! That is the ultimate compliment.
Yummy! I just recently started getting into more bread baking and working on forming a great batard is on my short list of things to learn! Thanks for sharing at Throwback Thursday!
Thank you Carlee! Take a look at the shaping video on the King Arthur website. It’s a big help.
As usual, Julie, your bread game is on point! You continue to amaze me with your incredible baking skills! Btw, love the new logo. 🙂
Thank you Demeter! I just put my new logo up this morning, and I love it too. Thank you for noticing. Happy dance going on here!!
Hi Julie, Amazing bread loaf recipe, it looks perfect and delicious!
Thank you Rani!
Julie, the bread looks so beautiful. Got to try this as hubby loves breads with a crunchy crust and soft inner bit.
Thank you so much Mayuri! It was a hit with my hubby too.
Thus bread is beautiful, Julie! And how wonderful your house must smell while its baking. I’ve made regular bread before, but never attempted a baguette. You have me inspired
Thanks Natalie! This was my first success getting that crunchy crust that we love, and it wasn’t difficult.
The garlic batard looks amazing. A very interesting bread!
Thank you Su!
Wow Julie! I take my hat off to you! I have never attempted a baguette, so this looks extra amazing to me. Just pass me the whole loaf and I will supply my own pound of butter! Better than cake any day, don’t you think? 😀
Thank you Julianna! I’d take a baguette with some good butter and a glass of wine over cake any day.
You know, I’m just terrified of making bread with a poolish/starter. I don’t know why, but I’m just paranoid that I’ll mess it up. But that’s the reason I haven’t made a ciabatta yet or something like this. But your post makes it look so easy I just may have to get over my fear and just do i already, so thank Julie! your bread looks wonderful.
Thanks Jess! A lot of people are intimidated by poolish, but it’s basically flour water and a pinch of yeast and let science do the rest. You are such a talented baker, I am sure you will wonder why you let it get to you. I did to though…not anymore. Have a wonderful weekend!
I have been on a bit of a bread baking binge lately, and was just thinking of making a baguette style this weekend. The roasted garlic sold me on this one – so wish me luck. Thanks for co-hosting this week!
Thank you Hilda! I really loved the way this garlic tasted in this bread. Nothing harsh. I hope you will stop back and let me know how it goes. I hope you are enjoying FF. I sure am!
I just made a couple of loaves following your recipe and it turned out perfectly. I made one small change – while baking I put a pan of water in the bottom of the oven as I always do for making baguettes. I think this helps keep it from drying out. I also highly recommend eating it with butter and a good sprinkling of sumac powder on it – absolutely the best tartine ever! Thanks for a super recipe.
Wonderful Hilda! Thank you so much for letting me know that it turned out for you too. Very glad that you enjoyed it. I love the idea of using the steam. I’ve never used sumac powder. I’m a bit of a spice hoarder so will have to add it to my arsenal!
Every bite of this delicious bread would be perfect! So gooood, Julie!
Thank you Jhuls! I hope you have a wonderful weekend, and so nice to see you at FF!
Just beautiful- and I can smell the garlic right now! Is that a danish dough wish I see in your photo? Has it made a difference in your bread making?
Thank you Ashley! This was a non enriched dough (no eggs or dairy). It did smell and taste very yummy!
visiting from fiesta fridays, wow I want to try this bread, esp as I love garlic
Awesome Shaheen! Welcome to Fiesta Friday and Hostess At Heart! I love that you are a first time visitor. I loved this bread and it was yummy. I’ll be making it again. Enjoy your weekend and have fun at Fiesta Friday!
Nice work! This bread looks delicious!
Thank you Chef! I appreciate you stopping by!